a-simple-triangle / Part 5 - Setup Android app
Marcel Braghetto 9 March 2019
In this article we are going to add in the Android platform target to our existing workspace. To recap where we got to in our previous article we:
- Setup the iOS platform target using
XcodeGen to automatically create the project.
- Added the ability to know the current platform at runtime.
- Added the ability to create the SDL window with respect to the platform.
In this article, we will onboard our Android platform target, which will consist of:
- One Android project, containing two modules.
- The first module will be an
Android app module.
- The second module will be an
Android library module.
The Android app module will be configured to consume the library module as well as our shared C++ code. Because we are working with C++, we will use the Android NDK, along with CMake and make files to configure the C++ build.
Let’s get into it!
Warning! You are about to enter the mysterious realm of Android development! If you don’t have an Android developer background, it will probably feel like there are heaps of moving parts to wrap your brain around. It is just the nature of the Android beast so take a deep breath, pay attention and go with the flow!
Note: I originally only wrote this article for Android on MacOS but later came back and added in details for Windows too. You will find the Windows section further down this article.
Install Android Studio
The very first thing we have to do is make sure we have installed Android Studio. Visit this link to download then install it: https://developer.android.com/studio.
Important: Ensure you have installed Android Studio 3.5 or later as it contains build tools that we require which earlier versions do not have, such as the ability to pin to specific NDK versions.
You will need to have installed Android Studio before continuing to the next step.
Creation of the Android project structure
Although historically the Android SDK has offered a tool named android which was able to bootstrap a new Android project from the command line, unfortunately Google decided to deprecate this tool which means we can no longer easily automate the creation of our Android projects.
While it is actually possible to manually automate this, it is very fiddly and error prone and overall not terribly worth the effort. So sadly, we must start off our Android project manually using Android Studio itself. The up side is that after creating the Android project we could (and should) check it into version control, so you wouldn’t need to do this every time someone checked out the code base. There will be a few parts that we won’t check into version control that our venerable setup.sh concept will accommodate.
To get started, create a new folder named android as a sibling to our other platform targets:
Now open Android Studio and choose Start a new Android Studio project from the startup screen.
In the Choose your project wizard, select the option named Empty Activity and select Next.
In the Configure your project wizard, enter the following properties:
- Name:
A Simple Triangle.
- Package name:
io.github.marcelbraghetto.asimpletriangle.
- Save location: Browse to your
root/project/android folder.
- Language:
Java - we could use Kotlin however we will only be writing a very tiny amount of Java code so it isn’t really worth pulling in the Kotlin language dependencies for it.
- Minimum API level:
API 21: Android 5.0 (Lollipop).
- Leave the remaining checkboxes in their default states.
Select Finish and let Android Studio open your project and finish syncing itself. When it is ready you should see something similar to this:
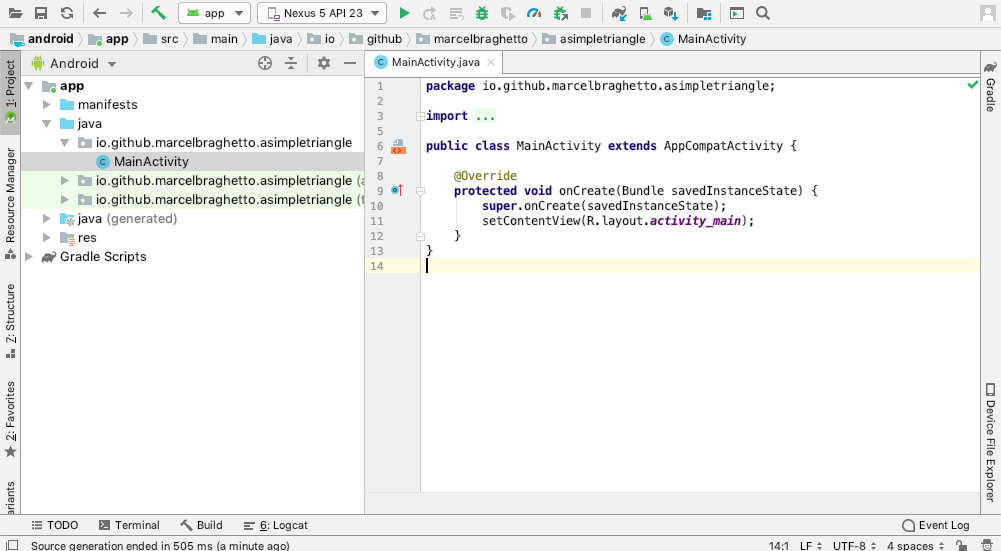
In the left hand Project panel you can see a folder named app. This will be our main Android application that we’ll build and run for our project. Next we will add the basic structure for our library module which will be needed in order to import the SDL code.
In Android Studio, select File -> New -> New Module then choose Android Library as the type of module to create then select Next.
In the Configure the new module wizard, enter the following properties:
- Application/Library name:
SDL.
- Module name:
sdl.
- Package name: Select the
Edit button and enter org.libsdl.app and press Done to apply it.
- Minimum SDK:
API 21: Android 5.0 (Lollipop).
Select Finish and let Android Studio add the library module and finish syncing itself. When it is ready you should see something similar to this:

In the Project panel you can now see that we have a new sdl module as a sibling to our app module. We will now update some of the configuration files to prepare these modules for the SDL library and our shared C++ code.
Quit Android Studio - although we could do some of the remaining steps inside Android Studio it’s just easier to do them ourselves in a text editor.
Before proceeding, delete the following folders - we won’t be using them and the test suites will cause us compilation errors if we leave them:
android/sdl/src/androidTestandroid/sdl/src/testandroid/sdl/src/main/resandroid/sdl/libsandroid/sdl/consumer-rules.proandroid/sdl/proguard-rules.pro
Ensuring availability of the Android SDK components
An Android project almost always requires some set of core Android SDK dependencies and often to get them we would just open Android Studio, navigate to the SDK manager GUI wizard, click the SDK components we need then click to download them. Although this approach works, it is not so good if someone checks out a code base for the first time that requires SDK components that aren’t currently installed. It would be much nicer to be able to automatically fetch and install them. This is especially important if you ever wanted to build your application on a continous integration server, which typically would be headless (not have any GUI interactions). We are going to write ourselves a setup.sh script, which will fetch the appropriate Android SDK components for us to ensure they exist on our computer.
Note: It is totally possible to install the Android SDK without needing to install Android Studio - which is a great option if your app has to build on a continous integration server. We will instead take the approach of expecting that Android Studio has already been installed on the computer before the setup script runs. This gives us assurance that the tool sdkmanager exists, which we’ll be using to pull down SDK components via our setup.sh script.
Create a new text file named setup.sh in the android folder, and mark it as executable as normal (chmod +x setup.sh):
root
  + project
    + android
setup.sh
Enter the following script into setup.sh:
#!/bin/bash

# Include the shared scripts and utility methods that are common to all platforms.
. ../shared-scripts.sh

# We will assume that the Android SDK is in the default location that Android Studio installs it to.
ANDROID_SDK="/Users/$USER/Library/Android/sdk"
echo "Using Android SDK at: $ANDROID_SDK"

# We will assume that we'll use Java that is bundled with Android Studio.
export JAVA_HOME="/Applications/Android Studio.app/Contents/jre/jdk/Contents/Home"

# We will be using a specific version of the Android NDK.
NDK_VERSION="20.0.5594570"
ANDROID_NDK="$ANDROID_SDK/ndk/$NDK_VERSION"
echo "Using Android NDK at: $ANDROID_NDK"

# This command will automatically answer 'yes' to each of the licences that a user normally has to manually agree to.
echo "Auto accepting Android SDK licenses ..."
yes | $ANDROID_SDK/tools/bin/sdkmanager --licenses

# This is the collection of Android SDK components that our code base will need.
echo "Installing required Android SDK components ..."
$ANDROID_SDK/tools/bin/sdkmanager \
    "platform-tools" \
    "build-tools;28.0.3" \
    "tools" \
    "platforms;android-28" \
    "cmake;3.10.2.4988404" \
    "ndk;$NDK_VERSION"
Points of interest:
- We are including our
shared-scripts.sh as we normally do.
- We will then set an
ANDROID_SDK variable, holding the path to our existing Android SDK. By default Android Studio will put the Android SDK in the ~/Library/Android/sdk folder. If you have put your Android SDK somewhere else you would need to point to that instead. It is also fairly common to have an ANDROID_HOME environment variable set, but we won’t worry about that for now.
- We will set the
JAVA_HOME environment variable to point to the Java Runtime Environment that is bundled into the Android Studio installation. This is needed in order to be able to launch some of the Android command line tools.
- We will set an
NDK_VERSION specifying the exact version of the Android NDK we want to download. Prior to Android Studio 3.5 it was not possible to specify which version of the NDK to download or use which was really frustrating because it meant you had to manually download the NDK version you wanted then do some hackery to force your project to use it. Since 3.5 though this problem has evaporated (thankfully!). When I originally wrote this article I had to do this but have since revised this article to use the updated Android tooling.
- We will set an
ANDROID_NDK variable to specify the path to find the NDK we want to use. This will become important in later articles.
- We will need to automatically
agree to the licenses that some of the Android SDK components prompt for. If we didn’t do this, the script would stop and wait for a human to type in yes for each of them.
- Next we will invoke the
sdkmanager tool, giving it a list of which Android components we want to install. The tool will then download each of them into our Android SDK folder if they don’t exist. Visit https://developer.android.com/studio/command-line/sdkmanager to learn more about the Android sdkmanager tool.
Run your setup script and observe that it auto accepts licences, then downloads and installs all the components we requested from it. Be patient as this happens, some of the components are fairly large downloads - especially the Android NDK.
You should see output similar to this (I’ve trimmed it for brevity):
$ ./setup.sh
Using Android SDK at: /Users/<snip>/Library/Android/sdk
Using Android NDK at: /Users/<snip>/Library/Android/sdk/ndk/20.0.5594570
Auto accepting Android SDK licenses ...
All SDK package licenses accepted.======] 100% Computing updates...

Installing required Android SDK components ...
[=======================================] 100% Unzipping... android-ndk-r20/ndk-
Once the setup script has completed you can actually run the sdkmanager tool to see what is installed (I’ve trimmed the output so it fits nicely on this page). Some of the version numbers might be different for you but the correctly versioned packages we asked the SDK manager to install should be present:
$ ~/Library/Android/sdk/tools/bin/sdkmanager --list

Installed packages:=====================] 100% Computing updates...
  Path
  -------                                             | -------
  build-tools;28.0.3                                  | 28.0.3
  cmake;3.10.2.4988404                                | 3.10.2
  emulator                                            | 28.0.23
  extras;android;m2repository                         | 47.0.0
  extras;google;m2repository                          | 58
  extras;intel;Hardware_Accelerated_Execution_Manager | 7.3.2
  ndk;20.0.5594570                                    | 20.0.5594570 | NDK (Side by side) 20.0.5594570
  patcher;v4                                          | 1
  platform-tools                                      | 28.0.1
  platforms;android-28                                | 6
  sources;android-28                                  | 1
  tools                                               | 26.1.1
Now that we have run the setup.sh script we can be assured that the Android SDK components that our code base needs will exist on the machine.
Lets now move on to configuring the modules in our default Android project to run our C++ code.
Android uses make files to build C++ source code. For the sdl module, we will be attaching the SDL source code folder that contains a make file to build the Android SDL library. This will enable the sdl library module to build and include SDL for us. Visit this link to learn more about Android and C++ integration: https://developer.android.com/studio/projects/add-native-code.
To activate the C++ integration for the sdl module, we need to update it’s build.gradle file, but first we must create a couple of make files that will be referenced in the build script.
Create a new folder named jni under the android/sdl folder and then create two new text files in it named Android.mk and Application.mk, like so:
root
  + project
    + android
      + sdl
        + jni
          Android.mk
          Application.mk
Edit the Android.mk file with the following content:
include $(call all-subdir-makefiles)
This instructs Android to recurse through all the make files it can find, building them all.
Edit the Application.mk file with the following content:
APP_STL := c++_shared
APP_ABI := armeabi-v7a arm64-v8a x86 x86_64
APP_PLATFORM := android-21
This instructs Android to target the architectures in the APP_ABI list which will cause each architecture to generate its own compiled .so (shared object) output file. The APP_PLATFORM field instructs Android to target the Android API 21 platform (Lollipop) when building - which is also the minimum version of Android our app will require to run on. The APP_STL tells Android that we will be making use of the C++ standard template library (STL) via a shared library.
We will now update our setup.sh script to do the last part of linking the SDL source library to our Android sdl library module.
What our setup script will do:
- Fetch the SDL source code library into our third party folder if needed.
- Create a symlink in our
android/sdl/jni folder that points into the SDL source folder containing the SDL make file. We are creating a symlink so the Android library project thinks there is a folder named SDL in the jni folder, therefore building the make file within the SDL folder as part of the library outputs.
- Copy over some key Java source files into our Android library project so they become available to our main application. The Java source files we need are found at
third-party/SDL/android-project/app/src/main/java.
Update the setup.sh to match the following content:
#!/bin/bash

# Include the shared scripts and utility methods that are common to all platforms.
. ../shared-scripts.sh

# We will assume that the Android SDK is in the default location that Android Studio installs it to.
ANDROID_SDK="/Users/$USER/Library/Android/sdk"
echo "Using Android SDK at: $ANDROID_SDK"

# We will assume that we'll use Java that is bundled with Android Studio.
export JAVA_HOME="/Applications/Android Studio.app/Contents/jre/jdk/Contents/Home"

# We will be using a specific version of the Android NDK.
NDK_VERSION="20.0.5594570"
ANDROID_NDK="$ANDROID_SDK/ndk/$NDK_VERSION"
echo "Using Android NDK at: $ANDROID_NDK"

# This command will automatically answer 'yes' to each of the licences that a user normally has to manually agree to.
echo "Auto accepting Android SDK licenses ..."
yes | $ANDROID_SDK/tools/bin/sdkmanager --licenses

# This is the collection of Android SDK components that our code base will need.
echo "Installing required Android SDK components ..."
$ANDROID_SDK/tools/bin/sdkmanager \
    "platform-tools" \
    "build-tools;28.0.3" \
    "tools" \
    "platforms;android-28" \
    "cmake;3.10.2.4988404" \
    "ndk;$NDK_VERSION"

fetch_brew_dependency "wget"

fetch_third_party_lib_sdl

# If required, create the SDL symlink into the Android library project so it can include it in its build.
pushd sdl/jni
    if [ ! -d "SDL" ]; then
      echo "Linking SDL path to sdl/jni/SDL ..."
      ln -s ../../../../third-party/SDL SDL
    fi
popd

# Copy the Java classes from the SDL library source into the Android library project.
pushd sdl/src/main
    echo "Copying base SDL Java source to Android library project ..."
    cp -r ../../../../../third-party/SDL/android-project/app/src/main/java .
popd
Run the setup.sh again and in addition to the Android SDK commands we will configure the SDL library and our sdl module ready to build it:
$ ./setup.sh
Using Android SDK at: /Users/<snip>/Library/Android/sdk
Using Android NDK at: /Users/<snip>/Library/Android/sdk/ndk/20.0.5594570
Auto accepting Android SDK licenses ...
All SDK package licenses accepted.======] 100% Computing updates...

Installing required Android SDK components ...
[=======================================] 100% Computing updates...
Fetching Brew dependency: 'wget'.
Dependency 'wget' is already installed, continuing ...
Fetching SDL (SDL2: 2.0.9) ...
Saving to: ‘SDL2-2.0.9.zip’
Linking SDL path to sdl/jni/SDL ...
Copying base SDL Java source to Android library project ...
Now we will have a symlink in the sdl module which will cause it to build the SDL library, and have a copy of the Java code from the SDL library also.
Gradle build script: root
Our Android project has two modules: app and sdl. Both of these modules will need to declare fields about which versions of build tools to compile with. Since both modules will pretty much use the same build tool versions we will add some shared global Gradle properties in our root build.gradle file that we can reference. This avoids duplicating dependency version codes and prevents accidentally updating one but not the other in the future.
Edit the android/build.gradle file and completely replace it with:
// Create some global properties to share common build attributes.
ext.ast = [
    versionCode: 1,
    versionName: '1.0',
    buildToolsVersion: '28.0.3',
    compileSdkVersion: 28,
    minSdkVersion: 21,
    targetSdkVersion: 28,
    ndkVersion: '20.0.5594570'
]

buildscript {
    repositories {
        google()
        jcenter()

    }
    dependencies {
        classpath 'com.android.tools.build:gradle:3.5.1'
    }
}

allprojects {
    repositories {
        google()
        jcenter()

    }
}

task clean(type: Delete) {
    delete rootProject.buildDir
}
In particular take note of the ext.ast map of key value pairs. This allows other Gradle scripts to access a global object named ast to read the key value pairs within it. You’ll see how we use them next.
Gradle build script: sdl module
Since we have our Android make files ready in the jni folder, we can now edit the Gradle build script for the sdl module. Edit the android/sdl/build.gradle file and replace its content with:
apply plugin: 'com.android.library'

android {
    buildToolsVersion ast.buildToolsVersion
    compileSdkVersion ast.compileSdkVersion
    ndkVersion ast.ndkVersion

    defaultConfig {
        minSdkVersion ast.minSdkVersion
        targetSdkVersion ast.targetSdkVersion
        versionCode ast.versionCode
        versionName ast.versionName
    }

    buildTypes {
        release {
            minifyEnabled false
        }
    }

    externalNativeBuild {
        ndkBuild {
            path 'jni/Android.mk'
        }
    }
}
This configures the sdl module to activate Android NDK builds by specifying the externalNativeBuild / ndkBuild / path property, setting it to look at the jni/Android.mk file which we just created, which in turn if you recall will build all other make files it can find in the jni folder - including the one symlinked from the SDL source library.
Note also that we are specifying a ndkVersion ast.ndkVersion which was introduced with the Android Gradle plugin 3.5 and is the way we can now pin Android NDK versions within an Android project. Before this we would have had to manually force our project to use a manually downloaded NDK that isn’t bundled into the default Android Studio installation. The ndkVersion Gradle property is a major step forward in this regard.
Also note the use of the ast.* variables to specify the version codes of all the build configuration fields. This is possible because we put the ext.ast definition in the root build.gradle file a moment ago.
Android manifest: sdl module
Every Android application or library must have a manifest, named AndroidManifest.xml. Our sdl module already has a default manifest that was generated when we created the project in Android Studio, however we need to change it. Edit the android/sdl/src/main/AndroidManifest.xml file and enter the following:
<?xml version="1.0" encoding="utf-8"?>
<manifest xmlns:android="http://schemas.android.com/apk/res/android"
    package="org.libsdl.app">

    <uses-feature android:glEsVersion="0x00020000" />
    <uses-feature android:name="android.hardware.touchscreen" android:required="false" />
    <uses-feature android:name="android.hardware.gamepad" android:required="false" />
    <uses-feature android:name="android.hardware.type.pc" android:required="false" />
</manifest>
The manifest is the description of what Android components the application or library will be using. For our library, the manifest primarily defines what device features our code uses.
The android:required="false" tag means that devices that do not have those features will still be able to install the application, but we would need to ensure we don’t try to execute code that would use those features if they aren’t supported.
An interesting line to note is the following:
<uses-feature android:glEsVersion="0x00020000" />
This means that our library requires the device to have OpenGL ES 2, and it is required (because it doesn’t have android:required="false"), so if we published an app that used this library, any devices that did not support OpenGL ES 2 would would not be eligible to install it via Google Play.
The Android manifest for the sdl module will be merged into our main application when we compile it, adding these uses-feature configurations automatically into our final application.
Configure the main app module
The default Android project that was generated by Android Studio doesn’t yet have C++ integration or include our library module. We will update the build.gradle file for the app module, and link in the C++ support with a new CMakeLists.txt file. You might remember we made a CMakeLists.txt file for our console target - the Android target will be similar to this. We will also use the global Gradle properties we defined with the ext.ast map we put into the root build.gradle file. This demonstrates how we can declare shared properties in Gradle and have them used in multiple Android modules avoiding duplication and maintenance mistakes when trying to upgrade dependency and build tool versions across the project.
Update the Gradle build script
Edit the android/app/build.gradle file and enter the following text:
apply plugin: 'com.android.application'

android {
    buildToolsVersion ast.buildToolsVersion
    compileSdkVersion ast.compileSdkVersion
    ndkVersion ast.ndkVersion

    defaultConfig {
        applicationId "io.github.marcelbraghetto.asimpletriangle"

        minSdkVersion ast.minSdkVersion
        targetSdkVersion ast.targetSdkVersion
        versionCode ast.versionCode
        versionName ast.versionName

        externalNativeBuild {
            cmake {
                arguments "-DANDROID_STL=c++_shared", "-DAPP_PLATFORM=android-21"
            }
        }

        ndk {
            abiFilters 'armeabi-v7a', 'arm64-v8a', 'x86', 'x86_64'
        }
    }

    buildTypes {
        release {
            signingConfig signingConfigs.debug
            minifyEnabled false
        }
    }

    externalNativeBuild {
        cmake {
            path "CMakeLists.txt"
        }
    }
}

dependencies {
    implementation project(':sdl')
}
Points of interest:
- For this example, we will use a trick to be able to build a
release version of our application signed with our debug key as a convenience to avoid having to setup a release key store. We do this by declaring signingConfig signingConfigs.debug. If you wanted to publish your app to Google Play you would need to create a proper release key store and use that.
- The
android / defaultConfig / externalNativeBuild / cmake settings will pass configuration options into the C++ build, for us enabling the use of the C++ STL and targetting Android API 21.
- The
android / defaultConfig / ndk setting specifies what architectures to include support for when building the Android application.
- The
android / externalNativeBuild / cmake / path setting tells Android that we want to use the file named CMakeLists.txt as the input for how to build the C++ code for the application (we will create the CMakeLists.txt file soon).
- The
dependencies settings specifies that we want to use the sdl module by referencing it with implementation project(':sdl'). The implementation keyword means that the app module will consume the sdl library but it won’t expose it to any other modules (not that we have any others at the moment). The project keyword tells Android to look for a module in our current project with the name sdl. The colon : is a Gradle scoping character - if you have worked with Gradle before it should look familiar.
Remove redundant folders
Delete the following folders from the android/app folder, these are source files and resources that we don’t need and will actually cause our app to fail to build if left there:
src/androidTestsrc/testlibssrc/main/res/layoutsrc/main/res/values/colors.xmlsrc/main/res/values/styles.xmlproguard-rules.pro
Update app manifest
The main app manifest specifies a main launch activity and a few other settings which would be normal for a regular Android app, but don’t meet the needs for our full screen graphics app. Edit the android/app/src/main/AndroidManifest.xml file and enter the following:
<?xml version="1.0" encoding="utf-8"?>
<manifest
    xmlns:android="http://schemas.android.com/apk/res/android"
    package="io.github.marcelbraghetto.asimpletriangle"
    >

    <application
        android:allowBackup="false"
        android:icon="@mipmap/ic_launcher"
        android:label="@string/app_name"
        android:roundIcon="@mipmap/ic_launcher_round"
        android:theme="@android:style/Theme.NoTitleBar.Fullscreen"
        android:hardwareAccelerated="true"
        >

        <activity
            android:name=".MainActivity"
            android:configChanges="keyboard|keyboardHidden|orientation|screenSize"
            android:screenOrientation="sensorLandscape"
            >
            <intent-filter>
                <action android:name="android.intent.action.MAIN" />
                <category android:name="android.intent.category.LAUNCHER" />
            </intent-filter>
        </activity>
    </application>
</manifest>
Points of interest:
- The
android:theme in the application tag specifies that we don’t want any kind of toolbar showing up for our application and that it will be running in a fullscreen kind of way.
- The
android:configChanges tag specifies that Android should not destroy and recreate our main activity if any of those configuration change events happen. Normal Android behaviour is to recreate an activity on any kind of configuration change.
- The
android:screenOrientation is set to sensorLandscape which forces our activity to run in landscape mode - sensor means it could be either landscape or upside down landscape.
Update the main activity
The main activity Java class that was auto generated is not suitable for our graphics application. Instead our main activity should extend the SDLActivity class that was copied into the sdl module through the setup.sh script earlier. The SDLActivity will hook into the SDL library and do the boilerplate setup of the view for us.
Note: The reason we have access to the SDLActivity class is because our app module declared a dependency on the sdl module, so any public code in the sdl module becomes available to us.
Edit the android/app/src/main/java/io/github/marcelbraghetto/asimpletriangle/MainActivity.java and replace its content with the following:
package io.github.marcelbraghetto.asimpletriangle;

import org.libsdl.app.SDLActivity;

public class MainActivity extends SDLActivity {
    @Override
    protected String[] getLibraries() {
        return new String[]{
                "hidapi",
                "SDL2",
                "a-simple-triangle"
        };
    }
}
The only thing interesting about our updated MainActivity is that it now extends the org.libsdl.app.SDLActivity class, which does the Android initialisation for us when the app starts. We are overriding the getLibraries() method, because we need to specify what C++ code to bootstrap with our application:
hidapi is generated by building the SDL source code in our sdl module, and is needed as a dependency for SDL to work.SDL2 is the C++ library which contains the main implementation of SDL2.a-simple-triangle is our own C++ code, resulting from the compilation of the shared source files in the main/src folder.
The string names we are using here should match the targets that we will define in our CMakeLists.txt file, which we should really create right about now.
CMakeLists.txt
Our Android application declared in its build.gradle that we should use the file named CMakeLists.txt to control the C++ integration like so:
// build.gradle

...

externalNativeBuild {
    cmake {
        path "CMakeLists.txt"
    }
}

...
The CMakeLists.txt file should feel familiar to us, because we are already using one for the console platform target. Create a new text file named CMakeLists.txt in your android/app folder:
root
  + project
    + android
      + app
        CMakelists.txt
Enter the following into the new file:
cmake_minimum_required(VERSION 3.4.1)

# Instruct our compiler that we want to use C++ 17 and use exceptions.
set(CMAKE_CXX_FLAGS "${CMAKE_CXX_FLAGS} -std=c++17 -fexceptions")

# Determine what build type we are in, shifted to lower case (debug or release).
string(TOLOWER ${CMAKE_BUILD_TYPE} BUILD_VARIANT_DIR)

# Location of our third party libraries.
set(THIRD_PARTY_DIR "../../../third-party")

# Location of our own shared C++ code base.
set(MAIN_SOURCE_DIR "../../main/src")

# Location of the .so files generated by the 'sdl' module.
set(SDL_SO_DIR "${CMAKE_SOURCE_DIR}/../sdl/build/intermediates/ndkBuild/${BUILD_VARIANT_DIR}/obj/local/${ANDROID_ABI}")

# This is a dependency target for SDL, we will name it 'hidapi'.
add_library(
        hidapi
        SHARED
        IMPORTED
)

# This is the main SDL library target, we will name it 'sdl2'.
add_library(
        sdl2
        SHARED
        IMPORTED
)

# This is the built in NDK logging library
find_library(log-lib log)

# We need to tell the C++ compiler where to find the .so (shared object) files for each of our targets. When the 'sdl' module is built, it will generate these .so files in its build folder. At the top of this file we created a field named SDL_SO_DIR which points at the build folder location where the .so files can be found.
set_target_properties(
        hidapi
        PROPERTIES
        IMPORTED_LOCATION
        ${SDL_SO_DIR}/libhidapi.so
)

set_target_properties(
        sdl2
        PROPERTIES
        IMPORTED_LOCATION
        ${SDL_SO_DIR}/libSDL2.so
)

# We will tell our build system where to look for third party header files.
include_directories(${THIRD_PARTY_DIR}/SDL/include)

# We will recursively collate all .hpp header and .cpp source files under the main source directory as the input for the compilation.
file(GLOB_RECURSE CPP_HEADERS ${MAIN_SOURCE_DIR}/*.hpp)
file(GLOB_RECURSE CPP_SOURCES ${MAIN_SOURCE_DIR}/*.cpp)

# The 'a-simple-triangle' library target is actually our own C++ code from the shared 'main' source code folder.
add_library(
        a-simple-triangle
        SHARED
        ${CPP_HEADERS}
        ${CPP_SOURCES}
)

# Finally, we need to link all the libraries we want to use in our project together, remembering that the 'a-simple-triangle' library is in fact our own C++ code. Note also we are including the 'GLESv2' library for OpenGL ES2 support, though we don't need to define it ourselves with the 'add_library' commands.
target_link_libraries(
        a-simple-triangle
        hidapi
        sdl2
        ${log-lib}
        GLESv2
)
Come up for air
You made it this far, well done.
Take a breath.
Now, let’s see if we can build our Android application. Just for the moment I’m going to keep using the command line instead of opening Android Studio.
In your Terminal, navigate to your android folder and run the following command:
./gradlew :app:assembleDebug
Note: If you do not have a separate Java JDK installed on your machine, you may have to enter the following command whenever you start a new Terminal session so it can find the Java runtime bundled with Android Studio: export JAVA_HOME="/Applications/Android Studio.app/Contents/jre/jdk/Contents/Home"
This command tells our main app module to execute its assembleDebug Gradle task, in essence, building the debug version of our Android application.
You should see a whole heap of C++ build output as the sdl module is triggered to build (because it is a dependency of the app module).
After (probably) some time building C++, the build will eventually fail with these kinds of warnings and errors:
main/src/core/platform.cpp:13:1: warning: control reaches end of non-void function
main/src/main.cpp:9:5: error: use of undeclared identifier 'glClearColor'
    glClearColor(0.3f, 0.7f, 0.0f, 1.0f);
    ^
So what’s going on ?? Well, we have a few C++ classes and header files which are using #if defined(...) checks to figure out what platform we are building for, then subsequently including header files based on that information.
So far, we have only put conditional code to accommodate Mac or iOS, like so:
ast::Platform ast::getCurrentPlatform()
{
#if defined(__APPLE__)
#include "TargetConditionals.h"
#if TARGET_OS_IPHONE
    return ast::Platform::ios;
#else
    return ast::Platform::mac;
#endif
#endif
}
So in the class above, Android will not meet any of the current criteria, therefore there won’t be any code path that returns a value for this function.
The errors about not being able to find glClearColor and others is because our graphics-wrapper.hpp class currently looks like this:
#pragma once

#if defined(__APPLE__)
#define GL_SILENCE_DEPRECATION
#include "TargetConditionals.h"
#if TARGET_OS_IPHONE
#include <OpenGLES/ES2/gl.h>
#else
#include <OpenGL/gl3.h>
#endif
#endif
Again, note that there is no condition where Android is accommodated, therefore on Android we aren’t actually including any OpenGL header files at the moment. That’s the reason for all the OpenGL related errors we are seeing.
Let’s fix these problems. Open your a-simple-triangle.workspace in Visual Studio Code again.
Change main/src/core/platform.hpp to:
#pragma once

namespace ast
{
    enum class Platform
    {
        mac,
        ios,
        android
    };

    Platform getCurrentPlatform();
} // namespace ast
Note the addition of the new android enum.
Change main/src/core/platform.cpp to:
#include "platform.hpp"

ast::Platform ast::getCurrentPlatform()
{
#if defined(__APPLE__)
#include "TargetConditionals.h"
#if TARGET_OS_IPHONE
    return ast::Platform::ios;
#else
    return ast::Platform::mac;
#endif
#elif __ANDROID__
    return ast::Platform::android;
#endif
}
Note the addition of the extra conditional to check for __ANDROID__ where we return the ast::Platform::android enum if its Android. This resolves the warnings about not returning a value from the ast::getCurrentPlatform() function.
Change main/src/core/graphics-wrapper.hpp to:
#pragma once

#if defined(__APPLE__)
#define GL_SILENCE_DEPRECATION
#include "TargetConditionals.h"
#if TARGET_OS_IPHONE
#include <OpenGLES/ES2/gl.h>
#else
#include <OpenGL/gl3.h>
#endif
#elif __ANDROID__
#include <GLES2/gl2.h>
#endif
Again, note the addition of the extra conditional to check for __ANDROID__, where we include the <GLES2/gl2.h> header for Android - this resolves the OpenGL related errors.
With those changes made, our code base should now accommodate the Android platform target. Exit out of Visual Studio Code back to your Terminal and re-run the Gradle task again:
./gradlew :app:assembleDebug
This time, the compilation should succeed!
Running the Android app
We could actually run the Android app from the command line, but instead we’ll hop back into Android Studio to do this. Open Android Studio for our project. If you have a real Android device you can run the app via USB, but you can also run the app in the Android emulator which is handy for quick testing.
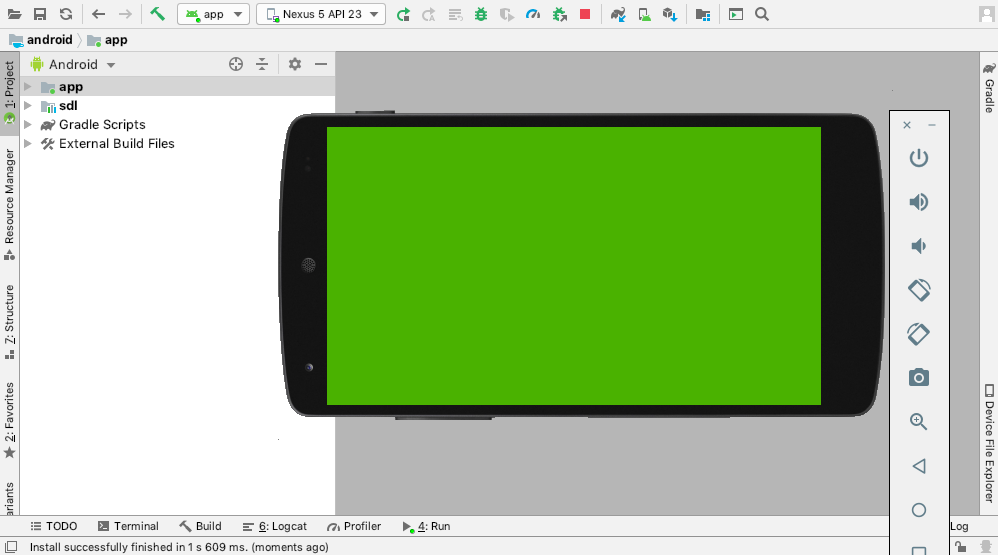
Hit the play button next to the dropdown list with app in it. If you can’t see a play button, go to View and make sure Toolbar is enabled. If you have never created an Android emulator before, you will be prompted to create one.

Not bad, everything seems to be working. There is a problem though, notice how we can still see the clock and battery icons on the screen? That would be pretty annoying in a game, but why do we see them?
Remember that in our sdl-wrapper.cpp class, we had some rules about which platforms should be full screen or have fixed display sizes. Here is the code as a reminder:
...

bool shouldDisplayFullScreen()
{
    switch (ast::getCurrentPlatform())
    {
        case ast::Platform::ios:
            return true;

        default:
            return false;
    }
}

...
and
...

switch (ast::getCurrentPlatform())
{
    case ast::Platform::ios:
    {
        // For mobile platforms we will fetch the full screen size.
        SDL_DisplayMode displayMode;
        SDL_GetDesktopDisplayMode(0, &displayMode);
        displayWidth = static_cast<uint32_t>(displayMode.w);
        displayHeight = static_cast<uint32_t>(displayMode.h);
        break;
    }

    default:
    {
        // For other platforms we'll just show a fixed size window.
        displayWidth = 640;
        displayHeight = 480;
        break;
    }
}

...
You might notice that we are only checking for the ast::Platform::ios platform when considering full screen mode or whether we have a fixed display size. So … I guess we’ll include the ast::Platform::android case as well to fix the problem.
Update the shouldDisplayFullScreen() function to include the Android case as well as the iOS case, like so:
bool shouldDisplayFullScreen()
{
    switch (ast::getCurrentPlatform())
    {
        case ast::Platform::ios:
        case ast::Platform::android:
            return true;

        default:
            return false;
    }
}
Update the ast::sdl::getDisplaySize() method to include the Android case as well:
...

switch (ast::getCurrentPlatform())
{
    case ast::Platform::ios:
    case ast::Platform::android:
    {
        // For mobile platforms we will fetch the full screen size.
        SDL_DisplayMode displayMode;
        SDL_GetDesktopDisplayMode(0, &displayMode);
        displayWidth = static_cast<uint32_t>(displayMode.w);
        displayHeight = static_cast<uint32_t>(displayMode.h);
        break;
    }

...
After making those changes, run the Android app again and you will see that the status bar with the clock is gone, and the display size will have been derived the same way that iOS had been:
Setup Android for Windows
I wasn’t originally going to include Windows for building our Android application but I figured there shouldn’t be a reason to not be able to support it so here we go!
To get started you can follow pretty much all the steps at the start of this article but refer to the following Windows setup script instead of the MacOS setup script as you go. The Windows setup script will be written in PowerShell and will do pretty much the same thing that our shell script does on MacOS.
Create a new file named setup.ps1 in the android folder alongside the setup.sh file we already have. I’ll paste the full script below, then walk through it to explain the different parts - you might need to incrementally write this setup script if you intend to follow along step by step with the earlier parts of the article about creating the actual Android project:
# Don't allow our script to continue if any errors are observed
$ErrorActionPreference = "Stop"

# We will assume that we'll use Java that is bundled with Android Studio.
$env:JAVA_HOME="C:\Program Files\Android\Android Studio\jre\jre"

# We will assume that the Android SDK is in the default location that Android Studio installs it to.
$env:ANDROID_HOME="C:\Users\$env:UserName\AppData\Local\Android\Sdk"
Write-Host "Using Android SDK at: $env:ANDROID_HOME"

# We will be using a specific version of the Android NDK.
$NDK_VERSION="20.0.5594570"
$env:ANDROID_NDK="$env:ANDROID_HOME\ndk\$NDK_VERSION"
Write-Host "Using Android NDK at: $env:ANDROID_NDK"

Push-Location -Path "$env:ANDROID_HOME\tools\bin"
    Write-Host "Reviewing Android SDK licenses ..."

    # Create a file that can answer 'y' to each of the Android licenses automatically.
    Set-Content -Path 'yes.txt' -Value "y`r`ny`r`ny`r`ny`r`ny`r`ny`r`ny`r`ny`r`ny`r`ny`r`n"
    cmd.exe /c 'sdkmanager.bat --licenses < yes.txt'
    Remove-Item -Path 'yes.txt'

    Write-Host "Installing required Android SDK components ..."
    cmd.exe /c "sdkmanager.bat platform-tools build-tools;28.0.3 tools platforms;android-28 cmake;3.10.2.4988404 ndk;$NDK_VERSION"
Pop-Location

# Check that we have a 'third-party' folder
Push-Location -Path "..\..\"
if (!(Test-Path "third-party")) {
    New-Item -ItemType Directory -Path "third-party"
}
Pop-Location

# Check that we have the SDL third party source folder.
if (!(Test-Path "..\..\third-party\SDL")) {
    Write-Host "Downloading SDL source into third party folder SDL ..."
    $WebClient = New-Object System.Net.WebClient
    $WebClient.DownloadFile("https://www.libsdl.org/release/SDL2-2.0.9.zip", "..\..\third-party\SDL2-2.0.9.zip")

    Push-Location -Path "..\..\third-party"
        Write-Host "Unzipping SDL source into third-party\SDL ..."
        cmd.exe /c 'tar -xf SDL2-2.0.9.zip'
        Move-Item -Path SDL2-2.0.9 -Destination SDL
        Remove-Item -Path SDL2-2.0.9.zip
    Pop-Location
}

# If required, create the SDL symlink into the Android library project so it can include it in its build.
Push-Location "sdl\jni"
if (!(Test-Path "SDL")) {
    Write-Host "Linking third-party\SDL to sdl\jni\SDL."
    cmd.exe /c 'mklink /d SDL ..\..\..\..\third-party\SDL'
}
Pop-Location

# Copy the Java classes from the SDL library source into the Android library project.
Push-Location "sdl\src\main"
if (!(Test-Path "java\org\libsdl")) {
    Write-Host "Copying base SDL Java source to Android library project ..."
    Copy-Item -Path ..\..\..\..\..\third-party\SDL\android-project\app\src\main\java -Recurse -Destination java
}
Pop-Location

Write-Host "All done - import the project in this folder into Android Studio to run it!"
First we mark the script so it will stop if it encounters an error:
$ErrorActionPreference = "Stop"
Next we setup the JAVA_HOME environment variable to point at the default Java runtime that comes bundled with Android Studio. I will assume that you have installed Android Studio in the default location otherwise you’d need to change the path. Additionally you might already have a Java JDK installed separately on your computer in which case this may not be necessary but I don’t think it will matter much if it is left in the script:
$env:JAVA_HOME="C:\Program Files\Android\Android Studio\jre\jre"
We will be invoking Android tools which need to know the location of the Android SDK. The Android SDK that is installed during the Android Studio setup ends up in the location shown in the script for the current user. Again you may already have an ANDROID_HOME environment variable in which case this may not be necessary, or you might need to change the location if you have your SDK in a non standard location:
$env:ANDROID_HOME="C:\Users\$env:UserName\AppData\Local\Android\sdk"
Write-Host "Using Android SDK at: $env:ANDROID_HOME"
Next we declare what version of the NDK we would like to install and use and its location:
# We will be using a specific version of the Android NDK.
$NDK_VERSION="20.0.5594570"
$env:ANDROID_NDK="$env:ANDROID_HOME\ndk\$NDK_VERSION"
Write-Host "Using Android NDK at: $env:ANDROID_NDK"
The next part will invoke the Android SDK manager which is bundled inside the Android SDK under the tools/bin folder. I am using a hacky trick to cause the Android licences to be automatically accepted to avoid having to manually type y for each of them. By piping a text file containing the letter y on multiple lines into the SDK manager licenses command it will simulate a user typing it in:
Push-Location -Path "$env:ANDROID_HOME\tools\bin"
    Write-Host "Reviewing Android SDK licenses ..."

    # Create a file that can answer 'y' to each of the Android licenses automatically.
    Set-Content -Path 'yes.txt' -Value "y`r`ny`r`ny`r`ny`r`ny`r`ny`r`ny`r`ny`r`ny`r`ny`r`n"
    cmd.exe /c 'sdkmanager.bat --licenses < yes.txt'
    Remove-Item -Path 'yes.txt'
We then run the SDK manager a second time requesting that it automatically install the following components into the Android SDK on the computer:
- Android platform tools
- Android build tools version 28.0.3
- Android tools
- Android platform SDK version 28
- CMake version 3.10.2.4988404
- Android NDK 20.0.5594570
    Write-Host "Installing required Android SDK components ..."
    cmd.exe /c "sdkmanager.bat platform-tools build-tools;28.0.3 tools platforms;android-28 cmake;3.10.2.4988404 ndk;$NDK_VERSION"
Pop-Location
Next we check to make sure we have a third-party folder ready for us to download all our dependencies:
Push-Location -Path "..\..\"
if (!(Test-Path "third-party")) {
    New-Item -ItemType Directory -Path "third-party"
}
Pop-Location
The first dependency is the SDL source code which contains the Android things we need to integrate with. This is the same code we downloaded on MacOS. I am using the System.Net.WebClient to perform the file downloads with the caveat that it doesn’t display any kind of download progress. There are other ways to download in PowerShell but this was the fastest performing approach I tried. After downloading the SDL zip file we go into the third-party folder and unzip it using tar. This is slightly interesting because PowerShell in fact has a built in way to unzip files but I discovered that it blows up if any file paths within the zip exceed a paltry character length (I think it was 250-something). Using tar avoids this issue though it would have been nice to be able to use the default PowerShell commands:
if (!(Test-Path "..\..\third-party\SDL")) {
    Write-Host "Downloading SDL source into third party folder SDL ..."
    $WebClient = New-Object System.Net.WebClient
    $WebClient.DownloadFile("https://www.libsdl.org/release/SDL2-2.0.9.zip", "..\..\third-party\SDL2-2.0.9.zip")

    Push-Location -Path "..\..\third-party"
        Write-Host "Unzipping SDL source into third-party\SDL ..."
        cmd.exe /c 'tar -xf SDL2-2.0.9.zip'
        Move-Item -Path SDL2-2.0.9 -Destination SDL
        Remove-Item -Path SDL2-2.0.9.zip
    Pop-Location
}
Next we create a symlink to the third party SDL folder inside our Android sdl project under the jni folder, similar to the MacOS script:
Push-Location "sdl\jni"
if (!(Test-Path "SDL")) {
    Write-Host "Linking third-party\SDL to sdl\jni\SDL."
    cmd.exe /c 'mklink /d SDL ..\..\..\..\third-party\SDL'
}
Pop-Location
Also similar to the MacOS script we copy over a bunch of SDL Java classes into our project if they don’t already exist:
Push-Location "sdl\src\main"
if (!(Test-Path "java\org\libsdl")) {
    Write-Host "Copying base SDL Java source to Android library project ..."
    Copy-Item -Path ..\..\..\..\..\third-party\SDL\android-project\app\src\main\java -Recurse -Destination java
}
Pop-Location
That’s pretty much it. There is a fair chance that if you have not run a PowerShell script on your computer before, you will get an execution policy error. You can change the execution policy in PowerShell, but the other way to get around this problem is to enable Developer mode on your computer. To find the Developer mode option, go to your Windows settings -> Update & Security -> For developers. Enable the Developer mode radio choice then reboot your computer. After doing this your script should be able to run successfully.

Open a new PowerShell session in the android folder and execute the setup.ps1 script. You should see something similar to the following - perhaps with a bit more output than I’m showing below:
.\setup.ps1
Using Android SDK at: C:\Users\<snip>\AppData\Local\Android\Sdk
Using Android NDK at: C:\Users\<snip>\AppData\Local\Android\Sdk\ndk\20.0.5594570
Reviewing Android SDK licenses ...
All SDK package licenses accepted.======] 100% Computing updates...

Installing required Android SDK components ...
[=======================================] 100% Computing updates...
Downloading SDL source into third party folder SDL ...
Unzipping SDL source into third-party\SDL ...
Linking third-party\SDL to sdl\jni\SDL.
symbolic link created for SDL <<===>> ..\..\..\..\third-party\SDL
All done - import the project in this folder into Android Studio to run it!
Open Android Studio and Import the Android project and you should be able to run it just like on MacOS.
Summary
Working with Android can be rather challenging at times, there is a lot of knowledge needed to get the most out of it, and due to the age of the Android platform there is often ‘prior art’ with the Android SDKs themselves that can trap an unwary developer. At this point however, the Android project we’ve created is in a good state to use without much further work.
Git ignore
If you were to commit A Simple Triangle into version control, you would want to create a new .gitignore file for the root/platform/android folder, so it won’t include all the files that get auto generated by running the Android build. Here is a sample .gitignore that would achieve this for our project:
*.iml
.idea
.gradle
.DS_Store
.cxx
build
captures
.externalNativeBuild
local.properties
The code for this article can be found here.
In the next article we will add the Emscripten platform target, allowing us to run our application directly in a web browser.
Continue to Part 6: Setup Emscripten.
End of part 5
