crust / Part 6 - OpenGL window
Marcel Braghetto 13 February 2022

In this article we will add a main loop to our application and display an OpenGL window. We will also stub out the basics for a scene with user input handling.
Application architecture
Before we dive into code let’s talk about a few different components we need to build and what they do.
Launcher
We have already written part of the launcher, it is responsible for bootstrapping our application and running until the user wants to quit. We will be updating it to construct an engine, then create and run an instance of a main loop which will drive the continous cycle of the application. The main loop will be handed the engine implementation to integrate with.
For this series we will only be creating an engine implementation using OpenGL however we’ll use Rust traits to model the engine such that we could add additional implementations in the future such as Vulkan.
Scene
A scene will contain the specific implementation for what to draw on the screen and what user facing behaviour to perform on each loop cycle. The currently active scene will be given the chance to update or render on each loop iteration. It will also be notified when events happen such as the window size changing.
A scene will have no awareness of what graphics system is being used and will only be allowed to perform a restricted set of graphical operations via Rust trait definitions. Although we will be writing our engine with OpenGL, there will be zero OpenGL code within a scene implementation, instead we will be using abstractions for different graphics domain objects - but we’ll get into that in a later article.
For this series we will only create one scene implementation but in a larger project you would likely create many scenes to represent different scenarios for your users to experience and provide a way to transition or combine scenes as needed.
We will use a Rust trait named Scene to represent the functionality common to all scenes, defining methods to update, render and react to system events such as window size changes. This allows our engine or main loop to invoke these methods on the currently active scene without knowing anything about the specific implementation of the scene.
Engine
The engine will represent an implementation of a graphics system such as OpenGL and offer a set of rendering commands that a scene can invoke to draw objects in the 3D world.
We will use Rust traits to represent an engine, such that the owner of an engine won’t know anything about its implementation but can still invoke the appropriate methods on it.
As mentioned in the launcher section, this would allow us to author different engine implementations - for example we could write a Vulkan engine implementation in addition to the OpenGL one - the scene and main loop shouldn’t know that we are using one or the other.
The Rust traits we will use to represent an engine are:
Graphics: Trait defining methods to handle window events and hooks to begin and end rendering cyclesRenderer: Trait defining methods which can be invoked to draw objects on the screenEngine: A simple composite trait that combines the Graphics + Renderer traits - more for syntactic convenience than anything - an implementor of the Engine trait would therefore need to implement both Graphics and Renderer
Main loop
This is the heartbeat of our application and will calculate the time delta on each loop then use it to issue update commands to the active scene.
It will also instruct the engine to start or end its rendering phases and tell the active scene when it can perform its rendering operations.
It will also notify the engine if certain events happen, such as the window being resized. The main loop will create the default scene when it starts up.
Display
At various points in our implementation we will need to pass around the width and height of the current display size. Rust allows for generic tuples in the form of (T, U) which would work but it would be better to model this data in a more formal way.
Add core/display_size.rs:
pub struct DisplaySize {
    pub width: i32,
    pub height: i32,
}
We can now pass an object of type DisplaySize which has the width and height dimensions in it. Note that we are using signed integers even though theoretically you may not expect a display to have negative dimensions. Having signed integers will help with a variety of math calculations we’ll need to do later on and we will never have a display that would exceed the bounds of a signed integer anyway.
We will also write a new service that can return the host window size to use, add core/window.rs:
use crate::core::{display_size::DisplaySize, failable::Failable};

pub fn get_size(video: &sdl2::VideoSubsystem) -> Failable<DisplaySize> {
    let mut width = 640i32;
    let mut height = 480i32;

    if cfg!(target_os = "android") || cfg!(target_os = "ios") {
        let display_mode = video.desktop_display_mode(0)?;
        width = display_mode.w;
        height = display_mode.h;
    }

    Ok(DisplaySize {
        width: width,
        height: height,
    })
}
For this series we will default to a 640x480 window unless we are building for Android or iOS in which case we’ll use the entire screen size instead. You are welcome to use dimensions other than 640x480 or enrich the approach to run in fullscreen on desktop as well but I’ll leave that as an exercise for you in your own project.
Traits
To get started we will write the various traits required to fulfill our architecture. We will put our traits in the core module.
Note: All code from here will be in the crust-main project - we won’t need to touch crust-build for a while.
Graphics trait
The Graphics trait defines a slice of an engine to provide a way to raise window change events and to begin or end the general rendering phases. Add core/graphics.rs:
use crate::core::{display_size::DisplaySize, failable::Failable, failable_unit::FailableUnit};

pub trait Graphics {
    fn on_display_size_changed(&mut self) -> Failable<DisplaySize>;
    fn get_display_size(&self) -> Failable<DisplaySize>;
    fn render_begin(&mut self) -> FailableUnit;
    fn render_end(&mut self) -> FailableUnit;
}
Renderer trait
The Renderer trait defines a slice of an engine to provide a way for a scene (or whatever) to draw 3D models on the screen. We will actually tweak this trait in a later article as we haven’t yet written any structures to represent 3D models yet, but for now we can at least stub it out in a simple way to allow us to plumb it in. Add core/renderer.rs:
use crate::core::failable_unit::FailableUnit;

pub trait Renderer {
    fn render_models(&mut self) -> FailableUnit;
}
Engine trait
As discussed earlier, the Engine trait is really a convenience trait and applies the Rust approach to combining multiple traits together using the + syntax. We could actually write our code without this trait but it means we’d have to repeat ourselves with Graphics + Renderer and if we wanted to composite additional traits into an engine we’d need to go and update it everywhere. Add core/engine.rs:
use crate::core::{graphics::Graphics, renderer::Renderer};

pub trait Engine: Graphics + Renderer {}
Scene trait
The Scene trait will use the Renderer trait as a way to restrict what a scene can do in our engine - we wouldn’t want to give our scenes the ability to mess with other aspects of the engine that it shouldn’t know about. Add core/scene.rs:
use crate::core::{display_size::DisplaySize, failable_unit::FailableUnit, renderer::Renderer};

pub trait Scene {
    fn update(&mut self, delta: f32, event_pump: &sdl2::EventPump) -> FailableUnit;
    fn render(&mut self, renderer: &mut dyn Renderer) -> FailableUnit;
    fn on_display_size_changed(&mut self, display_size: DisplaySize) -> FailableUnit;
}
This trait probably needs a bit more explanation:
update: This method will be called from the main loop, providing the delta of time that has elapsed since the last loop and an event_pump which is the hook into the SDL2 system for knowing what input events are happening at the moment - such as key presses or mouse movementsrender: This will also be called from the main loop at the appropriate time to let the scene have the opportunity to draw to the screen. It will be passed a sliced view of the engine via the Renderer trait which is how we restrict the scene to only be able to call render methods in the engine.on_display_size_changed: This will be called if something causes the size of the application window to change - it gives the scene the chance to recompute anything that might be sensitive to the display size such as cameras and viewports
Main scene
Ok, now that we have our traits defined we can start on the implementations. We are actually going to work from the outside in, starting with the implementation of our scene then work our way back toward the engine, main loop and launcher.
We will put our scenes into a new Rust module named scenes giving us a nice spot to add more scenes in the future. Create a new directory named scenes next to the existing core directory and add a mod.rs file into it. Register the scenes module at the root level inside lib.rs with pub mod scenes;.
Add scenes/main_scene.rs to hold the initial implementation of our main scene:
use crate::{
    core::{display_size::DisplaySize, failable::Failable, failable_unit::FailableUnit, logs, renderer::Renderer, scene::Scene},
    log_tag,
};
use sdl2::keyboard::Scancode;

pub struct MainScene {
    display_size: DisplaySize,
}

impl MainScene {
    pub fn new(display_size: DisplaySize) -> Failable<Self> {
        Ok(MainScene {
            display_size: display_size,
        })
    }

    fn process_input(&mut self, event_pump: &sdl2::EventPump) -> FailableUnit {
        let key_state = event_pump.keyboard_state();

        if key_state.is_scancode_pressed(Scancode::Up) {
            logs::out(log_tag!(), "Key pressed: UP");
        }

        if key_state.is_scancode_pressed(Scancode::Down) {
            logs::out(log_tag!(), "Key pressed: DOWN");
        }

        if key_state.is_scancode_pressed(Scancode::A) {
            logs::out(log_tag!(), "Key pressed: A");
        }

        if key_state.is_scancode_pressed(Scancode::Z) {
            logs::out(log_tag!(), "Key pressed: Z");
        }

        if key_state.is_scancode_pressed(Scancode::Left) {
            logs::out(log_tag!(), "Key pressed: LEFT");
        }

        if key_state.is_scancode_pressed(Scancode::Right) {
            logs::out(log_tag!(), "Key pressed: RIGHT");
        }

        Ok(())
    }
}

impl Scene for MainScene {
    fn update(&mut self, _: f32, event_pump: &sdl2::EventPump) -> FailableUnit {
        self.process_input(event_pump)?;
        Ok(())
    }

    fn render(&mut self, _: &mut dyn Renderer) -> FailableUnit {
        Ok(())
    }

    fn on_display_size_changed(&mut self, display_size: DisplaySize) -> FailableUnit {
        self.display_size = display_size;
        Ok(())
    }
}
To start with our main scene will simply process input events and print log statements for a few keys on the keyboard when the update method is called. We will also keep track of the scene display size as later we will be creating cameras and doing view space calculations.
Notice how we are implementing the Scene trait - the way to implement traits in Rust is by declaring an impl block with the name of the trait followed by the type that owns the implementation, in our case MainScene:
impl Scene for MainScene {
The input handling code in the process_input method checks the keyboard using the keyboard_state of the SDL event pump, allowing us to trigger behaviour if certain keys are pressed.
The C API for this is here: https://wiki.libsdl.org/SDL_GetKeyboardState but since we are using Rust we need to refer to the SDL2 Rust code to figure out the Rust equivalent: https://github.com/Rust-SDL2/rust-sdl2/blob/master/src/sdl2/keyboard/mod.rs.
You may also notice that some method arguments are named _ - these are arguments that we aren’t using in our code. Normally Rust will warn us if we have unused code but this is one way to indicate that we are aware that there are no usages of the argument and to not warn us about it.
OpenGL Engine
Next up we can implement the basics of the engine we’ll be using in this series. As I mentioned earlier, we will stick with OpenGL for this series due to its simplicity. I would like to add Vulkan support as well but I’ll leave that as a future project as I have a strong feeling it will be quite complicated.
We have our Engine trait which hints at a few of the things our OpenGL engine needs to be able to do:
Graphics::on_display_size_changed: For OpenGL this will require us to update the active viewport with the new display size dimensions to avoid our screen becoming stretched or distortedGraphics::get_display_size: This is to allow the owner of our engine to ask about the current display size which is not necessarily the same as the window sizeGraphics::render_begin: OpenGL (and other graphics stacks) often have the concept of beginning a render pass, preparing to take commands to draw to the graphics systemGraphics::render_end: A command to cause the ending of a render pass often resulting in committing any drawing commands since the render pass beganRenderer:render_models: For now this will be a basic stub but later on we’ll pass lists of 3D models to render through this method
We will put all our OpenGL code in its own module to keep it isolated from the rest of the code base. Create a new opengl directory next to the core directory along with its mod.rs file then register it in lib.rs with: pub mod opengl;.
Add opengl/opengl_engine.rs with:
use crate::{
    core::{
        display_size::DisplaySize, engine::Engine, failable::Failable, failable_unit::FailableUnit, graphics::Graphics, logs,
        renderer::Renderer, window,
    },
    log_tag,
};
use sdl2::video::{GLContext, GLProfile, Window};

pub struct OpenGLEngine {
    window: sdl2::video::Window,
    gl_context: GLContext,
}

impl OpenGLEngine {
    pub fn new(sdl: &sdl2::Sdl) -> Failable<Self> {
        let video = sdl.video()?;
        let attributes = video.gl_attr();

        if cfg!(target_os = "android") || cfg!(target_os = "ios") || cfg!(target_os = "emscripten") {
            attributes.set_context_profile(GLProfile::GLES);
        } else {
            attributes.set_context_profile(GLProfile::Compatibility);
        }

        attributes.set_context_version(2, 1);

        let window = OpenGLEngine::new_window(&sdl)?;
        let gl_context = OpenGLEngine::new_context(&sdl, &window)?;
        let engine = OpenGLEngine {
            window: window,
            gl_context: gl_context,
        };

        engine.update_viewport()?;

        Ok(engine)
    }

    fn new_window(sdl: &sdl2::Sdl) -> Failable<Window> {
        let video = sdl.video()?;
        let window_size = window::get_size(&video)?;
        let mut window_builder = video.window("crust", window_size.width.try_into()?, window_size.height.try_into()?);

        window_builder.position_centered();

        if cfg!(target_os = "android") || cfg!(target_os = "ios") {
            window_builder.fullscreen();
        }

        let flags = sdl2::sys::SDL_WindowFlags::SDL_WINDOW_ALLOW_HIGHDPI as u32
            | sdl2::sys::SDL_WindowFlags::SDL_WINDOW_RESIZABLE as u32
            | sdl2::sys::SDL_WindowFlags::SDL_WINDOW_OPENGL as u32;

        window_builder.set_window_flags(flags);

        Ok(window_builder.build().map_err(|_| String::from("Failed to create window"))?)
    }

    fn new_context(sdl: &sdl2::Sdl, window: &Window) -> Failable<GLContext> {
        logs::out(log_tag!(), "Creating context ...");
        let gl_context = window.gl_create_context()?;
        logs::out(log_tag!(), "Context created successfully ...");

        let video = sdl.video()?;
        gl::load_with(|s| video.gl_get_proc_address(s) as *const _);

        unsafe {
            gl::ClearDepthf(1.);
            gl::Enable(gl::DEPTH_TEST);
            gl::DepthFunc(gl::LEQUAL);
            gl::Enable(gl::CULL_FACE);
        }

        Ok(gl_context)
    }

    fn update_viewport(&self) -> FailableUnit {
        let display_size = self.get_display_size()?;

        unsafe {
            gl::Viewport(0, 0, display_size.width, display_size.height);
        }

        Ok(())
    }
}

impl Graphics for OpenGLEngine {
    fn get_display_size(&self) -> Failable<DisplaySize> {
        let size = self.window.drawable_size();

        Ok(DisplaySize {
            width: size.0.try_into()?,
            height: size.1.try_into()?,
        })
    }

    fn on_display_size_changed(&mut self) -> Failable<DisplaySize> {
        self.update_viewport()?;
        Ok(self.get_display_size()?)
    }

    fn render_begin(&mut self) -> FailableUnit {
        self.window.gl_make_current(&self.gl_context)?;

        unsafe {
            gl::ClearColor(0.5, 0.2, 0.0, 1.0);
            gl::Clear(gl::COLOR_BUFFER_BIT | gl::DEPTH_BUFFER_BIT);
        }

        Ok(())
    }

    fn render_end(&mut self) -> FailableUnit {
        self.window.gl_swap_window();
        Ok(())
    }
}

impl Renderer for OpenGLEngine {
    fn render_models(&mut self) -> FailableUnit {
        Ok(())
    }
}

impl Engine for OpenGLEngine {}
Let’s examine this code a bit deeper.
new
The new method takes the instance of the initialised SDL system and configures the attributes we want to apply to our OpenGL environment. For our project we are sticking with a somewhat older OpenGL version (2.1) as it gives us compatibility with OpenGL ES2 needed by Android, iOS and Emscripten - though it may be possible to use OpenGL ES3 compatible code instead if you want to go in that direction. We also hint to OpenGL about what profile we would like to activate:
pub fn new(sdl: &sdl2::Sdl) -> Failable<Self> {
    let video = sdl.video()?;
    let attributes = video.gl_attr();

    if cfg!(target_os = "android") || cfg!(target_os = "ios") || cfg!(target_os = "emscripten") {
        attributes.set_context_profile(GLProfile::GLES);
    } else {
        attributes.set_context_profile(GLProfile::Compatibility);
    }

    attributes.set_context_version(2, 1);
Important: Incorrectly setting the context profile will often cause OpenGL to fail to initialise properly.
Once we’ve configured the OpenGL attributes we will create a new OpenGL based window through the SDL system, then from the window an OpenGL context. Finally we create an instance of our engine implementation with the window and context, then tell it to update its viewport before returning it.
    let window = OpenGLEngine::new_window(&sdl)?;
    let gl_context = OpenGLEngine::new_context(&sdl, &window)?;
    let engine = OpenGLEngine {
        window: window,
        gl_context: gl_context,
    };

    engine.update_viewport()?;

    Ok(engine)
}
new_window
The new_window method interacts with SDL2 and requests a new window with the configuration appropriate for our OpenGL use case. We will decide on what size to make our window through the window::get_size method then create a window builder, appending configuration properties to influence the resulting window.
If we are running on Android or iOS we’ll elect to run in full screen mode.
fn new_window(sdl: &sdl2::Sdl) -> Failable<Window> {
    let video = sdl.video()?;
    let window_size = window::get_size(&video)?;
    let mut window_builder = video.window("crust", window_size.width.try_into()?, window_size.height.try_into()?);

    window_builder.position_centered();

    if cfg!(target_os = "android") || cfg!(target_os = "ios") {
        window_builder.fullscreen();
    }
The flags we will set include:
SDL_WINDOW_ALLOW_HIGHDPI: This is required if we want retina / high density display support on iOS and other systemsSDL_WINDOW_RESIZABLE: Allows the window to be resized - technically we don’t need to do this but for development it’s nice to be able to mess around with the window to debug what happensSDL_WINDOW_OPENGL: Tells SDL that OpenGL is the graphics system we want - there are other options such as Vulkan available
    let flags = sdl2::sys::SDL_WindowFlags::SDL_WINDOW_ALLOW_HIGHDPI as u32
        | sdl2::sys::SDL_WindowFlags::SDL_WINDOW_RESIZABLE as u32
        | sdl2::sys::SDL_WindowFlags::SDL_WINDOW_OPENGL as u32;

    window_builder.set_window_flags(flags);
Finally, we will try to build and return the window configuration and if there was a problem, transform the error into a message that will be returned instead.
    Ok(window_builder.build().map_err(|_| String::from("Failed to create window"))?)
}
new_context
OpenGL requires us to obtain a context before being able to interact with it. We ask our SDL window to create an OpenGL context for us, so we don’t really have to do any heavy lifting for that.
fn new_context(sdl: &sdl2::Sdl, window: &Window) -> Failable<GLContext> {
    logs::out(log_tag!(), "Creating context ...");
    let gl_context = window.gl_create_context()?;
Next we have to do something that seems a bit quirky - we need to load all the OpenGL API method addresses in memory so we can call them successfully. In A Simple Triangle for Windows we used the GLEW library for this (not all platforms need to map these methods themselves though). In our Rust application we can use the gl::load_with to iterate all the method references inside the video system and expose them into our OpenGL runtime:
let video = sdl.video()?;

gl::load_with(|s| video.gl_get_proc_address(s) as *const _);
We then do a bit of general OpenGL configuration to set up things like depth testing and hidden surface removal and finally return the OpenGL context reference to the caller:
    unsafe {
        gl::ClearDepthf(1.);
        gl::Enable(gl::DEPTH_TEST);
        gl::DepthFunc(gl::LEQUAL);
        gl::Enable(gl::CULL_FACE);
    }

    Ok(gl_context)
}
Note: You will start to see code wrapped in unsafe blocks. While not ideal from a Rust perspective, we are forced to run foreign code in this way as Rust has no introspection or control over data and lifetimes of objects outside its domain.
update_viewport
This method simply tells OpenGL to update its viewport dimensions to keep the aspect ratio and size correct for the screen. We need to call this method whenever the window size changes as well:
fn update_viewport(&self) -> FailableUnit {
    let display_size = self.get_display_size()?;

    unsafe {
        gl::Viewport(0, 0, display_size.width, display_size.height);
    }

    Ok(())
}
Graphics::get_display_size
This calculates the size of the drawable area in the host window - the dimensions of the drawable area may not be the same as the window size so don’t confuse the two! We ask the current window for its drawable_size then pack the resulting tuple of unsigned integers into a DisplaySize structure:
fn get_display_size(&self) -> Failable<DisplaySize> {
    let size = self.window.drawable_size();

    Ok(DisplaySize {
        width: size.0.try_into()?,
        height: size.1.try_into()?,
    })
}
Graphics::on_display_size_changed
Whenever our main loop detects a window changed event it will call this method - we need to update our OpenGL viewport and return the new drawable display size to the caller so it can be forwarded on to the active scene.
fn on_display_size_changed(&mut self) -> Failable<DisplaySize> {
    self.update_viewport()?;
    Ok(self.get_display_size()?)
}
Graphics::render_begin
Begins the rendering phase which for OpenGL simply ensures that our OpenGL context is currently being used, then clears the screen to a lovely rusty shade of brown:
fn render_begin(&mut self) -> FailableUnit {
    self.window.gl_make_current(&self.gl_context)?;

    unsafe {
        gl::ClearColor(0.5, 0.2, 0.0, 1.0);
        gl::Clear(gl::COLOR_BUFFER_BIT | gl::DEPTH_BUFFER_BIT);
    }

    Ok(())
}
Graphics::render_end
Signals the end of the rendering phase for the current frame and simply asks OpenGL to display whatever is in its buffer to the screen:
fn render_end(&mut self) -> FailableUnit {
    self.window.gl_swap_window();
    Ok(())
}
Renderer::render_models
At the moment we are just stubbing this out - later in the series we will revisit this and add arguments to take in a list of 3D models to draw, then draw them through a shader program:
fn render_models(&mut self) -> FailableUnit {
    Ok(())
}
Engine trait implementation
We need to declare that we implement the Engine trait even though it has no methods of its own. This may seem a bit odd since we’ve fully implemented all of its composite traits (Graphics and Renderer) but the Rust language requires us to do it as the Engine trait is seen as a discrete entity in its own right:
impl Engine for OpenGLEngine {}
Ok, we are done with our OpenGL engine for now! Next stop - main loop!
Main loop
Our main loop will bring our application to life, by driving the events through our engine and scene for each frame. Let’s not waste time and hook in! Add core/main_loop.rs:
use crate::{
    core::{engine::Engine, failable::Failable, scene::Scene},
    scenes::main_scene::MainScene,
};
use sdl2::{
    event::{Event, WindowEvent},
    keyboard::Keycode,
    EventPump,
};

fn current_time(timer: &sdl2::TimerSubsystem) -> u64 {
    sdl2::TimerSubsystem::performance_counter(timer)
}

pub struct MainLoop<T: Engine> {
    engine: T,
    scene: Box<dyn Scene>,
    timer: sdl2::TimerSubsystem,
    performance_frequency: f64,
    current_time: u64,
    previous_time: u64,
    event_pump: EventPump,
}

impl<T: Engine> MainLoop<T> {
    pub fn new(sdl: &sdl2::Sdl, engine: T) -> Failable<Self> {
        let timer = sdl.timer()?;
        let performance_frequency = sdl2::TimerSubsystem::performance_frequency(&timer) as f64;
        let current_time = current_time(&timer);
        let display_size = engine.get_display_size()?;
        let event_pump = sdl.event_pump()?;

        Ok(MainLoop {
            engine: engine,
            scene: Box::new(MainScene::new(display_size)?),
            timer: timer,
            performance_frequency: performance_frequency,
            current_time: current_time,
            previous_time: current_time,
            event_pump: event_pump,
        })
    }

    pub fn run(&mut self) -> Failable<bool> {
        for event in self.event_pump.poll_iter() {
            if let Event::Window {
                win_event: WindowEvent::Resized { .. },
                ..
            } = event
            {
                self.scene.on_display_size_changed(self.engine.on_display_size_changed()?)?;
            }

            if let Event::Quit { .. }
            | Event::KeyDown {
                keycode: Some(Keycode::Escape),
                ..
            } = event
            {
                return Ok(true);
            }
        }

        self.previous_time = self.current_time;
        self.current_time = current_time(&self.timer);

        let elapsed = (self.current_time - self.previous_time) as f64;
        let delta = (elapsed / self.performance_frequency) as f32;

        self.scene.update(delta, &self.event_pump)?;
        self.engine.render_begin()?;
        self.scene.render(&mut self.engine)?;
        self.engine.render_end()?;

        Ok(false)
    }
}
Dissection time!
current_time
This method queries SDL to find out the current time with a high performance timer resulting in an unsigned 64 bit number. we use the result of this method to figure out the delta of time that has elapsed between each frame as we loop:
fn current_time(timer: &sdl2::TimerSubsystem) -> u64 {
    sdl2::TimerSubsystem::performance_counter(timer)
}
MainLoop structure
This structure holds a range of properties and uses monomorphic generics in order to accept and embed an instance of an Engine as type T. This means that an instance of a main loop for a given type of engine is a fully concrete type in its own right and could not be substituted for a main loop object with a different type of engine. We could have used a Box with a dynamic engine type instead but I’ve opted to go with this approach for the embedded engine property as it simplifies some of the subsequent code and gives us static dispatch for the engine.
We are also holding an instance of a Scene trait which does use dynamic generics because we wouldn’t necessarily know what type of scene is behind the scene field - especially if we wanted to swap the scene out for a different one at runtime. If you were absolutely certain that only one specific scene would ever be used you could take the monomorphic generics approach for the scene field as well.
The main loop also needs to keep track of a few timing properties so it can calculate how much time has elapsed between frames (delta).
The event_pump is our hook into the SDL framework to be able to intercept all sorts of system events such as window resizing and keyboard entry.
pub struct MainLoop<T: Engine> {
    engine: T,
    scene: Box<dyn Scene>,
    timer: sdl2::TimerSubsystem,
    performance_frequency: f64,
    current_time: u64,
    previous_time: u64,
    event_pump: EventPump,
}
new
The new method for the main loop constructs the timing properties we need via SDL and instantiates a MainScene to use as the default scene to drive. An enhancement here could be to introduce a scene manager and decouple the scene lifecycles further but I’ll keep it inline for now:
pub fn new(sdl: &sdl2::Sdl, engine: T) -> Failable<Self> {
    let timer = sdl.timer()?;
    let performance_frequency = sdl2::TimerSubsystem::performance_frequency(&timer) as f64;
    let current_time = current_time(&timer);
    let display_size = engine.get_display_size()?;
    let event_pump = sdl.event_pump()?;

    Ok(MainLoop {
        engine: engine,
        scene: Box::new(MainScene::new(display_size)?),
        timer: timer,
        performance_frequency: performance_frequency,
        current_time: current_time,
        previous_time: current_time,
        event_pump: event_pump,
    })
}
run
The run method is our heartbeat - it will be called continually until something signals that we should exit our application. The method will return a bool indicating whether we should exit the program or not - our launcher will be responsible for evaluating this and looping again so long as false is returned.
The first phase of the run method is to look at the event_pump to check for the presence of any special events we care about. We use Rust’s matching syntax to see if there is pending WindowEvent::Resized event and if so, we tell our current scene that the display size has changed, using the result of the engine.on_display_size_changed to know what the new display dimensions are. We also look for a Quit event or if the Escape key is being pressed and short circuit from the main loop with a true value - meaning we are finished and the program should exit:
pub fn run(&mut self) -> Failable<bool> {
    for event in self.event_pump.poll_iter() {
        if let Event::Window {
            win_event: WindowEvent::Resized { .. },
            ..
        } = event
        {
            self.scene.on_display_size_changed(self.engine.on_display_size_changed()?)?;
        }

        if let Event::Quit { .. }
        | Event::KeyDown {
            keycode: Some(Keycode::Escape),
            ..
        } = event
        {
            return Ok(true);
        }
    }
Next we compute the time difference since we last ran the loop to form the delta. The delta will be used in our game logic later to compute deterministic time related properties, things like how far things should move or rotate such that they operate at the same real world speed regardless of whether we are running at 10 frames per second or 60 (or whatever).
Note: We are trying to measure the raw time differences at a 64 bit floating point precision to mitigate against floating point inaccuracies when computing our delta. The final delta however is truncated to a 32 bit float because most of the 3D graphics code we will be writing deals with using 32 bit floats for mathematics.
self.previous_time = self.current_time;
self.current_time = current_time(&self.timer);

let elapsed = (self.current_time - self.previous_time) as f64;
let delta = (elapsed / self.performance_frequency) as f32;
Lastly our main loop takes its calculated time delta and the event pump and orchestrates the scene and engine to perform updates and do any desired rendering for the frame before returning false to indicate that we should not exit our program yet:
    self.scene.update(delta, &self.event_pump)?;
    self.engine.render_begin()?;
    self.scene.render(&mut self.engine)?;
    self.engine.render_end()?;

    Ok(false)
}
Clear as mud? Let’s hook it up and give it a spin!
Launcher
The final step is to revisit our launcher code and have it create a new OpenGL engine and main loop, then cycle our main loop until it reports it is ready to quit. Edit launcher.rs:
use crate::{
    core::{failable_unit::FailableUnit, logs, main_loop::MainLoop},
    log_tag,
    opengl::opengl_engine::OpenGLEngine,
};

pub fn launch() -> FailableUnit {
    logs::out(log_tag!(), "Init SDL2 ...");
    let sdl = sdl2::init()?;

    logs::out(log_tag!(), "Init SDL2 Image ...");
    sdl2::image::init(sdl2::image::InitFlag::PNG)?;

    logs::out(log_tag!(), "SDL2 ready ...");

    logs::out(log_tag!(), "Init OpenGL ...");
    let engine = OpenGLEngine::new(&sdl)?;

    logs::out(log_tag!(), "Init main loop ...");
    let mut main_loop = MainLoop::new(&sdl, engine)?;

    while !main_loop.run()? {
        // Keep looping until the main loop returns 'true'
    }

    logs::out(log_tag!(), "Finished ...");

    Ok(())
}
The main additions here is the creation of the OpenGL engine and main loop, then an eternal while statement calling to the main loop until it returns true:
let engine = OpenGLEngine::new(&sdl)?;

let mut main_loop = MainLoop::new(&sdl, engine)?;

while !main_loop.run()? {
    // Keep looping until the main loop returns 'true'
}
Ok, run the application again and you should get a rusty coloured OpenGL window appear. Tap the arrow keys to see our logging statements related to the event pump input. Press the Escape key to quit the program:
Note: I am showing the Windows version here but MacOS will look similar.
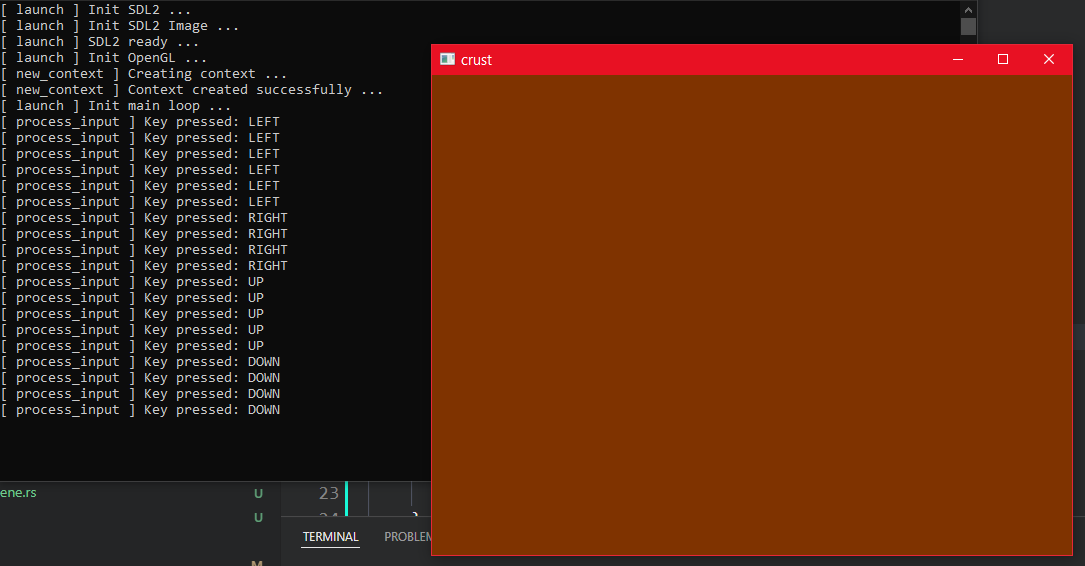
Woohoo! Finally we have our main application up and running in a window!
One final tweak we can make that is Windows specific, if we were to create a release build, our resulting Windows executable would currently launch a terminal window similar to a debug build shown in the screenshot but we probably don’t want that for a release build. Edit bin.rs and add a configuration attribute which gives the binary a hint about how to render the Windows application if it isn’t a debug build:
#![cfg_attr(not(debug_assertions), windows_subsystem = "windows")]
pub fn main() {
    crustlib::main();
}
If you are a Windows user you can test this out by running the following command from the crust-build directory then launching crust.exe from the windows/out/release location, noting that no terminal window will display:
cargo run -- --target windows --variant release
Summary
Ok that was a pretty huge article - but now we have our main loop in place and an active OpenGL window to play with so we can continue on with the implementation of some actual 3D model rendering code :)
The code for this article can be found here.
Continue to Part 7: Components and assets.
End of part 6
