a-simple-triangle / Part 6 - Setup Emscripten
Marcel Braghetto 10 March 2019
In this article we are going to add in the Emscripten platform target to our existing workspace. This will give us a way to run our application within a WebGL compatible browser.
For me this is one of the coolest technologies I got to play with while writing this series of articles. Many (many!) years ago I was a professional multimedia developer and spent a great deal of my time developing rich browser applications using Adobe Flash and have also published mobile applications developed with Adobe AIR.
Around the same time that Steve Jobs killed off Flash (yeah he did) I shifted gears and gave up being a multimedia developer and instead became a mobile app developer with more of a focus on business centric mobile apps. To see a modern technology like Emscripten that allows rich multimedia software to run in the browser again really impresses me and reminds me of my multimedia days.
Enough reminiscing though, let’s get into it. I would highly recommend spending a good amount of time reading the official Emscripten site: https://emscripten.org - the technology is truly remarkable and is a great use case of LLVM.
Here are some examples of what Emscripten can do:
The technical approach I settled on to successfully run an Emscripten project is similar to the other platform targets we’ve implemented but with greater reliance on the Emscripten tools themselves. In fact, you have to compile your Emscripten project using a custom C++ compiler provided by the Emscripten SDK. We also need to splice a bit of #ifdef type code to apply Emscripten specific code paths in our C++, but its not too bad.
The good news is that we can model our application build with a CMakeLists.txt file, very much like we did for the console and Android projects - so there will be some familiarity for those of you who have persevered this far with my series of articles.
To recap where we got to in our previous article we:
- Setup the Android platform target using a mix of Android Studio, CMake and shell scripts.
- Added the Android platform and conditional code into the shared C++ source to accommodate our Android target.
In this article, we will onboard our Emscripten platform target which will consist of:
- A CMake based project, editable in Visual Studio Code and compiled with the Emscripten SDK tools.
- A HTML template file that will run our Emscripten application in a browser.
Setup the Emscripten SDK
There is no IDE or specific development environment for creating Emscripten applications so we will keep using Visual Studio Code as we’ve done before.
In order to compile our code we will need to fetch and configure the Emscripten SDK as well as ensuring that we have CMake available. As we’ve done many times before, we’ll automate the setup and configuration through a setup.sh script.
To get started, create a new folder named emscripten as a sibling to our other platform targets:
root
  + project
    + emscripten
Create a new text file named setup.sh in the emscripten folder, and mark it as executable as normal (chmod +x setup.sh):
root
  + project
    + emscripten
      setup.sh
Enter the following script into setup.sh:
#!/bin/bash

# Include the shared scripts and utility methods that are common to all platforms.
. ../shared-scripts.sh

fetch_brew_dependency "wget"
fetch_brew_dependency "cmake"

fetch_third_party_lib_sdl

# If required, download and configure the Emscripten SDK into the third-party folder.
pushd ../../third-party
    if [ ! -d "emscripten" ]; then
        echo "Fetching Emscripten SDK ..."

        # Download the Emscripten SDK as a zip file from GitHub.
        wget https://github.com/emscripten-core/emsdk/archive/master.zip

        # Unzip the Emscripten SDK.
        unzip -q master.zip

        # Rename it to 'emscripten'.
        mv emsdk-master emscripten

        # Clean up the zip file we downloaded.
        rm master.zip

        pushd emscripten
            echo "Updating Emscripten SDK ..."
            ./emsdk update

            echo "Installing latest Emscripten SDK ..."
            ./emsdk install latest

            echo "Activating latest Emscripten SDK ..."
            ./emsdk activate latest
        popd
    fi
popd
Points of interest:
- We are including our
shared-scripts.sh as we normally do.
- We need to have
wget and cmake installed, similar to some of our other platforms.
- We need the SDL source code library - however this will only be needed as a reference to the header files. Emscripten has its own ports of the SDL2 libraries that it will automatically fetch during compilation. This is fairly different to how we’ve had to link to frameworks or static libraries for the other platform targets.
- We need to download the actual Emscripten SDK itself, then
update, install and activate it.
Run the setup script and you should see output similar to this (I’ve trimmed it for brevity):
Note: Be patient, the Emscripten SDK is fairly large and the update, install and activate steps can take some time.
$ ./setup.sh
Fetching Brew dependency: 'wget'.
Dependency 'wget' is already installed, continuing ...
Fetching Brew dependency: 'cmake'.
Dependency 'cmake' is already installed, continuing ...
SDL library already exists in third party folder.
Fetching Emscripten SDK ...
https://github.com/emscripten-core/emsdk/archive/master.zip
Saving to: ‘master.zip’
Updating Emscripten SDK ...
Installing latest Emscripten SDK ...
Installing SDK 'sdk-1.38.28-64bit'..
Installing tool 'clang-e1.38.28-64bit'..
Installing tool 'node-8.9.1-64bit'..
Installing tool 'emscripten-1.38.28'..
Activating latest Emscripten SDK ...
Writing .emscripten configuration file to user home directory
Set the following tools as active:
   clang-e1.38.28-64bit
   node-8.9.1-64bit
   emscripten-1.38.28
Note that in the third-party folder there is now a new emscripten folder. This is where the Emscripten SDK has been installed.
Define a CMakeLists.txt
Our CMakeLists.txt file is the heart of our Emscripten project as it defines what to compile and how to influence the Emscripten compiler.
Create a new text file named CMakeLists.txt in the root/project/emscripten folder:
root
  + project
    + emscripten
      CMakeLists.txt
      setup.sh
Edit CMakeLists.txt and enter the following text:
cmake_minimum_required(VERSION 3.4.1)

# We are using C++ 17 and will make use of C++ exceptions.
set(CMAKE_CXX_FLAGS "${CMAKE_CXX_FLAGS} -std=c++17 -fexceptions")

set(THIRD_PARTY_DIR "../../third-party")
set(MAIN_SOURCE_DIR "../main/src")
set(CMAKE_RUNTIME_OUTPUT_DIRECTORY ${CMAKE_CURRENT_SOURCE_DIR}/out)

include_directories(${THIRD_PARTY_DIR}/SDL/include)

file(GLOB_RECURSE CPP_HEADERS ${MAIN_SOURCE_DIR}/*.hpp)
file(GLOB_RECURSE CPP_SOURCES ${MAIN_SOURCE_DIR}/*.cpp)

# The 'a-simple-triangle' executable is the output target for our Emscripten application and is why we end up with 'a-simple-triangle.js' in the output folder. Note that it will use the C++ source code from the shared 'main' folder through the collated sources.
add_executable(
    a-simple-triangle
    ${CPP_HEADERS}
    ${CPP_SOURCES}
)

# These properties specify what kind of Emscripten build to perform and are assigned to our 'a-simple-triangle' executable target.
set_target_properties(
    a-simple-triangle
    PROPERTIES
    LINK_FLAGS
    "-O2 -s USE_SDL=2 -s USE_WEBGL2=1"
)
Most of this file is the same as for our console target, in fact the only difference is the last section where we are calling set_target_properties. The target properties for the a-simple-triangle LINK_FLAGS are:
-02: This is a compiler optimization flag that is best described here.-s USE_SDL=2: This flag indicates that Emscripten should download its own port of SDL2 and link against it. Note that Emscripten also ships with SDL1 support but we do not want to use that. Emscripten will do some magic at compile time to figure out if it needs to fetch the SDL2 port or not. When it is done you can actually find the downloaded files in the ~/.emscripten_ports folder, but you don’t need to worry about them too much.-s USE_WEBGL=1: This will enable some WebGL optimizations that may help our application performance. Here is the doco if you want to learn more.
One thing that we don’t define in the CMakeLists.txt file is which compiler to use to build the code. Unfortunately I couldn’t figure out how to define the compiler inside the CMakeLists.txt file - I could only figure out how to specify it from the script that performs the build.
Build script
The shiny new CMakeLists.txt file isn’t going to do much without a script to invoke CMake to build it. Let’s create a new build script for our Emscripten target. Create a new text file named build.sh in the root/project/emscripten folder, make it executable (chmod +x build.sh) and enter the following text:
#!/bin/bash

# Include the shared scripts and utility methods that are common to all platforms.
. ../shared-scripts.sh

# Make sure we have a 'build' folder.
if [ ! -d "build" ]; then
    mkdir build
fi

# Remove the 'out' folder if it exists.
if [ -d "out" ]; then
    rm -rf out
fi

# In order to find the Emscripten build tools, we need to configure some environment variables so they are available during the build. The required environment variables are initialized by sourcing the 'emsdk_env.sh' that ships with the Emscripten SDK.
pushd ../../third-party/emscripten
    echo "Configuring Emscripten environment variables"
    . ./emsdk_env.sh
popd

# Hop into the 'build' folder to start our CMake build.
pushd build

    # Because we sourced the Emscripten environment variables, we can use the 'EMSCRIPTEN' var to know where the current SDK can be found, which we need so we can locate the 'Emscripten.cmake' toolchain file.
    EMSCRIPTEN_CMAKE_PATH=${EMSCRIPTEN}/cmake/Modules/Platform/Emscripten.cmake

    # We ask CMake to configure itself against the parent folder, but unlike our other platform targets, we will tell CMake to use the Emscripten CMake toolchain which knows how to perform Emscripten builds.
    echo "Emscripten CMake path: ${EMSCRIPTEN_CMAKE_PATH}"
    cmake -DCMAKE_TOOLCHAIN_FILE=${EMSCRIPTEN_CMAKE_PATH} ..

    # Start the actual build.
    echo "Building project ..."
    make
popd
Points of interest:
- Our script will make sure we have a
build folder and if there is an existing out folder, it will be deleted to ensure clean build output.
- Before performing any Emscripten command line builds, we need to know where all the Emscripten tools are located. The Emscripten SDK comes with a script named
emsdk_env.sh which injects Emscripten environment variables into the current Terminal session. You can see that our build script loads the emsdk_env.sh before initiating a build, ensuring that the environment is correctly configured.
- The Emscripten SDK has a file named
Emscripten.cmake, which we need to supply to the cmake command as the CMAKE_TOOLCHAIN_FILE property. This file configures the build to use the Emscripten compiler and tools, instead of the default tools that CMake would otherwise use.
Close the build.sh file and run it from the command line, you will see output similar to this:
$ ./build.sh
Configuring Emscripten environment variables
Adding directories to PATH:
PATH += <snip>/root/third-party/emscripten
PATH += <snip>/root/third-party/emscripten/clang/e1.38.28_64bit
PATH += <snip>/root/third-party/emscripten/node/8.9.1_64bit/bin
PATH += <snip>/root/third-party/emscripten/emscripten/1.38.28

Setting environment variables:
EMSDK = <snip>/root/third-party/emscripten
EM_CONFIG = <snip>/.emscripten
BINARYEN_ROOT = <snip>/root/third-party/emscripten/clang/e1.38.28_64bit/binaryen
EMSCRIPTEN = <snip>/root/third-party/emscripten/emscripten/1.38.28

Emscripten CMake path: <snip>/root/third-party/emscripten/emscripten/1.38.28/cmake/Modules/Platform/Emscripten.cmake
-- Configuring done
-- Generating done
-- Build files have been written to: <snip>/root/project/emscripten/build
Building project ...
Scanning dependencies of target a-simple-triangle
<snip>/root/project/main/src/core/platform.cpp:15:1: warning:
      control reaches end of non-void function [-Wreturn-type]
}
^
<snip>/root/part-06-setup-emscripten/main/src/main.cpp:9:5: error:
      use of undeclared identifier 'glClearColor'
    glClearColor(0.3f, 0.7f, 0.0f, 1.0f);
    ^
Fixing the compilation errors
If you recall the compiler warnings and errors from the Android setup article you might see a familiar theme here. Let’s refresh the reasons for the warnings and errors.
Non void function control warning
<snip>/root/project/main/src/core/platform.cpp:15:1: warning:
      control reaches end of non-void function [-Wreturn-type]
}
^
This warning is happening because our C++ code which figures out what platform we are on does not yet accommodate the Emscripten target. Here is the existing code:
#pragma once

namespace ast
{
    enum class Platform
    {
        mac,
        ios,
        android
    };

    Platform getCurrentPlatform();
} // namespace ast
and
#include "platform.hpp"

ast::Platform ast::getCurrentPlatform()
{
#if defined(__APPLE__)
#include "TargetConditionals.h"
#if TARGET_OS_IPHONE
    return ast::Platform::ios;
#else
    return ast::Platform::mac;
#endif
#elif __ANDROID__
    return ast::Platform::android;
#endif
}
Note that there is no enumeration for ast::Platform::emscripten and no conditional logic to accommodate it. Let’s correct it now, edit the main/src/core/platform.hpp file to look like:
#pragma once

namespace ast
{
    enum class Platform
    {
        mac,
        ios,
        android,
        emscripten
    };

    Platform getCurrentPlatform();
} // namespace ast
Note the addition of the emscripten enum.
Edit the main/src/core/platform.cpp file to look like:
#include "platform.hpp"

ast::Platform ast::getCurrentPlatform()
{
#if defined(__EMSCRIPTEN__)
    return ast::Platform::emscripten;
#elif __APPLE__
#include "TargetConditionals.h"
#if TARGET_OS_IPHONE
    return ast::Platform::ios;
#else
    return ast::Platform::mac;
#endif
#elif __ANDROID__
    return ast::Platform::android;
#endif
}
Note the addition of the __EMSCRIPTEN__ conditional check. I’ve placed the Emscription conditional check first, so it is evaluated at the earliest point in time. You can see that if we are building for Emscripten, we return the emscripten enum now. This should resolve the warning about not returning a value from a non-void function.
Next we need to deal with these kind of errors:
<snip>/root/part-06-setup-emscripten/main/src/main.cpp:9:5: error:
      use of undeclared identifier 'glClearColor'
    glClearColor(0.3f, 0.7f, 0.0f, 1.0f);
    ^
Just like for the Android project, the reason for these errors is that we don’t accommodate the Emscripten platform in the preprocessor conditional code in the graphics-wrapper.hpp file.
Change the main/src/core/graphics-wrapper.hpp from this:
#pragma once

#if defined(__APPLE__)
#define GL_SILENCE_DEPRECATION
#include "TargetConditionals.h"
#if TARGET_OS_IPHONE
#include <OpenGLES/ES2/gl.h>
#else
#include <OpenGL/gl3.h>
#endif
#elif __ANDROID__
#include <GLES2/gl2.h>
#endif
to this:
#pragma once

#if defined(__EMSCRIPTEN__)
#include <GLES2/gl2.h>
#elif __APPLE__
#define GL_SILENCE_DEPRECATION
#include "TargetConditionals.h"
#if TARGET_OS_IPHONE
#include <OpenGLES/ES2/gl.h>
#else
#include <OpenGL/gl3.h>
#endif
#elif __ANDROID__
#include <GLES2/gl2.h>
#endif
Note the addition of the __EMSCRIPTEN__ conditional check. I’m also checking for Emscripten first. The include is actually the same as for Android but we’ll keep them written separately for clarity. This should now resolve all of our OpenGL errors.
Run the build.sh script again, and our Emscripten application should successfully compile.
Note: The first time you compile your application, Emscripten will likely need to build and cache some of its own internal dependencies. Subsequent builds don’t do this and will be much faster, so just be patient the first time through.
I’ve trimmed the output to make it more compact, but it should look roughly like this:
$ ./build.sh
Configuring Emscripten environment variables
Building project ...
Scanning dependencies of target a-simple-triangle
[ 25%] Building CXX object <snip>/main/src/core/platform.cpp.o
[ 50%] Building CXX object <snip>/main/src/core/sdl-wrapper.cpp.o
[ 75%] Building CXX object <snip>/main/src/main.cpp.o
[100%] Linking CXX executable ../out/a-simple-triangle.js
emscripten:INFO: generating port: sdl2.bc...
emscripten:INFO: generating system library: libc++_noexcept.a...
emscripten:INFO: generating system library: libc++abi.bc...
emscripten:INFO: generating system library: libc.bc...
emscripten:INFO: generating system library: libcompiler_rt.a...
emscripten:INFO: generating system library: libc-wasm.bc...
emscripten:INFO: generating system library: libdlmalloc.bc...
emscripten:INFO: generating system library: libgl-webgl2.bc...
emscripten:INFO: generating system library: libpthreads_stub.bc...
emscripten:INFO: generating system library: libc-extras.bc...
emscripten:INFO: generating system asset: generated_struct_info.json...
[100%] Built target a-simple-triangle
If you re-run the build script again, you will see that all the generating system library commands do not execute again:
$ ./build.sh
Configuring Emscripten environment variables
Building project ...
Scanning dependencies of target a-simple-triangle
[ 25%] Building CXX object <snip>/main/src/main.cpp.o
[ 50%] Linking CXX executable ../out/a-simple-triangle.js
[100%] Built target a-simple-triangle
Where is the output?
The build message Linking CXX executable ../out/a-simple-triangle.js should give us a clue as to what is actually generated during an Emscripten build.
If you observe the root/project/emscripten folder you will see that it has a new folder named out which contains the generated result of our build. It will look something like:
root
  + project
    + emscripten
      + out
        a-simple-triangle.js
        a-simple-triangle.wasm
The a-simple-triangle.js is just a generated Javascript file that is intended to be embedded in a HTML document, which bootstraps our application.
The a-simple-triangle.wasm is an interesting file - it represents our compiled C++ code but in the Web Assembly format. This file is the secret sauce that will be run by the browser to execute our Emscripten application.
How do we actually run this code?
A Javascript based application needs to be bootstrapped and hosted within a Javascript virtual machine in order to execute, which most web browsers offer - though it is totally possible to run Javascript without a web browser as long as you have a compatible virtual machine to run it in. Our Emscripten platform target is actually a Javascript application, so to run it in a browser we need to create a HTML document to load and start it.
Note: If you would like to see how it is possible to run Javascript in a headless Javascript virtual machine, see my Mockifer framework which uses the awesome Duktape library.
The Emscripten SDK has compilation arguments that will actually generate a HTML document for us during a build, but we are going to make our own template document so it can be customized the way we want it.
Create a new text file named template.html in the emscripten folder:
root
  + project
    + emscripten
      template.html
Edit the template.html in Visual Studio Code (or whatever) and enter the following:
<html>
    <head>
        <meta charset="utf-8">
        <meta http-equiv="Content-Type" content="text/html; charset=utf-8">
        <style>
            canvas.emscripten {
                display:block;
                border: 0px none;
                background-color: #333333;
            }

            textarea.emscripten {
                resize: none;
                width: 600px;
                height: 200px;
                display:block;
                border: 0px none;
                padding: 8px;
                background-color: #222222;
                color: #ffffff;
                margin: 0px;
            }

            .content {
                border: 1px solid #333333;
                display: inline-block;
            }
        </style>
    </head>

    <body>
        <div class="content">
            <canvas class="emscripten" id="canvas" width="600", height="360" oncontextmenu="event.preventDefault()" tabindex=-1></canvas>
            <textarea class="emscripten" id="output" rows="8"></textarea>
        </div>

        <script type='text/javascript'>
            var Module = {
                preRun: [],
                postRun: [],
                print: (function () {
                    var element = document.getElementById('output');
                    if (element) element.value = '';
                    return function (text) {
                        if (arguments.length > 1) {
                            text = Array.prototype.slice.call(arguments).join(' ');
                        }

                        console.log(text);

                        if (element) {
                            element.value += text + "\n";
                            element.scrollTop = element.scrollHeight;
                        }
                    };
                })(),
                printErr: function (text) {
                    if (arguments.length > 1) {
                        text = Array.prototype.slice.call(arguments).join(' ');
                    }

                    console.error(text);
                },
                canvas: (function () {
                    return document.getElementById('canvas');
                })()
            };
        </script>
        <script async type="text/javascript" src="a-simple-triangle.js"></script>
    </body>
</html>
A reasonable amount of the HTML was derived from the auto generated file that Emscripten produces. There are few important bits worth calling out:
<canvas class="emscripten" id="canvas" width="600", height="360" oncontextmenu="event.preventDefault()" tabindex=-1></canvas>
This block registers a HTML canvas object with a fixed size of 600 x 360. Of course you can make it as large as you like. The a-simple-triangle.js file will ask for this canvas via the following function:
canvas: (function () {
    return document.getElementById('canvas');
})()
Important: If you move the width and height properties for the canvas element into a CSS style, then querying the canvas for its width and height will return the wrong values. A word of advice is to leave the width and height as properties only. If you know some kind of CSS/Javascript trick to avoid this then feel free to ignore my advice but this problem stumped me for far too long when I hit it so you have been warned!
This block declares a text area where all our cout logging statements will appear:
<textarea class="emscripten" id="output" rows="8"></textarea>
The rest of the document is just styling and wiring in some of the other Javascript - Emscripten functions.
Automating the HTML template into the build
In order to use our new HTML template to load our Emscripten application, we will add a post build shell script along with a post build step in our CMakeLists.txt file to copy the HTML template file into our out folder whenever a build happens.
Create a new text file named cmake-post-build.sh in the emscripten folder and mark it as executable (chmod +x cmake-post-build.sh). Enter the following text into it:
#!/bin/bash

# Copy our 'template.html' into the output folder as 'index.html'.
cp template.html out/index.html

# Navigate into the output folder then start a simple server and open it.
pushd out
    python -m SimpleHTTPServer 8000 & open http://localhost:8000
popd
Next we need to update our CMakeLists.txt file to add in the post build step. Add the following to the end of the CMakeLists.txt file in the emscripten folder:
# When the build is complete we will run the 'cmake-post-build.sh' script.
add_custom_command(
    TARGET a-simple-triangle
    POST_BUILD
    WORKING_DIRECTORY ${PROJECT_SOURCE_DIR}
    COMMAND ./cmake-post-build.sh
)
We did the same thing in our first platform target (console) to run a shell script after the CMake build completes. In this case, CMake will run our cmake-post-build.sh script after it has compiled our code, which will in turn copy our HTML template file into the output folder, then open it in a browser via a simple Python web server that we start up in the out folder. To stop the server just CTRL+C in the Terminal session that is running it.
Note: If you don’t have Python you can install it with brew install python.
Save your changes, and re-run the build script again. The code should compile and open in a browser window.
Important: The reason we are using a simple Python web server is related to the note about XHR request restrictions while viewing content locally at: https://emscripten.org/docs/getting_started/Tutorial.html. Depending on your browser, you may not need to host the output files in a local web server to view them, however we will do this. Also, some of the screenshots I took for this article was of the Emscripten application running in Firefox without a web server but via the Python web server the web address in the browser will be http://localhost:8000.
The out folder will look something like this:
root
  + project
    + emscripten
      + out
        a-simple-triangle.js
        a-simple-triangle.wasm
        index.html
Although the browser will open and run our application, you will see a blank view and will probably be warned that the page is slowing down your computer:

Fixing the Emscripten main loop
The reason that our application doesn’t look correct and is running slowly in the browser is related to the way an Emscripten application must define its main loop - that is, the block of code that runs repeatedly until the application quits.
Currently, our main loop is driven by this code in the main.cpp file:
void runApplication()
{
    ...

    while (runMainLoop(window, context))
    {
        // Just waiting for the main loop to end.
    }
}
So basically, we are just in an endless while loop until the runMainLoop function returns a value of false. When this code executes within a browser, it effectively never relinquishes control to the browser during the loop causing our browser window to freeze while it waits for our program to complete.
The main looping requirement of an Emscripten application is best explained in this page https://emscripten.org/docs/porting/emscripten-runtime-environment.html, specifically in the Browser main loop section.
Not to worry though, with a few C++ code adjustments we can respect these requirements and have our Emscripten application running cooperatively within the browser.
Edit the main.cpp file and add the following at the top:
#ifdef __EMSCRIPTEN__
#include <emscripten.h>
#endif
To use Emscripten SDK code we need to include the <emscripten.h> header, but we only want to do this if Emscripten is the platform we are building.
We will need to create a new function that meets the requirements of the emscripten_set_main_loop signature, of which we will be using the one shaped like void (*)(). This means that our existing runMainLoop function cannot be used, because it returns a bool and takes in argument parameters, and therefore has a different signature to what Emscripten will accept.
Create a new function below the runMainLoop function like so:
#ifdef EMSCRIPTEN
void runEmscriptenMainLoop()
{
    runMainLoop();
}
#endif
Next we will need to update the runApplication function to start the main loop either using an Emscripten approach, or our existing approach:
void runApplication()
{
    ...

#ifdef __EMSCRIPTEN__
    emscripten_set_main_loop(runEmscriptenMainLoop, 60, 1);
#else
    while (runMainLoop())
    {
        // Just waiting for the main loop to end.
    }
#endif

    ...
}
A subtle difference is that we won’t be passing the arguments SDL_Window* window, const SDL_GLContext& context any more because the Emscripten main loop won’t be in the same scope as our runApplication function. There is actually a way to pass a strongly typed object into the Emscripten main loop method that we will use when we revisit this code in a future article, but for now we will simply declare the SDL_Window* window and SDL_GLContext context as member fields of main.cpp. While this approach is sufficient for now, it has a bit of a code smell about it so in a future article we will refactor the main.cpp class into something a bit more formal.
After the #include statements, create two fields:
SDL_Window* window;
SDL_GLContext context;
Remove the arguments from the render function:
void render(SDL_Window* window, const SDL_GLContext& context)
becomes
Note: you will also need to remove the arguments when calling the render function in the runMainLoop function.
Remove the arguments from the runMainLoop function:
bool runMainLoop(SDL_Window* window, const SDL_GLContext& context)
becomes
In the runApplication function change:
// Create a new SDL window based on OpenGL.
SDL_Window* window{ast::sdl::createWindow(SDL_WINDOW_RESIZABLE | SDL_WINDOW_OPENGL | SDL_WINDOW_ALLOW_HIGHDPI)};

// Obtain an OpenGL context based on our window.
SDL_GLContext context{SDL_GL_CreateContext(window)};
becomes
// Create a new SDL window based on OpenGL.
window = ast::sdl::createWindow(SDL_WINDOW_RESIZABLE | SDL_WINDOW_OPENGL | SDL_WINDOW_ALLOW_HIGHDPI);

// Obtain an OpenGL context based on our window.
context = SDL_GL_CreateContext(window);
After making all those changes, re-run the build script again and your browser should show the familiar green view:

Fixing the display size
Fantastic - our C++ code is actively running in the browser and OpenGL is working. That’s pretty awesome I think. There is a problem though - notice the output that claims:
Display size is: 640 x 480
But we know that in our HTML template, we set the canvas size to be 600 x 360 because of this tag:
<canvas class="emscripten" id="canvas" width="600", height="360" oncontextmenu="event.preventDefault()" tabindex=-1></canvas>
So, why on earth are we seeing 640 x 480 ?? Remember that in our sdl-wrapper.cpp, in the ast::sdl::getDisplaySize function, we decide whether to use a fixed size window, or fetch the dimensions of the display we are running on. At the moment, if the platform is not ios or android, we are using a fixed size of … you guessed it: 640 x 480.
We will update the ast::sdl::getDisplaySize function so if we are running an Emscripten application we will query the actual HTML canvas object to find out how big it is. Edit the sdl-wrapper.cpp file and at the very top, enter our conditional include for Emscripten:
#ifdef __EMSCRIPTEN__
#include <emscripten.h>
#endif
Now, replace the getDisplaySize function with:
std::pair<uint32_t, uint32_t> ast::sdl::getDisplaySize()
{
    uint32_t displayWidth{0};
    uint32_t displayHeight{0};

#ifdef __EMSCRIPTEN__
    // For Emscripten targets we will invoke some Javascript
    // to find out the dimensions of the canvas in the HTML
    // document. Note that the 'width' and 'height' attributes
    // need to be set on the <canvas /> HTML element, like so:
    // <canvas id="canvas" width="600", height="360"></canvas>
    displayWidth = static_cast<uint32_t>(EM_ASM_INT({
        return document.getElementById('canvas').width;
    }));

    displayHeight = static_cast<uint32_t>(EM_ASM_INT({
        return document.getElementById('canvas').height;
    }));
#else
    switch (ast::getCurrentPlatform())
    {
        case ast::Platform::ios:
        case ast::Platform::android:
        {
            // For mobile platforms we will fetch the full screen size.
            SDL_DisplayMode displayMode;
            SDL_GetDesktopDisplayMode(0, &displayMode);
            displayWidth = static_cast<uint32_t>(displayMode.w);
            displayHeight = static_cast<uint32_t>(displayMode.h);
            break;
        }

        default:
        {
            // For other platforms we'll just show a fixed size window.
            displayWidth = 640;
            displayHeight = 480;
            break;
        }
    }
#endif

    return std::make_pair(displayWidth, displayHeight);
}
Most of the code in that function is the same as before, except now we will conditionally fetch the width and height of the HTML canvas if the target is __EMSCRIPTEN__.
The interesting code is explained in the comments, but essentially an Emscripten application can invoke Javascript on its host browser. There are a few ways to do this, but the approach used here is to invoke the EM_ASM_INT function, which will evaluate the body of the function call as Javascript in the host browser and return an int as a result, which we then cast to uint32_t.
The lines of code that look like this are exactly what you would type as Javascript in the HTML page, and in this case would query the canvas DOM element, returning its width property:
return document.getElementById('canvas').width;
Final result
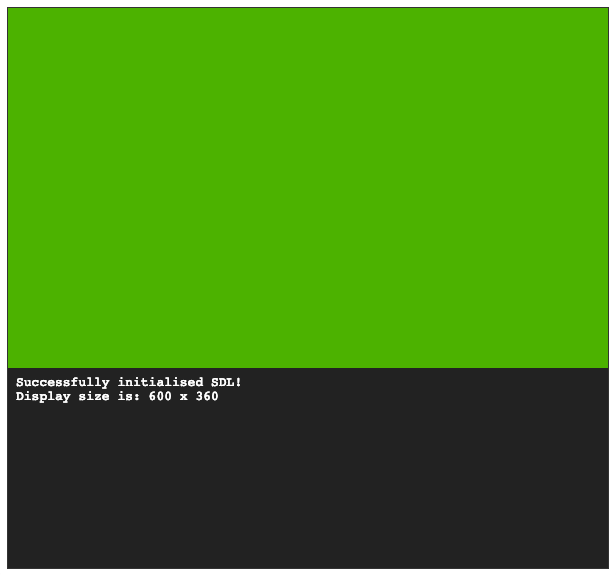
Save your C++ changes, then run the build script again to regenerate the Emscripten application and launch the browser. You should now see our beautiful green window at the correct size, like so:
Git ignore
If you were to commit A Simple Triangle into version control, you would want to create a new .gitignore file for the root/platform/emscripten folder, so it won’t include all the files that get auto generated by running the Emscripten build. Here is a sample .gitignore that would achieve this for our project:
The code for this article can be found here.
In the next article we will work through the setup for the Windows platform.
Continue to Part 7: Setup Windows.
End of part 6
