a-simple-triangle / Part 9 - Load a 3D model
Marcel Braghetto 14 April 2019
Our trusty green screen hasn’t been particularly inspiring so far but its main purpose was to allow us to focus on the basic bare bones of our engine. If we had tried to setup our cross platform engine and tried to also load a 3D model and display it, the earlier parts in this series would have been (even more!) confusing. Now that the core bones of our engine are ready, we can begin loading and rendering 3D models.
This article will be fairly long because loading a 3D model actually requires us to introduce a number of new concepts and techniques into our code base. Specifically we will cover the following in this article:
- Implement data structures that can describe basic 3D geometry using the OpenGL Mathematics (GLM) library to help us.
- Introduce file
assets into each platform and link them into the build pipeline for each platform.
- Implement code for loading a basic 3D model from an
obj formatted file, parsing it into the appropriate data structures which can then be used as a rendering source.
Note: The GLM library is not just for OpenGL, it can be used for any 3D math though it was originally designed to work well with the kinds of data structures typically needed to write OpenGL applications. In later articles you will see that it works just as well for our Vulkan implementation as well.
Because this article will be quite large it will only cover as far as loading file assets and parsing .obj files into memory. The follow up article will cover how to render the loaded 3D model from memory.
Adding GLM and Tiny OBJ Loader libraries
While we could write a suite of data structures ourselves to model and manipulate our 3D geometry (that in itself would be a very educational undertaking), we will instead use the OpenGL Mathematics (GLM) library to help us. This is a very popular library and gives us a lot of the mathematical functionality that we’ll need to work with spatial data. As always, we will automate the fetching of the GLM library into our third-party folder so our various platforms can share them.
GLM has a fair amount of documentation, explore these links to read up about it: https://glm.g-truc.net/0.9.9/index.html, https://github.com/g-truc/glm/blob/master/manual.md.
In regards to loading a 3D model file from storage and parsing it into something useful, we will be using the .obj 3D model file format along with the tinyobjloader library to help us load them. The .obj file format is actually a fairly simple text based format but I’d rather not spend a lot of time writing a parser for it, hence the use of tinyobjloader. I suspect a compact binary 3D file format might be better for more serious projects but I’ll leave that as an exercise for the enthused.
All platforms will need both of these libraries, so we will begin by opening up your shared-scripts.sh and adding the following scripts:
Note: We will add the equivalent setup scripts to Windows a bit further down.
# If required, download the GLM library into the third-party folder.
fetch_third_party_lib_glm() {
    verify_third_party_folder_exists

    pushd ../../third-party
        if [ ! -d "glm" ]; then
            echo "Fetching GLM from: https://github.com/g-truc/glm/releases/download/0.9.9.3/glm-0.9.9.3.zip"
            wget https://github.com/g-truc/glm/releases/download/0.9.9.3/glm-0.9.9.3.zip
            unzip -q glm-0.9.9.3.zip
            rm glm-0.9.9.3.zip
        fi
    popd
}

# If required, download the tinyobjloader into the third-party folder.
fetch_third_party_lib_tiny_obj_loader() {
    verify_third_party_folder_exists

    pushd ../../third-party
        if [ ! -d "tiny-obj-loader" ]; then
            echo "Fetching Tiny OBJ Loader from: https://github.com/syoyo/tinyobjloader/archive/v1.4.1.zip"
            wget https://github.com/syoyo/tinyobjloader/archive/v1.4.1.zip
            unzip -q v1.4.1.zip
            rm v1.4.1.zip
            mv tinyobjloader-1.4.1 tiny-obj-loader
        fi
    popd
}
The main operations these scripts perform are:
- The usual checking for the
third-party folder plus checking for existing glm and/or tiny-obj-loader folders.
- If there is no
glm folder, download the specific 0.9.9.3 version of the GLM library as a zip file then simply unzip it and clean up after.
- If there is no
tiny-obj-loader folder, download the specific 1.4.1 version of the tinyobjloader library as a zip file then unzip and rename the unzipped folder, and clean up after.
Save the shared-scripts.sh file and edit the setup.sh file for each of your platforms, adding the following lines near the existing fetch... commands:
fetch_third_party_lib_glm
fetch_third_party_lib_tiny_obj_loader
We will continue to use the console platform as our main development platform, so run the console/setup.sh script now and you should see something like the following (I’ve snipped unrelated output):
$ ./setup.sh
Fetching Brew dependency: 'wget'.
Fetching Brew dependency: 'cmake'.
Fetching Brew dependency: 'ninja'.

Fetching GLM from: https://github.com/g-truc/glm/releases/download/0.9.9.3/glm-0.9.9.3.zip
Saving to: ‘glm-0.9.9.3.zip’
glm-0.9.9.3.zip     100%[===================>]   5.68M  2.77MB/s    in 2.1s

Fetching Tiny OBJ Loader from: https://github.com/syoyo/tinyobjloader/archive/v1.4.1.zip
Saving to: ‘v1.4.1.zip’
v1.4.1.zip              [     <=>            ]   1006K   770KB/s    in 1.3s
Check your third-party folder and you should now have both glm and tiny-obj-loader folders.
Setup for Windows Desktop
For the Windows platform, open the windows/setup.ps1 file and add the following scripts to the end - note the GLM zip unzips into a glm folder by default so we don’t need to rename it:
# Check that we have the GLM third party library
if (!(Test-Path "..\..\third-party\glm")) {
    Write-Host "Downloading GLM into third party folder glm ..."
    $WebClient = New-Object System.Net.WebClient
    $WebClient.DownloadFile("https://github.com/g-truc/glm/releases/download/0.9.9.3/glm-0.9.9.3.zip", "..\..\third-party\glm-0.9.9.3.zip")

    Push-Location -Path "..\..\third-party"
        Write-Host "Unzipping GLM into third-party\glm ..."
        cmd.exe /c 'tar -xf glm-0.9.9.3.zip'
        Remove-Item -Path glm-0.9.9.3.zip
    Pop-Location
}

# Check that we have the Tiny OBJ Loader third party library
if (!(Test-Path "..\..\third-party\tiny-obj-loader")) {
    Write-Host "Downloading Tiny OBJ Loader into third party folder tiny-obj-loader ..."
    $WebClient = New-Object System.Net.WebClient
    $WebClient.DownloadFile("https://github.com/syoyo/tinyobjloader/archive/v1.4.1.zip", "..\..\third-party\tiny-obj-loader-v1.4.1.zip")

    Push-Location -Path "..\..\third-party"
        Write-Host "Unzipping Tiny OBJ Loader into third-party\tiny-obj-loader ..."
        cmd.exe /c 'tar -xf tiny-obj-loader-v1.4.1.zip'
        Move-Item -Path tinyobjloader-1.4.1 -Destination tiny-obj-loader
        Remove-Item -Path tiny-obj-loader-v1.4.1.zip
    Pop-Location
}
Save and run your setup.ps1 file via PowerShell and you should see the two libraries downloaded and unpacked into the third-party folder.
Setup for Windows Android
We need to also update our Android setup script, add the following to the bottom of the android\setup.ps1 script. Note it is using the same kind of techniques as for downloading or symlinking other dependencies:
# Check that we have the GLM third party library
if (!(Test-Path "..\..\third-party\glm")) {
    Write-Host "Downloading GLM into third party folder ..."
    $WebClient = New-Object System.Net.WebClient
    $WebClient.DownloadFile("https://github.com/g-truc/glm/releases/download/0.9.9.3/glm-0.9.9.3.zip", "..\..\third-party\glm-0.9.9.3.zip")

    Push-Location -Path "..\..\third-party"
        Write-Host "Unzipping GLM into third party folder ..."
        cmd.exe /c 'tar -xf glm-0.9.9.3.zip'
        Remove-Item -Path glm-0.9.9.3.zip
    Pop-Location
}

# Check that we have the Tiny OBJ Loader third party library
if (!(Test-Path "..\..\third-party\tiny-obj-loader")) {
    Write-Host "Downloading Tiny OBJ Loader into third party folder ..."
    $WebClient = New-Object System.Net.WebClient
    $WebClient.DownloadFile("https://github.com/syoyo/tinyobjloader/archive/v1.4.1.zip", "..\..\third-party\tiny-obj-loader-v1.4.1.zip")

    Push-Location -Path "..\..\third-party"
        Write-Host "Unzipping Tiny OBJ Loader into third party folder ..."
        cmd.exe /c 'tar -xf tiny-obj-loader-v1.4.1.zip'
        Move-Item -Path tinyobjloader-1.4.1 -Destination tiny-obj-loader
        Remove-Item -Path tiny-obj-loader-v1.4.1.zip
    Pop-Location
}

Write-Host "All done - import the project in this folder into Android Studio to run it!"
Now we have these new libraries in our third-party folder, we need to wire them into our code base. We will do this by adding third-party/glm and third-party/tiny-obj-loader folders to our includes, so our code base can see all the header files offered by them. Do the following for each platform to include the new headers:
Android, Console, Emscripten
Open the CMakeLists.txt file for each of these platforms (Android’s is under its app folder) and enter another include_directories entry for glm and another for tinyobjloader, so your include_directories section looks like this:
include_directories(${THIRD_PARTY_DIR}/SDL/include)
include_directories(${THIRD_PARTY_DIR}/glm)
include_directories(${THIRD_PARTY_DIR}/tiny-obj-loader)
Reminder: Don’t forget to sync CMake after changing the CMakeLists.txt files to pick up the changes.
Windows
Open the CMakeLists.txt file in the windows folder and add the include directories for glm and tinyobjloader. The include_directories section should look like this after:
include_directories(${THIRD_PARTY_DIR}/sdl-windows/include)
include_directories(${THIRD_PARTY_DIR}/glew/include)
include_directories(${THIRD_PARTY_DIR}/glm)
include_directories(${THIRD_PARTY_DIR}/tiny-obj-loader)
iOS and MacOS
Open the project.yml file for each of these platforms and update the existing settings section from this:
settings:
    HEADER_SEARCH_PATHS: $(PROJECT_DIR)/../../third-party/SDL/include
to this:
settings:
    HEADER_SEARCH_PATHS:
        - $(PROJECT_DIR)/../../third-party/SDL/include
        - $(PROJECT_DIR)/../../third-party/glm
        - $(PROJECT_DIR)/../../third-party/tiny-obj-loader
Reminder: Don’t forget to re-run setup.sh after editing the project.yml file so your Xcode project files are regenerated.
Creating a new GLM wrapper
The GLM library offers a toolbox of different classes and utilities and allows us to cherry pick exactly the ones that we want to use. We will take advantage of GLM to help us model the following things:
- A
vertex which represents a point in space, either 2D (x, y) represented by glm::vec2 or 3D (x, y, z) represented by glm::vec3.
- A
matrix which for us can represent various spatial states of an object in 3D space, and allow us to perform transformations of geometric data. We will use the 4x4 matrix from GLM represented by glm::mat4.
Hop into Visual Studio Code again and create a new file main/src/core/glm-wrapper.hpp with the following content (we will add more later):
#pragma once

#define GLM_LANG_STL11_FORCED
#define GLM_ENABLE_EXPERIMENTAL
#include <glm/vec2.hpp>
#include <glm/vec3.hpp>
#include <glm/mat4x4.hpp>
#include <glm/gtx/hash.hpp>
The #define GLM_LANG_STL11_FORCED line tells GLM that we are compiling with at least C++11 support - without this our Android application would fail to compile as GLM will by default assume that there is no C++11 support.
The #define GLM_ENABLE_EXPERIMENTAL line allows GLM to activate some GLM features we will need later. You can find more information here: https://github.com/g-truc/glm/blob/master/manual.md#-74-should-i-use-gtx-extensions.
The other #include statements give us access to the glm::vec2, glm::vec3 and glm::mat4 classes and provide hashing support which we will need when we parse the 3D data from storage.
Vertices and indices
Our geometric shapes will be stored as collections of vertices, where each vertex represents a single point on a polygon. Three vertices form a triangle, which is a simple 3D element that is easy to render. A 3D object can therefore be defined as a series of vertices which when ordered correctly form a series of triangles. OpenGL (and Vulkan) can then take this type of data and pass it to the graphics hardware to render. One of the main pieces of data that a vertex must have is a position, which in 3D will represent the x, y and z coordinates. As mentioned earlier, we will use the glm::vec3 class to represent the position of a vertex.
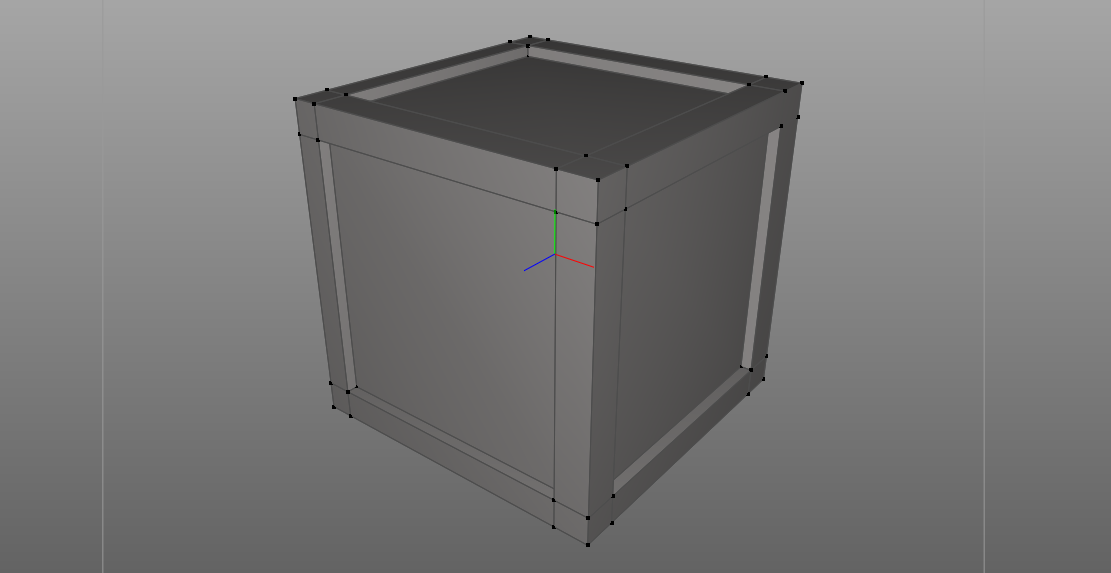
Here is a simple cube where I’ve selected one of its vertices:
Note: If you aren’t sure what vertices and polygons are it might be worth doing a little research into the topic before proceeding much further.
A few observations:
- A basic cube has
6 sides.
- Each side is a square that is therefore made of
2 triangles.
- So if a cube has
6 sides each having 2 triangles, there would be a total of 12 triangles.
Now a peculiar question: if a triangle has 3 vertices, and we have 12 triangles, shouldn’t this mean we should have 12 * 3 = 36 vertices?
Looking at the picture, I can only count 8 vertices - what’s going on ??
Well, notice that although we have 12 triangles, many of them actually share their vertices with other triangles. There is no point in specifying all 36 vertices - in fact its very wasteful. Instead, we take the 8 vertices that we know are shared, then for each triangle we describe which of the 8 vertices each of its corners uses. The list of which vertex from a pool of vertices to use for each corner of a triangle is known as the vertex indices of the triangle.
OpenGL and Vulkan can both render a 3D model using a list of indices and a pool of vertices which is the approach we will be taking.
To further explain this concept, I’ve exported the cube from above into an .obj file with my 3D modelling program.
Note: I use Cheetah 3D which I quite like on the Mac, but you might use something else such as the very popular Blender which is free, or if you are really rich one of the more industrial strength 3D modelling programs out there.
The .obj file format that we’ll be using is a simple text representation of a 3D object which makes it super easy to examine and understand how it works. Here is the contents of the cube.obj file, where I’ve trimmed everything except the vertex and face data (a face represents one of the triangles):
v -0.500000 -0.500000 0.500000
v -0.500000 0.500000 0.500000
v 0.500000 0.500000 0.500000
v 0.500000 -0.500000 0.500000
v 0.500000 -0.500000 -0.500000
v 0.500000 0.500000 -0.500000
v -0.500000 0.500000 -0.500000
v -0.500000 -0.500000 -0.500000

f 3/3/1 2/2/1 1/1/1
f 1/1/1 4/4/1 3/3/1
f 7/3/2 6/2/2 5/1/2
f 5/1/2 8/4/2 7/3/2
f 2/3/3 7/2/3 8/1/3
f 8/1/3 1/4/3 2/3/3
f 6/3/4 3/2/4 4/1/4
f 4/1/4 5/4/4 6/3/4
f 6/3/5 7/2/5 2/1/5
f 2/1/5 3/4/5 6/3/5
f 4/3/6 1/2/6 8/1/6
f 8/1/6 5/4/6 4/3/6
So, there are 8 lines that start with v. Can you guess what they represent? Yep, these are the (x, y, z) coordinates of the 8 vertices in our cube. For example, the first line represents a vertex at position (-0.5, -0.5, 0.5):
v -0.500000 -0.500000 0.500000
The next section is a series of lines starting with f for face - which we can also regard as a triangle. Can you guess how many faces are listed without counting them? Remember, our cube has 6 sides, each of which is made of 2 triangles.
Yep, there are 12 faces (you counted them didn’t you!) and the curious thing is the data on each line. Let’s look at the first face data line:
Each line is comprised of 3 groups - let’s call them groups A, B and C. Each group contains 3 numbers delimited by slashes. The first slash delimited number in each group represents the index into the pool of vertices to use as the position (x, y, z) of the vertex. The second and third slash delimited numbers are related to the texture coordinate and normal of the vertex which we won’t talk about until a future article.
       A    |    B    |    C
-----------------------------------
f    3/3/1     2/2/1     1/1/1
-----------------------------------
     | | |     | | |     | | |
     v t n     v t n     v t n

Where v = vertex, t = texture coordinate, n = normal
So, if we strip away the second and third number of each group (because they are the texture coordinate and normal indices), we are left with 3 vertex indices:
       A    |    B    |    C
-----------------------------------
f      3         2         1
-----------------------------------
       |         |         |
       v         v         v

Where v = vertex
So remembering that our vertex pool looks like this (I’ve added in the [index *] markers to make it clearer):
[index 1] v -0.500000 -0.500000 0.500000
[index 2] v -0.500000 0.500000 0.500000
[index 3] v 0.500000 0.500000 0.500000
[index 4] v 0.500000 -0.500000 0.500000
[index 5] v 0.500000 -0.500000 -0.500000
[index 6] v 0.500000 0.500000 -0.500000
[index 7] v -0.500000 0.500000 -0.500000
[index 8] v -0.500000 -0.500000 -0.500000
The three vertices that represent this face is determined like this:
A -> [index 3] in the pool of vertices -> v 0.500000 0.500000 0.500000 -> (x 0.5, y 0.5, z 0.5)B -> [index 2] in the pool of vertices -> v -0.500000 0.500000 0.500000 -> (x -0.5, y 0.5, z 0.5)C -> [index 1] in the pool of vertices -> v -0.500000 -0.500000 0.500000 -> (x -0.5, y -0.5, z 0.5)
Important: For the obj data format, indices start at 1, not 0 !
You can repeat the same evaluation for each face to discover what their vertices are.
Read more about the .obj file format here: https://en.wikipedia.org/wiki/Wavefront_.obj_file.
Why do we care?
We care because our C++ code will need to define a data structure that can hold:
- A pool of vertices, each one having an (x, y, z) position.
- A list of indices representing the references to the vertices for the triangles within the 3D object.
And so we shall spawn unto our code a new class named Mesh to fulfill this purpose. We shall also spawn a new class named Vertex to encapsulate a single vertex which initially will just hold a position but later will hold texture co-ordinates and possibly other attributes.
Vertex class
We will add our Vertex class that will initially contain just a 3D position. In a subsequent article we will add texture coordinates as well.
Create a new header file main/src/core/vertex.hpp with the following code:
#pragma once

#include "glm-wrapper.hpp"

namespace ast
{
    struct Vertex
    {
        glm::vec3 position;
    };
} // namespace ast
Notice that we are using our new glm-wrapper.hpp to give access to the glm::vec3 class. For the moment, we won’t need an implementation file for the Vertex class so don’t add a .cpp file.
Mesh class
The Mesh class is a little more heavyweight than the Vertex class as we’d like it to have an Internal implementation to hold its state and control how we’d like consumers to access its data.
Create the main/src/core/mesh.hpp and main/src/core/mesh.cpp files.
Enter the following into mesh.hpp:
#pragma once

#include "internal-ptr.hpp"
#include "vertex.hpp"
#include <vector>

namespace ast
{
    struct Mesh
    {
        Mesh(const std::vector<ast::Vertex>& vertices, const std::vector<uint32_t>& indices);

        const std::vector<ast::Vertex>& getVertices() const;

        const std::vector<uint32_t>& getIndices() const;

    private:
        struct Internal;
        ast::internal_ptr<Internal> internal;
    };
} // namespace ast
To create a new Mesh instance, a pool of vertices and a list of indices must be provided. After creation, the vertices and indices can be accessed via the const& getters.
Note also that the indices are a vector of type uint32_t. A uint32_t (32 bit unsigned integer) gives us quite a large range compared to a uint16_t (16 bit unsigned integer).
Note: If you choose to use 16 bit unsigned integers it means you will only be able to represent a maximum of 65535 indices which for a high poly model may not be enough. These articles will stick with 32 bit unsigned integers even though they take more memory storage space.
Enter the following into mesh.cpp:
#include "mesh.hpp"

using ast::Mesh;

struct Mesh::Internal
{
    const std::vector<ast::Vertex> vertices;
    const std::vector<uint32_t> indices;

    Internal(const std::vector<ast::Vertex>& vertices, const std::vector<uint32_t>& indices)
        : vertices(vertices), indices(indices) {}
};

Mesh::Mesh(const std::vector<ast::Vertex>& vertices, const std::vector<uint32_t>& indices)
    : internal(ast::make_internal_ptr<Internal>(vertices, indices)) {}

const std::vector<ast::Vertex>& Mesh::getVertices() const
{
    return internal->vertices;
}

const std::vector<uint32_t>& Mesh::getIndices() const
{
    return internal->indices;
}
Nothing particularly exciting in the implementation, probably more boilerplate than anything to be honest. Perhaps the only thing worth noting is that our ast::Vertex class doesn’t use an internal_ptr so it is copyable by default, allowing the Mesh constructor to take a copy of the vertices argument which a unique_ptr based object (such as our internal_ptr) would not be able to otherwise do without extra work.
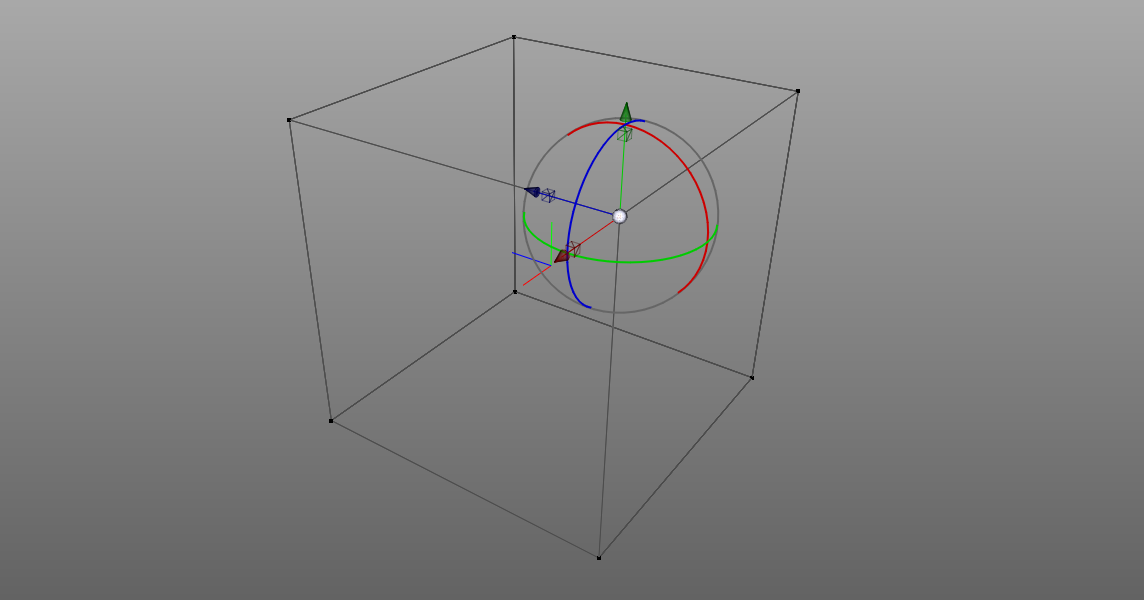
Loading mesh data from .obj files
Here is our cube from before, with a couple of after market mods to transmogrify it into a crate (yeah I just extruded the sides of a cube - it’s good enough!):
To load our crate model from an .obj file, we’ll first need a way to load asset files for our application. While file I/O for any single platform is usually straight forward, we need to do it in a cross platform way, which is less straight forward. We will lean on some built in SDL functionality to help us do this and author a new assets system.
Before jumping into the code to load assets, we should actually put some asset files into our solution - starting with a crate.obj file.
I’ll assume you are using my awesome crate model which you can download (crate.obj) from here. Save it somewhere handy for the next step.
Our assets will be shared amongst our target platforms, in the same way that our C++ code is. We’ll keep our assets under a main/assets folder. We will be linking the assets folder into each of the platforms so it is included during a build. So create the following folder structure and copy your crate.obj file into it:
: root
  + project-folder
    + main
      + assets
        + models
          - crate.obj
We will need to include these new assets folders when a build occurs to ensure they are bundled up with the output. Each platform needs some additional platform specific configuration to bundle these assets to achieve this. We will start by only adding the assets to the console platform, then toward the end of this article I’ll show how to add them to the remaining platforms too.
If you recall the initial setup of our console platform, we specified the build output folder via our CMakeLists.txt file like this:
set(CMAKE_RUNTIME_OUTPUT_DIRECTORY ${CMAKE_CURRENT_SOURCE_DIR}/out)
So every time we perform a build, the out folder contains the resulting executable file. This therefore means that when our code tries to load a file with a path starting with assets it will assume there is a folder named assets in the out folder. This of course is not currently true, the assets are unhelpfully sitting in the root/project-folder/main/assets location instead.
There are a couple of ways to put the assets into the out folder:
- Brute force: on each build, copy the
main/assets folder into the out/assets folder.
- Symlink: on each build, check whether we have a symlink to the
main/assets folder named assets in the out folder and if not, create one.
We will take the symlink approach as it avoids having to copy files around and always means the build is 100% in sync with the main/assets folder.
An ideal place to do this is in the cmake-post-build.sh script, which if you recall will be run each time a build completes. At the moment the post build script looks like this:
#!/bin/bash

echo "Adding Frameworks @rpath to binary ..."
install_name_tool -add_rpath @loader_path/../Frameworks out/a-simple-triangle-console
We just need to add an additional script which will:
- Check if there is already an
assets folder in the out folder.
- If there is no
assets folder, create a new symlink named assets, which points to the real assets folder under our main source folder.
Update your cmake-post-build.sh script to look like this:
#!/bin/bash

echo "Adding Frameworks @rpath to binary ..."
install_name_tool -add_rpath @loader_path/../Frameworks out/a-simple-triangle-console

pushd out
    # See if there is an `assets` folder already.
    if [ ! -d "assets" ]; then
        # If there isn't create a new symlink named `assets`.
        echo "Linking 'assets' path to '../../main/assets'"
        ln -s ../../main/assets assets
    fi
popd
Perform a CMake Clean rebuild to ensure that a build is actually triggered - otherwise the post build step won’t run:
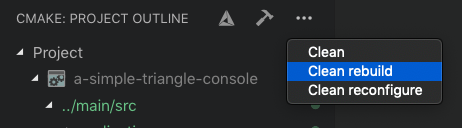
After the clean and rebuild, observe that there is now a new assets folder (which is actually a symlink) under the out folder.
The assets sytem
Now that we have our crate.obj asset file in our solution we can write the C++ code needed to load it from storage and parse its vertices into Vertex objects and subsequently group them into a Mesh object - giving us an in memory representation of our 3D model.
As mentioned earlier, we need a cross platform approach to loading files from storage which is where the SDL library can help us via the https://wiki.libsdl.org/SDL_RWops API.
Our new asset system will be a collection of free functions within the ast::assets namespace. Initially it will offer two functions named loadTextFile and loadOBJFile.
Create two new files main/src/core/assets.hpp and main/src/core/assets.cpp. Edit assets.hpp with the following:
#pragma once

#include "mesh.hpp"
#include <string>

namespace ast::assets
{
    std::string loadTextFile(const std::string& path);

    ast::Mesh loadOBJFile(const std::string& path);
} // namespace ast::assets
The header is fairly self explanatory - both new functions are called with the path of which asset file to load.
The implementation will need to do the following:
- Open and read in a text file - remember
.obj files are actually just text files. We will need to use some SDL APIs to perform the file I/O which probably look a bit uglier than some more standard ways of doing I/O in C++ - but it gives us our cross platform abstraction which is key.
- Pass the text content into the
tinyobj library which will parse it into a collection of data structures representing the parts of the 3D model for us.
- Iterate the parsed data structures, building up a set of vertices and indices along the way.
- Finally, use the vertices and indices to construct a
Mesh object and return it to the caller.
Note: We are making the loadTextFile function public as it will be needed in a later article when we will need to load shader files. Otherwise it could have been kept as a private function.
Loading a text file
We’ll start off our implementation by implementing our loadTextFile function which will be able to read in text files from storage. Remember: our crate.obj file is actually just a text file. We will use the SDL_RWops API to do this. Edit the assets.cpp file with the following:
#include "assets.hpp"
#include "sdl-wrapper.hpp"
#include <string>

std::string ast::assets::loadTextFile(const std::string& path)
{
    SDL_RWops* file{SDL_RWFromFile(path.c_str(), "r")};
    size_t fileLength{static_cast<size_t>(SDL_RWsize(file))};
    void* data{SDL_LoadFile_RW(file, nullptr, 1)};
    std::string result(static_cast<char*>(data), fileLength);
    SDL_free(data);

    return result;
}
This code needs a little explaining as the SDL APIs can seem a little cryptic and in fact if you were to write a regular C++ implementation which didn’t need to work cross platform you likely wouldn’t even use the SDL APIs.
Line by line, starting with:
SDL_RWops* file{SDL_RWFromFile(path.c_str(), "r")};
As per the SDL documentation here https://wiki.libsdl.org/SDL_RWops, the SDL_RWops class is:
“A structure that provides an abstract interface to stream I/O. Applications can generally ignore the specifics of this structure’s internals and treat them as opaque pointers.”
So for us, we create a new SDL_RWops object named file, specifying the path of the file to open, along with the "r" mode for opening (read mode, not binary).
Next we will determine the size of the file by using the SDL_RWsize method. Note that we need to cast it to a size_t so it can be used when creating the string content to return:
size_t fileLength{static_cast<size_t>(SDL_RWsize(file))};
We then ask SDL to actually load the file content using the SDL_LoadFile_RW method. This method returns a void* pointer to us which means we need to cast it to the correct data type to consume it. The trailing argument 1 tells SDL to close the file stream after it has loaded its content.
void* data{SDL_LoadFile_RW(file, nullptr, 1)};
Now that we have our data pointer to the loaded raw data in memory along with the length of the data from the fileLength, we can construct a std::string object from the loaded data. Note that we must cast the void* to char* in order for our std::string constructor to take it as a data source:
std::string result(static_cast<char*>(data), fileLength);
Before returning the result string to the caller, we must clean up the void* data pointer to release its memory and avoid a leak:
Finally, we return the result:
While this seems like a lot of work to load a text file, by doing it this way we will have the same code regardless of our target platform - letting the SDL library do most of the heavy lifting under the hood.
Loading an OBJ file
With the ability for our assets sytem to load text files, we can now read and parse .obj files. Let’s now add the implementation of our loadOBJFile function.
Update the assets.cpp header includes section to look like this:
#define TINYOBJLOADER_IMPLEMENTATION

#include "assets.hpp"
#include "sdl-wrapper.hpp"
#include "vertex.hpp"
#include <sstream>
#include <tiny_obj_loader.h>
#include <unordered_map>
#include <vector>
To use the tinyobjloader library, we need to include its header file, but also need to create the following definition to ensure that it actually compiles its own internal implementation - you can see where this is used in the tiny_obj_load.h header starting on line 405:
#define TINYOBJLOADER_IMPLEMENTATION
Important: The tinyobjloader library will not work in our application if we do not include the TINYOBJLOADER_IMPLEMENTATION definition.
The other header includes will be used to support our own data parsing. Now add the following function implementation at the bottom of assets.cpp:
ast::Mesh ast::assets::loadOBJFile(const std::string& path)
{
    std::istringstream sourceStream(ast::assets::loadTextFile(path));

    tinyobj::attrib_t attributes;
    std::vector<tinyobj::shape_t> shapes;
    std::vector<tinyobj::material_t> materials;
    std::string warning;
    std::string error;

    if (!tinyobj::LoadObj(
            &attributes,
            &shapes,
            &materials,
            &warning,
            &error,
            &sourceStream))
    {
        throw std::runtime_error("ast::assets::loadOBJFile: Error: " + warning + error);
    }

    std::vector<ast::Vertex> vertices;
    std::vector<uint32_t> indices;
    std::unordered_map<glm::vec3, uint32_t> uniqueVertices;

    for (const auto& shape : shapes)
    {
        for (const auto& index : shape.mesh.indices)
        {
            glm::vec3 position{
                attributes.vertices[3 * index.vertex_index + 0],
                attributes.vertices[3 * index.vertex_index + 1],
                attributes.vertices[3 * index.vertex_index + 2]};

            if (uniqueVertices.count(position) == 0)
            {
                uniqueVertices[position] = static_cast<uint32_t>(vertices.size());
                vertices.push_back(ast::Vertex{position});
            }

            indices.push_back(uniqueVertices[position]);
        }
    }

    return ast::Mesh{vertices, indices};
}
Let’s process this a bit at a time. First we will call our new ast::assets::loadTextFile function to fetch the actual string content of the .obj file. We then wrap it in a std::istringstream because the tinyobjloader can only parse a string stream, or a direct path to a file. Since we can’t use the direct path to a file due to cross platform requirements, we need to use the string stream approach.
std::istringstream sourceStream(ast::assets::loadTextFile(path));
The next block of code defines a number of data structures which tinyobjloader will inflate with the parsed model data, then invokes the tinyobj::LoadObj function, referencing the data structures to inflate. Notice that we pass in the &sourceStream as the final argument, which contains our loaded text content from the .obj file.
tinyobj::attrib_t attributes;
std::vector<tinyobj::shape_t> shapes;
std::vector<tinyobj::material_t> materials;
std::string warning;
std::string error;

if (!tinyobj::LoadObj(
        &attributes,
        &shapes,
        &materials,
        &warning,
        &error,
        &sourceStream))
{
    throw std::runtime_error("ast::assets::loadOBJFile: Error: " + warning + error);
}
Once the tinyobj::LoadObj function has completed, the attributes, shapes and materials data structures will contain all the elements we need to know to construct a Mesh object. The following block of code iterates each shape, then for each shape iterates its indices, computing and creating ast::Vertex objects along the way.
std::vector<ast::Vertex> vertices;
std::vector<uint32_t> indices;
std::unordered_map<glm::vec3, uint32_t> uniqueVertices;

for (const auto& shape : shapes)
{
    for (const auto& index : shape.mesh.indices)
    {
        glm::vec3 position{
            attributes.vertices[3 * index.vertex_index + 0],
            attributes.vertices[3 * index.vertex_index + 1],
            attributes.vertices[3 * index.vertex_index + 2]};

        if (uniqueVertices.count(position) == 0)
        {
            uniqueVertices[position] = static_cast<uint32_t>(vertices.size());
            vertices.push_back(ast::Vertex{position});
        }

        indices.push_back(uniqueVertices[position]);
    }
}
Let’s examine the important parts:
Note: I may refer to std::vector as a list to help disambiguate them from the term vector often used to describe an (x, y) or (x, y, z) object such as an instance of glm::vec3.
The vertices list will hold all the unique vertices of our mesh. Think of this as the vertex pool we talked about earlier. We will only store unique vertices in this list - based on their position. So, if we had two referenced vertices at the same (x, y, z) position, we will only record it once in the pool. Discovering whether a vertex is unique is explained a little further down.
std::vector<ast::Vertex> vertices;
The indices list will hold a collection of uint32_t numbers, which represent each vertex based on its index into the vertex pool. This was the topic I covered earlier in this article.
std::vector<uint32_t> indices;
The uniqueVertices is a temporary data structure which will allow us to keep track of whether we have already added a given vertex into the vertex pool. We only add a new vertex to the vertices list if it has not been added before.
std::unordered_map<glm::vec3, uint32_t> uniqueVertices;
The core loop will iterate through each shape, then through the properties of each shape.
for (const auto& shape : shapes)
{
    for (const auto& index : shape.mesh.indices)
    {
        ...
    }
}
The inner loop performs the following actions:
Create a new position
glm::vec3 position{
    attributes.vertices[3 * index.vertex_index + 0],
    attributes.vertices[3 * index.vertex_index + 1],
    attributes.vertices[3 * index.vertex_index + 2]};
Constructs a new glm::vec3 vector by extracting the x, y and z components using the current index of the inner loop to interrogate the parsed data. We know that a triangle has 3 vertices, so we can use the index and grab the data at position index.vertex_index * 3 - adding the following offsets to identify the x, y and z components:
- x offset:
+ 0
- y offset:
+ 1
- z offset:
+ 2
Check if the new position has been recorded before
if (uniqueVertices.count(position) == 0)
{
    uniqueVertices[position] = static_cast<uint32_t>(vertices.size());
    vertices.push_back(ast::Vertex{position});
}
We now take the new position and use it as a key into our hash map to identify whether we’ve ever added a vertex for this position before. If we have never added a vertex for the position (uniqueVertices.count(position) == 0 returns true), we will add a new ast::Vertex for the next position into the vertices list and record the position in our hash map with the index into the vertices pool where the new vertex can be found.
The hash map lookup works because the glm::vec3 class is able contribute a hash via the #include <glm/gtx/hash.hpp> which we put into the glm-wrapper.hpp earlier.
Add the current vertex index to the indices
At the end of the inner loop, we add a new uint32_t which represents which index into the vertices pool to reference to find the correct vertex.
indices.push_back(uniqueVertices[position]);
Return a new mesh
Finally, our method takes the vertices and indices and creates a new ast::Mesh object with them, returning it as the result from the loadOBJFile function.
Does it work??
This article is getting a bit long don’t you think? Before wrapping up, let’s add a snippet of code to test that all this new code actually works.
Open up main/src/application/opengl/opengl-application.cpp and add the following header include at the top:
#include "../../core/assets.hpp"
Now scroll to the Internal struct and add a new field named mesh, like so:
struct OpenGLApplication::Internal
{
    SDL_Window* window;
    SDL_GLContext context;
    const ast::Mesh mesh;

    Internal() : window(ast::sdl::createWindow(SDL_WINDOW_OPENGL | SDL_WINDOW_RESIZABLE | SDL_WINDOW_ALLOW_HIGHDPI)),
                 context(::createContext(window)),
                 mesh(ast::assets::loadOBJFile("assets/models/crate.obj"))
    {
        ast::log("CRATE!", "Crate has " + std::to_string(mesh.getVertices().size()) + " vertices and " + std::to_string(mesh.getIndices().size()) + " indices.");
    }
Note that we’ve added a new field named mesh:
We initialise it in the constructor using the assets system we just wrote:
mesh(ast::assets::loadOBJFile("assets/models/crate.obj"))
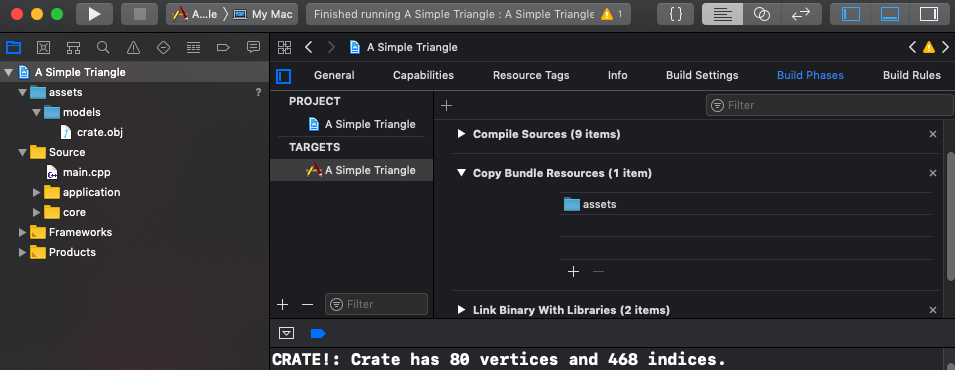
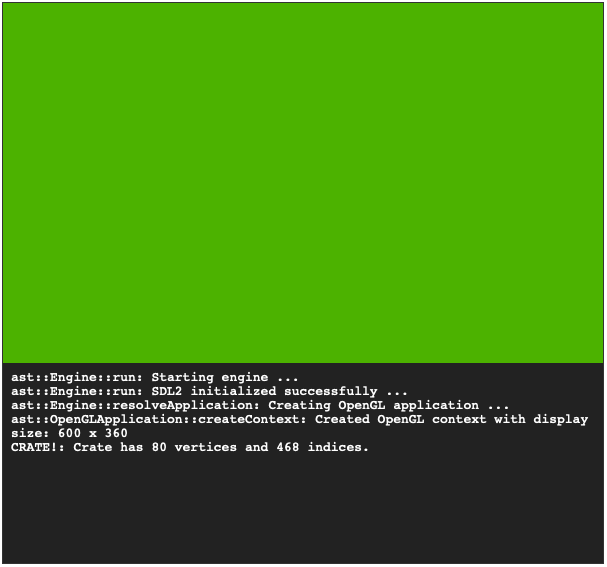
We’ve added a simple logging statement in the body of the constructor that prints out how many vertices and indices our mesh has. If you run the program now and look in the console output you will see the following:
CRATE!: Crate has 80 vertices and 468 indices.
This tells us that there are 80 unique vertices in our model and 468 indices that refer to the vertices in those 80. This indirectly also proves that our .obj file loading and parsing code is working!
If you open the crate.obj file with a text editor, you can double check that there are in fact 80 lines representing vertices (v) and 156 lines representing faces (f). So considering that each face has 3 vertex indices, 156 * 3 = 468 indices in total.
To finish this article, we will now visit each of our remaining platforms and include the asset files for them during a build.
MacOS can include folder references which can be marked as resources to be copied when compiling the product. We will use a symlink approach for MacOS similar to what we did for the C++ code, coupled with a change in the project.yml file to cause the assets folder reference to be bundled alongside the executable.
Open the setup.sh file in your macos folder and find the existing script which sets up a symlink for the main source folder. Add a new script below it but before the xcodegen generate command. The new script will look for an assets folder and if it doesn’t exist, will create a new symlink for it:
# Check to see if we have an existing symlink to our shared main assets folder.
if [ ! -d "assets" ]; then
    echo "Linking 'assets' path to '../main/assets'"
    ln -s ../main/assets assets
fi
Close the setup.sh and open the project.yml file. Find the existing section at targets/sources which would currently look like this:
Update it to look like this:
sources:
    - Source
- path: assets
type: folder
buildPhase: resources
What we are doing here is adding a new source to our main target, which will add the assets folder as a folder reference in the Xcode project, and mark it to be included in the resources build phase, meaning it will be copied into the compiled bundle.
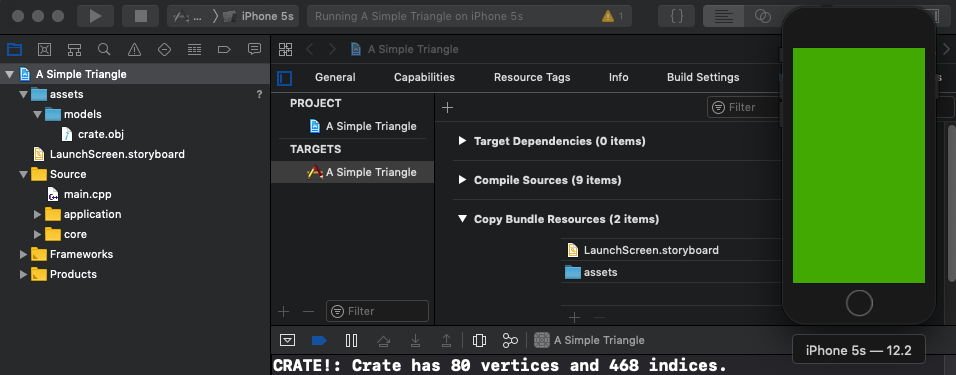
Save this file, then run the setup.sh to regenerate the Xcode project. When it is done, open up the project in Xcode and you will see the new assets folder in the project. Run the project and you should see the logging output as before:
Adding the assets to the iOS platform will be very similar to adding to the MacOS platform.
Edit the setup.sh file in the ios platform folder, adding the new script for the assets symlink after the existing script which adds the main source folder, but before the xcodegen generate command:
# Check to see if we have an existing symlink to our shared main assets folder.
if [ ! -d "assets" ]; then
    echo "Linking 'assets' path to '../main/assets'"
    ln -s ../main/assets assets
fi
Close setup.sh and edit the project.yml file, making similar changes as we did for MacOS, but keeping the iOS specific part as well:
This:
sources:
    - Source
    - LaunchScreen.storyboard
Becomes:
sources:
    - Source
    - LaunchScreen.storyboard
    - path: assets
      type: folder
      buildPhase: resources
Close the project.yml file and run the setup.sh script to regenerate the iOS Xcode project.
Open and run the iOS Xcode project to observe the same result as for the MacOS project:
The Android platform has a dedicated resource type for assets which is represented by the folder at android/app/src/main/assets. Any files that are placed into that folder will be bundled into the Android application during a build, and then can be loaded at runtime. Our current Android application doesn’t actually have a app/src/main/assets folder at all. We will use a symlink approach again here to link the main/assets folder into android/app/src/main/assets/assets (yes that assets/assets is deliberate).
For MacOS edit the setup.sh file in the android folder and at the very end add the following scripts:
# Check whether our main Android app has a root assets folder
pushd app/src/main
    if [ ! -d "assets" ]; then
      echo "Creating root 'assets' folder in app/src/main ..."
      mkdir assets
    fi
popd

# Check whether the root assets folder of our main Android app has a symlink to our shared assets
pushd app/src/main/assets
    if [ ! -d "assets" ]; then
      echo "Linking assets to ../../../../../main/assets"
      ln -s ../../../../../main/assets assets
    fi
popd
The first script simply makes sure that there is actually a android/app/src/main/assets folder which Android needs if we want to include assets in the build.
The second script then navigates into the root Android assets folder, then checks if there is a symlink folder named assets within it. If not, we make a symlink to link to our shared assets. Read these scripts a couple of times and don’t get tripped up on the seemingly double assets/assets dance we had to do.
Note: Android can actually add source sets to include other folders or files, however we’ve taken the symlink approach to be consistent with other platforms and to avoid needing the double assets/assets in our shared files to accommodate Android.
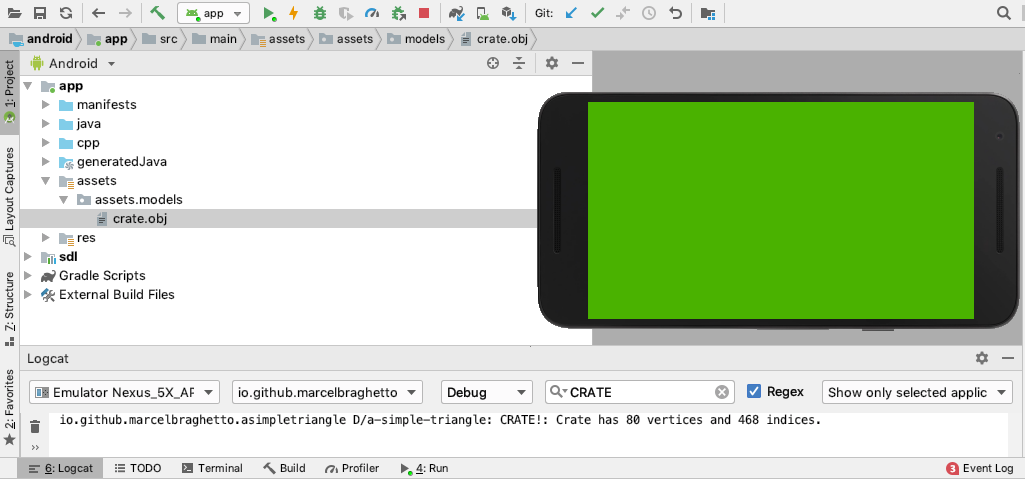
Close and run the setup.sh script and the assets will have been added to our Android application. Open Android Studio and run the app module. You can observe that the crate.obj asset is shown in the project structure and our logging output message is displayed in the Logcat area.
Tip: If your Android application compilation complains about missing files in the sdl/build/intermediates/ndkBuild path, you might need to force a rebuild to regenerate the intermediate C++ build files. To do this, go to Build -> Rebuild Project in Android Studio.
For Android on Windows add the following at the end of the android\setup.ps1 script to achieve the same outcome:
# If the main Android application doesn't yet have an assets folder, create one.
Push-Location "app\src\main"
if (!(Test-Path "assets")) {
    Write-Host "Creating Android root 'assets' folder ..."
    New-Item -Path assets -ItemType Directory
}
Pop-Location

# Create a symlink to the main assets folder so they are included in the Android application.
Push-Location "app\src\main\assets"
if (!(Test-Path "assets")) {
    Write-Host "Linking assets"
    cmd.exe /c 'mklink /d assets ..\..\..\..\..\main\assets'
}
Pop-Location
We will now add our new assets to the Emscripten platform. Due to the nature of the Emscripten tooling, this will be a bit different to our symlink approach for the other platforms.
I would highly recommend reading and digesting the methods for including asset files for Emscripten projects, in particular for our case, the use of modifying the file locations during compilation: https://emscripten.org/docs/porting/files/packaging_files.html#modifying-file-locations-in-the-virtual-file-system
To bundle up our shared assets folder we only need to add one build parameter to our Emscripten build like this:
--preload-file ../../main/assets@/assets
This will cause Emscripten to produce a new standalone file in the out folder containing the bundled asset files. The @/assets syntax causes the folder located at ../../main/assets which is relative to the emscripten/build folder during a build, to be remapped into the output virtual file system as though it were actually at the /assets path. So our C++ code without any changes will be able to correctly resolve file paths that start with assets.
To apply this build parameter, open the CMakeLists.txt file in the emscripten folder and update the set_target_properties block near line 25 to look like this:
# These properties specify what kind of Emscripten build to perform and are assigned to our 'a-simple-triangle' executable target.
set_target_properties(
    a-simple-triangle
    PROPERTIES
    LINK_FLAGS
    "-O2 -s USE_SDL=2 -s USE_WEBGL2=1 --preload-file ../../main/assets@/assets"
)
Note the additional --preload-file argument at the end.
Save and close the CMakeLists.txt file, then run the build.sh script in the Emscripten folder. After building, your browser should open and the familiar green screen will appear but additionally you will see the logging output proving that our crate.obj file was successfully loaded and parsed:
Also of interest, if you browse the emscripten/out folder now, you will notice an additional file that wasn’t there before named a-simple-triangle.data, which holds our asset files.
$ tree
.
├── a-simple-triangle.data
├── a-simple-triangle.js
├── a-simple-triangle.wasm
└── index.html
Finally we will add our assets to the Windows platform. We will apply the symlink style approach, where during the CMake post build stage we check if the out folder has an assets folder in it, and if it doesn’t we will create a symlink to the ../main/assets folder.
Note: If you were intending to actually package up the Windows application as a stand alone program you wouldn’t use a symlink but instead probably copy the assets folder entirely into the output.
When I first hit this on the Windows platform I naively assumed that creating a symlink in a PowerShell script would be as trivial as it is in Terminal. How wrong I was …
Of course PowerShell does in fact offer a very easy command to create a symlink, which looks like this:
New-Item -ItemType SymbolicLink -Name assets -Target "..\..\main\assets"
Fantastic, looks very much like our shell script equivalent, so surely we can just use that! Except that when we invoke it we get this:
New-Item -ItemType SymbolicLink -Name assets -Target "..\..\main\assets"

New-Item : Administrator privilege required for this operation.
At line:1 char:1
+ New-Item -ItemType SymbolicLink -Name assets -Target "..\..\main\asse ...
+ ~~~~~~~~~~~~~~~~~~~~~~~~~~~~~~~~~~~~~~~~~~~~~~~~~~~~~~~~~~~~~~~~~~~~~
    + CategoryInfo          : PermissionDenied: (C:\Users\\main\assets:String) [New-Item], UnauthorizedAccessException
    + FullyQualifiedErrorId : NewItemSymbolicLinkElevationRequired,Microsoft.PowerShell.Commands.NewItemCommand
For whatever reason Microsoft won’t allow this command to be run without admin privilege. Now, I’m sure a Windows guru might have some neat slight of hand configuration trick for avoiding this but I couldn’t divine such a trick myself apart from spawning a new process and requiring user input to allow the operation (which I did actually end up doing but then discarded). Instead we will execute a traditional command to create a symlink rather than a PowerShell command.
Edit the file cmake-post-build.ps1 in your windows folder, and update it to look like this:
# Don't allow our script to continue if any errors are observed
$ErrorActionPreference = "Stop"

Push-Location -Path "out"
if (!(Test-Path "SDL2.dll")) {
    Copy-Item -Path "..\..\..\third-party\sdl-windows\lib\x64\SDL2.dll"
}

# If there is no 'assets' folder in our output we need to create a new symlink for it
if (!(Test-Path "assets")) {
    cmd.exe /c 'mklink /d assets ..\..\main\assets'
}
Pop-Location
You can see that we test to see if there is an assets folder in the out folder and if there isn’t we create the symlink to the main assets with the mklink command:
cmd.exe /c 'mklink /d assets ..\..\main\assets'
To try it out, save and close the script and re-open Visual Studio. Click Build -> Rebuild All to cause the build scripts to fire. After it runs, you can browse the windows/out folder and you should see a new assets symlink folder.
Git ignore
Now is a good time to update your .gitignore files to avoid committing some of the generated outputs that we’ve introduced:
Android
Add the following to android/.gitignore:
app/src/main/assets/assets
Console
Add the following to console/.gitignore:
MacOS and iOS
Add the following to macos/.gitignore and ios/.gitignore:
Summary
This article ended up being a bit longer that I had hoped, but I wanted to walk carefully through the implementation of including and loading asset files for each platform. With our new assets system we can now include all kinds of data files in our application - initially just text based assets but later I’ll show how to load other kinds of assets including binary files.
In the next article we will take the mesh and render it to the screen (finally!).
The code for this article can be found here.
Continue to Part 10: OpenGL render mesh.
End of part 9
