crust / Part 8 - OpenGL engine
Marcel Braghetto 20 February 2022

In this article we will implement the remainder of our OpenGL engine such that we can start rendering some 3D models in the main scene. The main tasks we need to complete are:
- Transformation of
MeshData component into OpenGL mesh resources
- Transformation of
TextureData component into OpenGL texture resources
- Caching of resources
- Creation of a default shader pipeline using the shader asset resources
- Updating the main scene to create and render models using the shader pipeline
MeshData -> OpenGL mesh
The first OpenGL component we’ll implement is a Mesh structure which will be responsible for loading and parsing .obj file data via the MeshData component we wrote earlier. Remember, the MeshData is just a transport object - we still need to generate the OpenGL specific resource to represent vertices, indices and texture coordinates.
While it may seem like the MeshData component is redundant, keep in mind that if we wanted to implement another graphics technology like Vulkan in the same project, having these abstracted components would avoid the need to reimplement all the boilerplate code for loading and parsing asset files from storage again.
Create opengl/mesh.rs but this time when adding mesh to opengl/mod.rs we are going to do something slightly different and not make the mesh module public (via the pub keyword). This is because only code within the opengl module will use the mesh module so there is no need to expose it to the parent in the module hierarchy - effectively we are encapsulating the mesh module to be scoped only to the opengl module and its descendants.
Your opengl/mod.rs should be updated to look like:
pub mod opengl_engine;

mod mesh;
We will omit the pub key word for all the other Rust files we will create in this article as well.
use crate::{
    components::mesh_data::MeshData,
    core::{failable::Failable, io},
};
use gl::types::{GLint, GLsizeiptr, GLuint, GLvoid};
use std::mem::size_of;

pub struct Mesh {
    pub id_vertices: GLuint,
    pub id_indices: GLuint,
    pub num_indices: GLint,
}

impl Mesh {
    pub fn new(path: &str) -> Failable<Self> {
        let mesh_data = io::load_obj_file(path)?;

        Ok(Mesh {
            id_vertices: create_vertex_buffer(&mesh_data),
            id_indices: create_index_buffer(&mesh_data),
            num_indices: mesh_data.indices.len() as GLint,
        })
    }
}

impl Drop for Mesh {
    fn drop(&mut self) {
        unsafe {
            gl::DeleteBuffers(1, &self.id_vertices);
            gl::DeleteBuffers(1, &self.id_indices);
        }
    }
}

fn create_vertex_buffer(data: &MeshData) -> GLuint {
    let mut buffer_data = vec![];

    for vertex in &data.vertices {
        // Position
        buffer_data.push(vertex.position.x);
        buffer_data.push(vertex.position.y);
        buffer_data.push(vertex.position.z);

        // Texture coordinate
        buffer_data.push(vertex.texture_coord.x);
        buffer_data.push(vertex.texture_coord.y);
    }

    let mut id: GLuint = 0;

    unsafe {
        gl::GenBuffers(1, &mut id);
        gl::BindBuffer(gl::ARRAY_BUFFER, id);
        gl::BufferData(
            gl::ARRAY_BUFFER,
            (buffer_data.len() * size_of::<f32>()) as GLsizeiptr,
            buffer_data.as_ptr() as *const GLvoid,
            gl::STATIC_DRAW,
        );
        gl::BindBuffer(gl::ARRAY_BUFFER, 0);
    }

    id
}

fn create_index_buffer(data: &MeshData) -> GLuint {
    let mut id: GLuint = 0;
    let data_size = (data.indices.len() * size_of::<u32>()) as GLsizeiptr;

    unsafe {
        gl::GenBuffers(1, &mut id);
        gl::BindBuffer(gl::ELEMENT_ARRAY_BUFFER, id);
        gl::BufferData(gl::ELEMENT_ARRAY_BUFFER, data_size, data.indices.as_ptr() as *const GLvoid, gl::STATIC_DRAW);
        gl::BindBuffer(gl::ELEMENT_ARRAY_BUFFER, 0);
    }

    id
}
If we wanted to create a new Mesh object we would call the new method and pass the file system path to the .obj file to load, for example: val mesh = Mesh::new("assets/models/torus.obj")?;.
I covered in a reasonable amount of depth the topic of OpenGL data buffers in Part 10 of A Simple Triangle - particularly in the section titled OpenGL Vertex Buffer Objects (VBOs). The Rust code here is almost a direct port of that C++ code so I’ll leave you to review that article to learn more about creating data buffers in OpenGL.
Something that is worth mentioning however, is the way that Rust allows you to hook in to the destruction lifecycle of an object. In C++ we would use destructors, which typically are written with same name as the constructor but with a tilde character - ~MyClass() {}. In Rust we can also create a similar thing by implementing the Drop trait. When an object is about to go out of scope in a way that it would be deleted from memory, the Drop method will be called, giving us a chance to perform any final clean up operations that might be necessary.
You can see in our Mesh structure, our Drop implementation tells OpenGL to delete the buffer resources that are currently holding its vertices and indices:
impl Drop for Mesh {
    fn drop(&mut self) {
        unsafe {
            gl::DeleteBuffers(1, &self.id_vertices);
            gl::DeleteBuffers(1, &self.id_indices);
        }
    }
}
If we didn’t implement Drop, Rust wouldn’t have any idea that there are OpenGL resources to clean up so they wouldn’t get destroyed when the Mesh object goes out of scope and OpenGL wouldn’t know that the resources it is holding are no longer needed.
TextureData -> OpenGL texture
Next we will create the OpenGL implementation of a texture resource via the TextureData component. Create opengl/texture.rs:
use crate::{
    components::texture_data::TextureData,
    core::{failable::Failable, io},
};
use gl::types::{GLint, GLuint, GLvoid};

pub struct Texture {
    id: GLuint,
}

impl Texture {
    pub fn new(path: &str) -> Failable<Self> {
        let mut texture_data = io::load_png(path)?;

        Ok(Texture {
            id: create_texture(&mut texture_data),
        })
    }

    pub fn bind(&self) {
        unsafe {
            gl::BindTexture(gl::TEXTURE_2D, self.id);
        }
    }
}

impl Drop for Texture {
    fn drop(&mut self) {
        unsafe {
            gl::DeleteTextures(1, &self.id);
        }
    }
}

fn create_texture(data: &mut TextureData) -> GLuint {
    let mut id: GLuint = 0;

    unsafe {
        gl::GenTextures(1, &mut id);
        gl::BindTexture(gl::TEXTURE_2D, id);
        gl::TexParameteri(gl::TEXTURE_2D, gl::TEXTURE_MIN_FILTER, gl::LINEAR as GLint);
        gl::TexParameteri(gl::TEXTURE_2D, gl::TEXTURE_MAG_FILTER, gl::LINEAR as GLint);
        gl::TexImage2D(
            gl::TEXTURE_2D,
            0,
            gl::RGBA as GLint,
            data.width as GLint,
            data.height as GLint,
            0,
            gl::RGBA,
            gl::UNSIGNED_BYTE,
            data.surface().without_lock().unwrap().as_ptr() as *const GLvoid,
        );
    }

    id
}
You can refer to the Loading the image file for our texture section of my A Simple Triangle series to learn about how to create OpenGL textures from image files.
Shader program
Ok, we are up to some meaty bits now, we need to implement a default OpenGL shader pipeline by loading the assets/shaders/opengl/default.frag and assets/opengl/default.vert files. For this project we are only going to create one shader pipeline but you could author as many as you like to draw objects with different effects applied.
For any given shader pipeline a shader program is required. We create a shader program by loading up the desired shader asset files then asking OpenGL to parse them into a shader program resource. A shader program is intended to be activated during a shader pipeline rendering cycle to tell OpenGL how to interpret the geometry and texture data we want to render.
Create opengl/shader_program.rs:
use crate::core::{failable::Failable, io};
use gl::types::{GLchar, GLenum, GLint, GLuint};
use std::ffi::CString;

pub struct ShaderProgram {
    pub id: GLuint,
    pub vertex_shader_id: GLuint,
    pub fragment_shader_id: GLuint,
}

impl ShaderProgram {
    pub fn new(shader_name: &str) -> Failable<Self> {
        let vertex_shader_id = create_vertex_shader(shader_name)?;
        let fragment_shader_id = create_fragment_shader(shader_name)?;
        let program_id = create_shader_program(vertex_shader_id, fragment_shader_id)?;

        Ok(ShaderProgram {
            id: program_id,
            vertex_shader_id: vertex_shader_id,
            fragment_shader_id: fragment_shader_id,
        })
    }
}

fn create_vertex_shader(shader_name: &str) -> Failable<GLuint> {
    let shader_code = io::load_text_file(&format!("assets/shaders/opengl/{}.vert", shader_name))?;
    let prefix = if cfg!(target_os = "android") || cfg!(target_os = "ios") || cfg!(target_os = "emscripten") {
        "#version 100\n"
    } else {
        "#version 120\n"
    };

    Ok(compile_shader(gl::VERTEX_SHADER, &format!("{}{}", prefix, shader_code))?)
}

fn create_fragment_shader(shader_name: &str) -> Failable<GLuint> {
    let shader_code = io::load_text_file(&format!("assets/shaders/opengl/{}.frag", shader_name))?;
    let prefix = if cfg!(target_os = "android") || cfg!(target_os = "ios") || cfg!(target_os = "emscripten") {
        "#version 100\nprecision mediump float;\n"
    } else {
        "#version 120\n"
    };

    Ok(compile_shader(gl::FRAGMENT_SHADER, &format!("{}{}", prefix, shader_code))?)
}

fn create_shader_program(vertex_shader_id: GLuint, fragment_shader_id: GLuint) -> Failable<GLuint> {
    let shader_program_id = unsafe { gl::CreateProgram() };

    // Attach and link them.
    unsafe {
        gl::AttachShader(shader_program_id, vertex_shader_id);
        gl::AttachShader(shader_program_id, fragment_shader_id);
        gl::LinkProgram(shader_program_id);
    }

    // Check if there were any errors linking the shader program.
    let mut program_link_result: GLint = 1;
    unsafe {
        gl::GetProgramiv(shader_program_id, gl::LINK_STATUS, &mut program_link_result);
    }

    // 0 means program linking failed.
    if program_link_result == 0 {
        let mut error_message_length: GLint = 0;
        unsafe {
            gl::GetProgramiv(shader_program_id, gl::INFO_LOG_LENGTH, &mut error_message_length);
        }

        let error_message = vec![b' '; error_message_length as usize];

        unsafe {
            gl::GetProgramInfoLog(
                shader_program_id,
                error_message_length,
                std::ptr::null_mut(),
                error_message.as_ptr() as *mut GLchar,
            );
        }

        return Err(String::from_utf8_lossy(&error_message).into());
    }

    unsafe {
        gl::DetachShader(shader_program_id, vertex_shader_id);
        gl::DetachShader(shader_program_id, fragment_shader_id);
        gl::DeleteShader(vertex_shader_id);
        gl::DeleteShader(fragment_shader_id);
    }

    Ok(shader_program_id)
}

fn compile_shader(shader_type: GLenum, source: &str) -> Failable<GLuint> {
    let shader_id = unsafe { gl::CreateShader(shader_type) };
    let input = CString::new(source).unwrap();

    unsafe {
        gl::ShaderSource(shader_id, 1, &input.as_ptr(), std::ptr::null());
        gl::CompileShader(shader_id);
    }

    let mut shader_compilation_result: GLint = 1;
    unsafe {
        gl::GetShaderiv(shader_id, gl::COMPILE_STATUS, &mut shader_compilation_result);
    }

    // 0 means shader failed to compile.
    if shader_compilation_result == 0 {
        let mut error_message_length: GLint = 0;
        unsafe {
            gl::GetShaderiv(shader_id, gl::INFO_LOG_LENGTH, &mut error_message_length);
        }

        let error_message = vec![b' '; error_message_length as usize];

        unsafe {
            gl::GetShaderInfoLog(shader_id, error_message_length, std::ptr::null_mut(), error_message.as_ptr() as *mut GLchar);
        }

        return Err(String::from_utf8_lossy(&error_message).into());
    }

    Ok(shader_id)
}

impl Drop for ShaderProgram {
    fn drop(&mut self) {
        unsafe {
            gl::DeleteProgram(self.id);
        }
    }
}
I explained shader programs in detail in the OpenGL render mesh article of A Simple Triangle - I would highly recommend reading through that to get a sense of what we are doing here as this is just a Rust port of that C++ implementation. It also explains the content of the shader asset files we added in the previous article.
Resource caching
When we implement our default shader pipeline we will find that it needs to access the mesh and texture resources used by the 3D models it renders.
We would like to avoid repeatedly loading and processing resource assets every time they are used in a scene - only loading each resource exactly one time. To help with this we will introduce a basic cache component which can hold objects of a given type, with each cached object uniquely identified by a key so a user of the cache only need provide a key to access a cached resource.
Create components/cache.rs:
use crate::core::{failable::Failable, logs};
use std::{collections::HashMap, rc::Rc};

pub struct Cache<T> {
    log_tag: String,
    store: HashMap<String, Rc<T>>,
    factory: fn(key: &str) -> Failable<T>,
}

impl<T> Cache<T> {
    pub fn new(log_tag: &str, factory: fn(key: &str) -> Failable<T>) -> Self {
        Cache {
            log_tag: log_tag.to_owned(),
            store: HashMap::new(),
            factory: factory,
        }
    }

    pub fn get(&mut self, key: &str) -> Failable<Rc<T>> {
        if !self.store.contains_key(key) {
            logs::out(&format!("cache: {}", &self.log_tag), &format!("Creating: '{}'", key));
            self.store.insert(key.to_owned(), Rc::new((self.factory)(key)?));
        }

        Ok(self.store.get(key).ok_or("Caching error.")?.clone())
    }
}
We are using generics here so that we can have many different cache implementations each holding a specific data type, avoiding the need to repeat all the underlying caching code each time.
Notice that the cache is basically a glorified hash map which stores a String key and an Rc container to hold a shareable instance of type T for a key.
We must use the Rc container because there may be many consumers of a cache who all want their own reference to a cached object. As soon as the last reference to a cached object goes out of scope, the object will be reaped.
When a consumer calls the get method, the cache looks at its hash map for the given key and returns a cloned reference to the stored object if it exists. If the object doesn’t yet exist, the factory method that was defined when the cache was created is invoked and the resulting object is stored into the hash map before returning it to the caller.
Note: I haven’t implemented a way to remove cache entries in this project but you would probably want to do this to allow the clean up of resources on demand, particularly if you plan to have multiple scenes for the user to navigate between which use different resources.
We can use this new structure to implement Mesh and Texture caches - resulting in only loading a given mesh or texture asset exactly one time regardless of how many times we use it in our scene. Create opengl/caching.rs:
use crate::{
    components::cache::Cache,
    opengl::{mesh::Mesh, texture::Texture},
};

pub fn new_mesh_cache() -> Cache<Mesh> {
    Cache::new("meshes", |key| Mesh::new(key))
}

pub fn new_texture_cache() -> Cache<Texture> {
    Cache::new("textures", |key| Texture::new(key))
}
The factory lambda methods will create Mesh or Texture resources when the the given key doesn’t yet exist in the cache:
// Mesh factory method
|key| Mesh::new(key)

// Texture factory method
|key| Texture::new(key)
Because these factory lambdas are defined in the Cache::new method, it allows different cache implementations to have their own custom way to create the cached objects. The return type of the factory lambda also defines T for a cache implementation.
Shader
One of the last OpenGL components we need to implement is our default shader pipeline. To keep things simple we will just name it Shader. In your own programs you may choose to create many different shader pipelines to change how objects are rendered to the screen. I covered most of this material in Part 10 of A Simple Triangle - specifically around the topic of Creating our new default pipeline. The Rust code here is pretty close to the C++ implementation from that article, so I won’t go into huge detail explaining the OpenGL aspects of it again here. Create opengl/shader.rs:
use crate::{
    components::{cache::Cache, model::Model},
    core::{failable::Failable, failable_unit::FailableUnit},
    opengl::{mesh::Mesh, shader_program::ShaderProgram, texture::Texture},
};
use gl::types::{GLint, GLsizei, GLuint, GLvoid};
use glm::Mat4;
use std::{ffi::CString, mem::size_of};

pub struct Shader {
    program: ShaderProgram,
    uniform_mvp: GLint,
    attr_vertex: GLuint,
    attr_texture: GLuint,
    stride: GLsizei,
    offset_vertex: GLsizei,
    offset_texture: GLsizei,
}

impl Shader {
    pub fn new(shader_name: &str) -> Failable<Self> {
        let program = ShaderProgram::new(shader_name)?;

        let uniform_mvp_key = CString::new("u_mvp")?;
        let uniform_mvp = unsafe { gl::GetUniformLocation(program.id, uniform_mvp_key.as_ptr()) };

        let attr_vertex_key = CString::new("a_vertexPosition")?;
        let attr_vertex = unsafe { gl::GetAttribLocation(program.id, attr_vertex_key.as_ptr()) };

        let attr_texture_key = CString::new("a_texCoord")?;
        let attr_texture = unsafe { gl::GetAttribLocation(program.id, attr_texture_key.as_ptr()) };

        let stride = (5 * size_of::<f32>()) as GLint;
        let offset_vertex = 0 as GLint;
        let offset_texture = (3 * size_of::<f32>()) as GLint;

        Ok(Shader {
            program: program,
            uniform_mvp: uniform_mvp,
            attr_vertex: attr_vertex as GLuint,
            attr_texture: attr_texture as GLuint,
            stride: stride,
            offset_vertex: offset_vertex,
            offset_texture: offset_texture,
        })
    }

    pub fn render_model(
        &self,
        model: &Model,
        projection_view: &Mat4,
        meshes: &mut Cache<Mesh>,
        textures: &mut Cache<Texture>,
    ) -> FailableUnit {
        unsafe {
            // Instruct OpenGL to starting using our shader program.
            gl::UseProgram(self.program.id);

            // Enable the 'a_vertexPosition' attribute.
            gl::EnableVertexAttribArray(self.attr_vertex);

            // Enable the 'a_texCoord' attribute.
            gl::EnableVertexAttribArray(self.attr_texture);

            // Populate the 'u_mvp' uniform in the shader program.
            gl::UniformMatrix4fv(self.uniform_mvp, 1, gl::FALSE, &model.transform(projection_view).c0.x);
        }

        // Apply the texture we want to paint the mesh with.
        textures.get(&model.texture_id)?.bind();

        // Bind the mesh data.
        let mesh = meshes.get(&model.mesh_id)?;

        unsafe {
            // Bind the vertex and index buffers.
            gl::BindBuffer(gl::ARRAY_BUFFER, mesh.id_vertices);
            gl::BindBuffer(gl::ELEMENT_ARRAY_BUFFER, mesh.id_indices);

            // Configure the 'a_vertexPosition' attribute.
            gl::VertexAttribPointer(self.attr_vertex, 3, gl::FLOAT, gl::FALSE, self.stride, self.offset_vertex as *const GLvoid);

            // Configure the 'a_texCoord' attribute.
            gl::VertexAttribPointer(
                self.attr_texture,
                2,
                gl::FLOAT,
                gl::FALSE,
                self.stride,
                self.offset_texture as *const GLvoid,
            );

            // Execute the draw command - with how many indices to iterate.
            gl::DrawElements(gl::TRIANGLES, mesh.num_indices, gl::UNSIGNED_INT, std::ptr::null());

            // Tidy up.
            gl::DisableVertexAttribArray(self.attr_vertex);
            gl::DisableVertexAttribArray(self.attr_texture);
        }

        Ok(())
    }
}
The new method will create a new instance of our shader pipeline by creating a new shader program then asking OpenGL to identify where each of the shader attributes are within it. We hold onto these attribute locations as they are used during rendering to populate our geometry and texture data.
The render_model method will take an instance of the Model component we created earlier and populate the various shader attributes we defined with information from it. This includes the mvp (model, view, projection) matrix, the id of the texture to apply and the ids of the vertices and indices to refer to in order to draw the mesh itself.
Note also that we are using the mesh and texture caches to look up assets on demand - the first time the renderer runs it will load any assets that it needs dynamically and cache them:
meshes: &mut Cache<Mesh>,
textures: &mut Cache<Texture>,
I would recommend reviewing the following articles from A Simple Triangle to learn more about the rendering part of our OpenGL pipeline to learn more:
Now that we have created a shader pipeline we can add a new cache type to hold instances of it. Edit opengl/caching.rs:
use crate::{
    components::cache::Cache,
    opengl::{mesh::Mesh, shader::Shader, texture::Texture},
};

pub fn new_mesh_cache() -> Cache<Mesh> {
    Cache::new("meshes", |key| Mesh::new(key))
}

pub fn new_shader_cache() -> Cache<Shader> {
    Cache::new("shaders", |key| Shader::new(key))
}

pub fn new_texture_cache() -> Cache<Texture> {
    Cache::new("textures", |key| Texture::new(key))
}
Note the addition of the new_shader_cache method.
Renderer
Let us now revisit the Renderer trait which we wrote some time ago to add the ability to pass a list of Model components to be rendered. Edit core/renderer.rs:
use crate::{components::model::Model, core::failable_unit::FailableUnit};
use glm::Mat4;
use std::vec::Vec;

pub trait Renderer {
    fn render_models(&mut self, models: &Vec<Model>, projection_view: &Mat4) -> FailableUnit;
}
The render_models now takes a reference to a list of Model objects to render and the projection_view to apply to each one. The projection view would typically be provided by the camera that should represent the point of view of the rendered models.
Once the Renderer trait has been updated we will get a compiler error in opengl/opengl_engine.rs because the signature of render_models has changed. We can fix this up and finish wiring in the rendering capability in the engine while we are there.
Edit opengl/opengl_engine.rs and update the structure definition to include caching capability for our asset resources - don’t forget to update the use blocks as we go:
pub struct OpenGLEngine {
    window: sdl2::video::Window,
    gl_context: GLContext,
    meshes: Cache<Mesh>,
    shaders: Cache<Shader>,
    textures: Cache<Texture>,
}
Update the construction of the engine from this:
let engine = OpenGLEngine {
    window: window,
    gl_context: gl_context,
};
to this (include caching in the use block):
let engine = OpenGLEngine {
    window: window,
    gl_context: gl_context,
    meshes: caching::new_mesh_cache(),
    shaders: caching::new_shader_cache(),
    textures: caching::new_texture_cache(),
};
Finally, update the implementation of the Renderer trait from this:
impl Renderer for OpenGLEngine {
    fn render_models(&mut self) -> FailableUnit {
        Ok(())
    }
}
to this:
impl Renderer for OpenGLEngine {
    fn render_models(&mut self, models: &Vec<Model>, projection_view: &Mat4) -> FailableUnit {
        for model in models {
            self.shaders.get(&model.shader_id)?.render_model(model, projection_view, &mut self.meshes, &mut self.textures)?;
        }

        Ok(())
    }
}
Note: The Mat4 needs use glm::Mat4;
Update main scene
Well done for reaching this point - you are probably wondering when on earth we are actually going to see something for all this work. Well the good news is that everything is ready! All that is left is to create a camera and start calling the renderer in our scene with a list of models to draw.
To spice things up a bit we’ll also add the ability to move around the scene using the arrow keys. To help us with this we’ll model a new Player component which can keep track of our position in the scene and offer methods to move around. Create scenes/player.rs - you can register it in mod.rs without the pub modifier, as only code within the scenes module need access to it:
use crate::components::orientation::Orientation;
use glm::Vec3;

pub struct Player {
    position: Vec3,
    move_speed: f32,
    turn_speed: f32,
    orientation: Orientation,
}

impl Player {
    pub fn new(position: Vec3, pitch: f32, yaw: f32, roll: f32) -> Self {
        Player {
            position: position,
            move_speed: 5.,
            turn_speed: 120.,
            orientation: Orientation::new(pitch, yaw, roll),
        }
    }

    pub fn position(&self) -> Vec3 {
        self.position
    }

    pub fn direction(&self) -> Vec3 {
        self.orientation.direction()
    }

    pub fn move_forward(&mut self, delta: f32) {
        self.position = self.position - (self.direction() * (self.move_speed * delta));
    }

    pub fn move_backward(&mut self, delta: f32) {
        self.position = self.position + (self.direction() * (self.move_speed * delta));
    }

    pub fn turn_left(&mut self, delta: f32) {
        self.orientation.add_yaw(self.turn_speed * delta);
    }

    pub fn turn_right(&mut self, delta: f32) {
        self.orientation.add_yaw(-self.turn_speed * delta);
    }

    pub fn move_up(&mut self, delta: f32) {
        self.position.y += self.move_speed * delta;
    }

    pub fn move_down(&mut self, delta: f32) {
        self.position.y -= self.move_speed * delta;
    }
}
The Player component has methods that can change its position and orientation - allowing a player to move back and forth, up and down or turn left and right. You can see how we are making use of our Orientation component and the use of the delta to govern the magnitude of change to apply on any given update.
Let’s update our main scene now to pull everything together and render an interactive 3D world. Edit scenes/main_scene.rs:
use crate::{
    components::{model::Model, perspective_camera::PerspectiveCamera},
    core::{display_size::DisplaySize, failable::Failable, failable_unit::FailableUnit, renderer::Renderer, scene::Scene},
    scenes::player::Player,
};
use sdl2::keyboard::Scancode;

pub struct MainScene {
    camera: PerspectiveCamera,
    display_size: DisplaySize,
    models: Vec<Model>,
    player: Player,
}

impl MainScene {
    pub fn new(display_size: DisplaySize) -> Failable<Self> {
        let mut camera = PerspectiveCamera::new(&display_size);
        let player = Player::new(glm::vec3(0., 0., 2.), 0., 0., 0.);

        camera.configure(player.position(), player.direction());

        Ok(MainScene {
            camera: camera,
            player: player,
            models: create_models(),
            display_size: display_size,
        })
    }

    fn process_input(&mut self, delta: f32, event_pump: &sdl2::EventPump) -> FailableUnit {
        // We will see if the user is pressing arrow keys to move around the scene with.
        // https://wiki.libsdl.org/SDL_GetKeyboardState
        // https://github.com/Rust-SDL2/rust-sdl2/blob/master/src/sdl2/keyboard/mod.rs
        let key_state = event_pump.keyboard_state();

        if key_state.is_scancode_pressed(Scancode::Up) {
            self.player.move_forward(delta);
        }

        if key_state.is_scancode_pressed(Scancode::Down) {
            self.player.move_backward(delta);
        }

        if key_state.is_scancode_pressed(Scancode::A) {
            self.player.move_up(delta);
        }

        if key_state.is_scancode_pressed(Scancode::Z) {
            self.player.move_down(delta);
        }

        if key_state.is_scancode_pressed(Scancode::Left) {
            self.player.turn_left(delta);
        }

        if key_state.is_scancode_pressed(Scancode::Right) {
            self.player.turn_right(delta);
        }

        // We will also see if the user is pressing near the edges of the screen and move around accordingly.
        // This is kinda nice because it means on a mobile device we can touch the screen to move, though we'd
        // need to do more to support true multitouch input.
        // https://wiki.libsdl.org/SDL_GetMouseState
        // https://github.com/Rust-SDL2/rust-sdl2/blob/master/src/sdl2/mouse/mod.rs
        let mouse_state = event_pump.mouse_state();

        if mouse_state.left() {
            let x = mouse_state.x();
            let x_threshold = self.display_size.width / 3;

            if x < x_threshold {
                self.player.turn_left(delta);
            } else if x > self.display_size.width - x_threshold {
                self.player.turn_right(delta);
            }

            let y = mouse_state.y();
            let y_threshold = self.display_size.height / 3;

            if y < y_threshold {
                self.player.move_forward(delta);
            } else if y > self.display_size.height - y_threshold {
                self.player.move_backward(delta);
            }
        }

        Ok(())
    }
}

fn create_models() -> Vec<Model> {
    vec![
        Model::new(
            "assets/models/crate.obj",
            "assets/textures/crate.png",
            "default",
            glm::vec3(0.4, 0.6, 0.),
            glm::vec3(0.6, 0.6, 0.6),
        ),
        Model::new(
            "assets/models/torus.obj",
            "assets/textures/red_cross_hatch.png",
            "default",
            glm::vec3(-0.6, 0.4, 0.),
            glm::vec3(0.4, 0.4, 0.4),
        ),
        Model::new(
            "assets/models/crate.obj",
            "assets/textures/crate.png",
            "default",
            glm::vec3(-0.5, -0.5, 0.),
            glm::vec3(0.7, 0.3, 0.3),
        ),
        Model::new(
            "assets/models/torus.obj",
            "assets/textures/red_cross_hatch.png",
            "default",
            glm::vec3(0.6, -0.4, 0.),
            glm::vec3(0.4, 0.4, 0.4),
        ),
    ]
}

impl Scene for MainScene {
    fn update(&mut self, delta: f32, event_pump: &sdl2::EventPump) -> FailableUnit {
        self.process_input(delta, event_pump)?;

        self.camera.configure(self.player.position(), self.player.direction());

        for model in &mut self.models {
            let orientation = model.orientation();

            orientation.add_yaw(delta * 45.);
            orientation.add_pitch(delta * 35.);
            orientation.add_roll(delta * 15.);
        }

        Ok(())
    }

    fn render(&mut self, renderer: &mut dyn Renderer) -> FailableUnit {
        renderer.render_models(&self.models, &self.camera.projection_view())
    }

    fn on_display_size_changed(&mut self, display_size: DisplaySize) -> FailableUnit {
        self.display_size = display_size;
        self.camera = PerspectiveCamera::new(&self.display_size);

        Ok(())
    }
}
new
The new method now creates a player, camera and list of models for the scene:
pub fn new(display_size: DisplaySize) -> Failable<Self> {
    let mut camera = PerspectiveCamera::new(&display_size);
    let player = Player::new(glm::vec3(0., 0., 2.), 0., 0., 0.);

    camera.configure(player.position(), player.direction());

    Ok(MainScene {
        camera: camera,
        player: player,
        models: create_models(),
        display_size: display_size,
    })
}
Notice how we call the configure method on the camera, passing in the player position and direction. This basically makes the camera glue itself to the player as though we are looking through the player’s eyes.
We could have directly moved the camera around the scene instead of inventing the Player component, but decoupling the camera from the player means we can do cool stuff such as making the camera fly around the scene separate from the player.
process_input
The process_input method has been updated to now manipulate the player when keys are pressed, asking the player to move or turn in the scene. We also added some mouse events to detect if the mouse button is pressed near the edges of the screen which also moves the player around.
This is a bit interesting because on a mobile device the mouse events are delivered if the user is touching the screen - so we can use mouse events on mobile phones to receive user input via touch. If we didn’t add this mouse event code, then you wouldn’t be able to move around our scene on Android or iOS as they would use touch inputs rather than keyboard inputs.
Note: Technically you can attach a keyboard to mobile phones but I really doubt anyone is going to do that to play a mobile game.
create_models
The create_models method simply constructs a vector of Model components which define the mesh, texture and shader pipeline to use, along with a position and scale in the scene:
fn create_models() -> Vec<Model> {
vec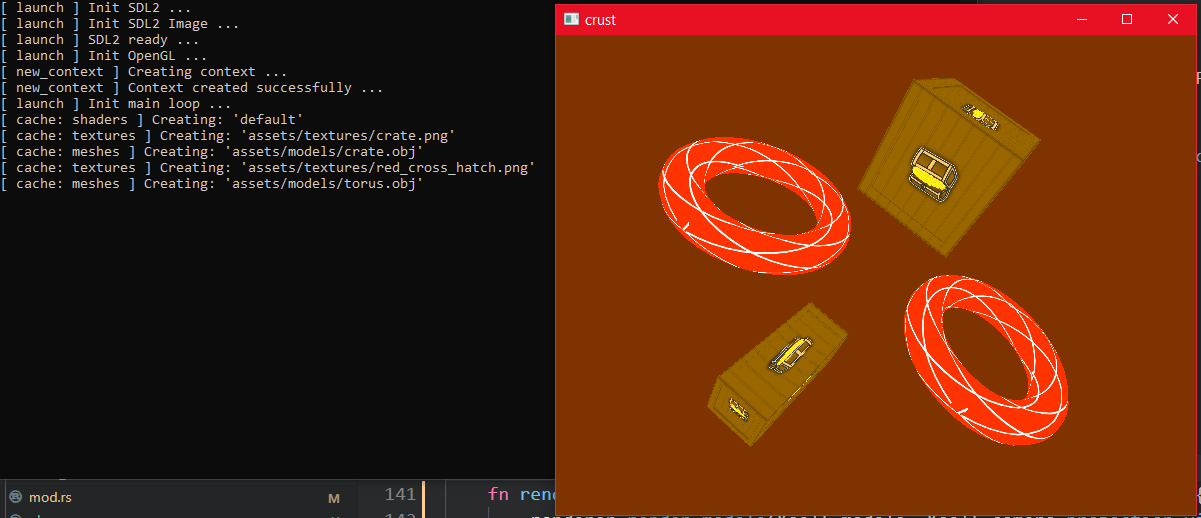
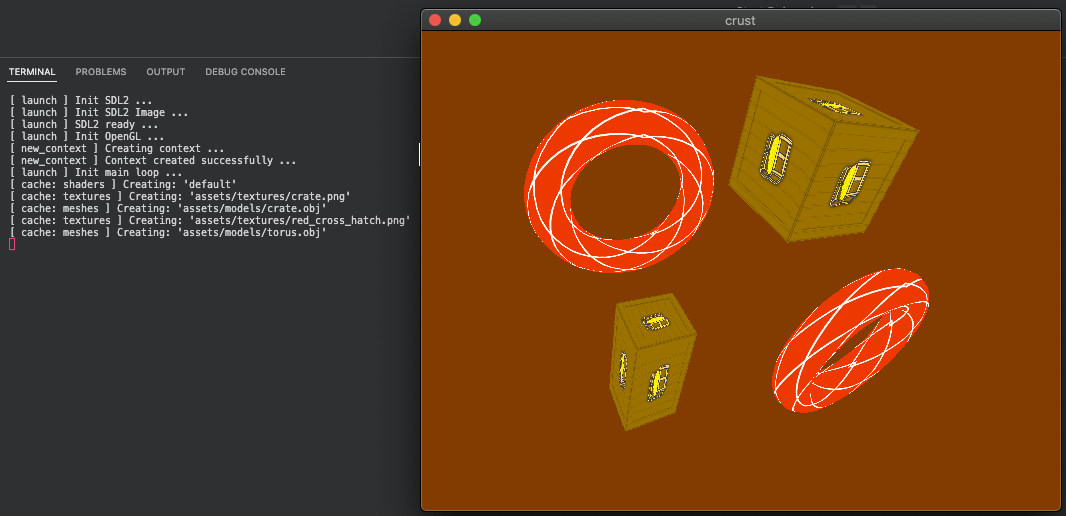
MacOS Console
Summary
This is a fairly major milestone for the series - we have pretty much finished most of the crust-main Rust application. The remaining articles will step through the crust-build implementation for each of the other target platforms we want to cross compile to.
The code for this article can be found here.
Continue to Part 9: Emscripten.
End of part 8
