iac-env / Part 3 - Setup Bitbucket
Marcel Braghetto 5 May 2020

In this part we will setup a local instance of Bitbucket server using an evaluation license so we can push and pull code locally to test drive our build pipeline. It is fairly likely that you already use Bitbucket or Github or something like that to manage your Git repositories - the idea is the same as what we will be doing here so these instructions can be applied to whatever you are using though you’ll need to read the docs for your platform.
I picked Bitbucket server because I can run it easily on my localhost and it is just for experimentation purposes so I don’t mind deleting it when I’m done.
Installing Bitbucket
We will use Docker to assist us with running Bitbucket which makes for a surprisingly easy setup. Start off by pulling down the Bitbucket Docker image we want to use:
docker pull atlassian/bitbucket-server:6.10
This will fetch the Bitbucket server Docker image to our local machine, ready for us to use it. I am opting for version 6.10 here.
Important: I am using version 6.10 deliberately as there is (at the time of writing) an outstanding bug in the Jenkins plugin we will need to use for webhooks that breaks pull request builds from Bitbucket 7+. I think there is a fix on the way so this might not be required at a later date.
When it’s done you can view the current Docker images to confirm it was downloaded:
$ docker images
REPOSITORY                   TAG                 IMAGE ID            SIZE
iac-env                      latest              1541cb836ece        714MB
atlassian/bitbucket-server   6.10                09c4f264b197        945MB
ubuntu                       bionic              c3c304cb4f22        64.2MB
Running Bitbucket
We will run Bitbucket as a Docker container - create a shell script named start-bitbucket.sh and give it executable permissions:
#!/usr/bin/env bash

# After Bitbucket has started it can be browsed at http://localhost:7990
# To access the Bitbucket data folder you can mount the Docker volume
# assigned to Bitbucket with the volume name: 'bitbucket-data', typically
# found at: /var/lib/docker/volumes/bitbucket-data on Linux. If you are
# running Docker on MacOS, the volumes are hidden inside a Docker VM.
#
# Bitbucket will auto restart after a system shutdown/reboot unless it was
# manually stopped, so theoretically you should only need to ever start it
# once. If for some reason you do want to manually stop Bitbucket, use the
# following command:
#
# docker stop bitbucket
#
echo 'Starting Bitbucket ...'
docker run \
    -d \
    --name bitbucket \
    --network iac-env \
    --publish 7990:7990 \
    --publish 7999:7999 \
    --restart unless-stopped \
    --volume bitbucket-data:/var/atlassian/application-data/bitbucket \
    atlassian/bitbucket-server:6.10
We are specifying the -d argument to have the Bitbucket image run in the background. We also want Bitbucket to automatically restart itself when the host machine is rebooted - if you don’t want that behaviour just remove the --restart unless-stopped argument.
We are publishing ports 7990 and 7999 as they are the ports Bitbucket will be running on so it needs to be bound to expose it to the external environment. Note we are also using --network iac-env in a similar way to our iac-env image - this is to allow Bitbucket to call other network resources on the host machine within the iac-env Docker network - such as Jenkins a bit later on.
The --volume argument is critical - we are mapping a location on our local file system as the place for Bitbucket to store all its data and state. If we didn’t do this, all of our Bitbucket repositories and configuration would be lost when the Docker container is terminated! As per the comments in the script, the actual files will be stored in /var/lib/docker/volumes/bitbucket-data if you are running Docker on Linux. If you are running Docker on MacOS, volumes are actually stored inside a Docker virtual machine - you’ll need to read the docs to find out how to access them.
Run the shell script to boot up Bitbucket for the first time, then browse to http://localhost:7990 to access it - you might have to wait a couple of minutes for it to boot up.
Note: We reach Bitbucket (and Jenkins later) via localhost only when browsing from the host machine that is running Docker. Networking done within the Bitbucket/Jenkins containers must use the iac-env network bridge instead.
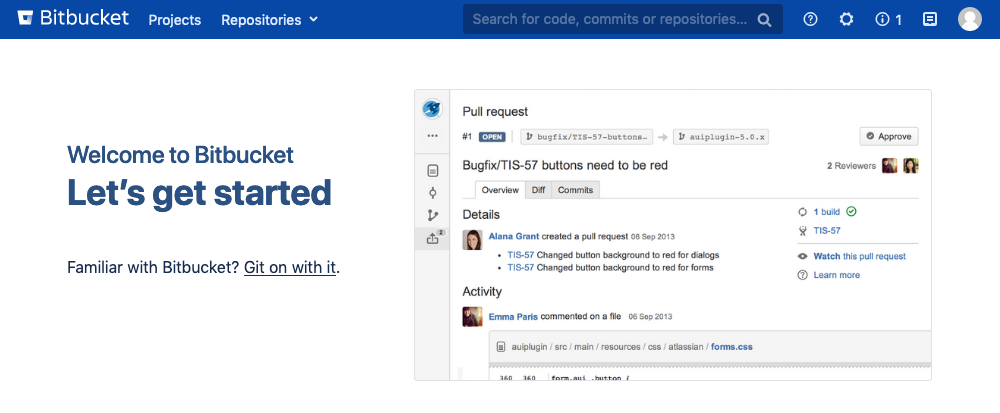
When Bitbucket has started, choose Internal - For evaluation and demo purposes only. and continue. For the next part you will need an Atlassian account (it’s free) to provision an evaluation license. This is a bit annoying but for the sake of this experiment it’s not that bad. Once you’ve navigated through the license activation and created your first admin user you will be greeted with the welcome screen:
Create a new project
We will create ourselves a new Bitbucket project so we have a place to push and pull code from. Create a new project with the following configuration:
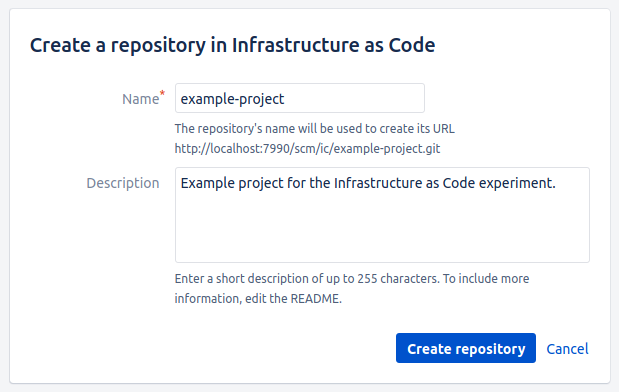
After creating the project, add a new repository to it for our example project:
Ok cool, we have a new repository in Bitbucket with nothing in it. Let’s create our first Git branch.
Create a folder next to our setup folder named example-project with a simple text file in it named readme.md - put whatever you like in it:
.
├─+ example-project
│   └── readme.md
├─+ setup
└── start-bitbucket.sh
Navigate into the example-project and create and push our first Git commit for it:
git init
git add --all
git commit -m "Initial Commit"
git remote add origin http://localhost:7990/scm/ic/example-project.git
git push -u origin master
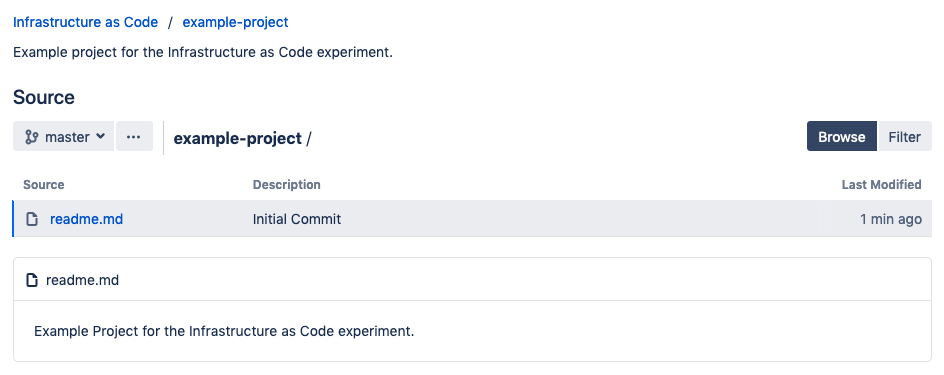
Check Bitbucket to see that you now have a new branch named master with your readme.md file in it:
Add a Jenkins user
We will add a new user to Bitbucket to allow Jenkins to talk to it. Without doing this there won’t be a way for Jenkins to check out code to perform builds, or notify Bitbucket when builds have succeeded or failed.
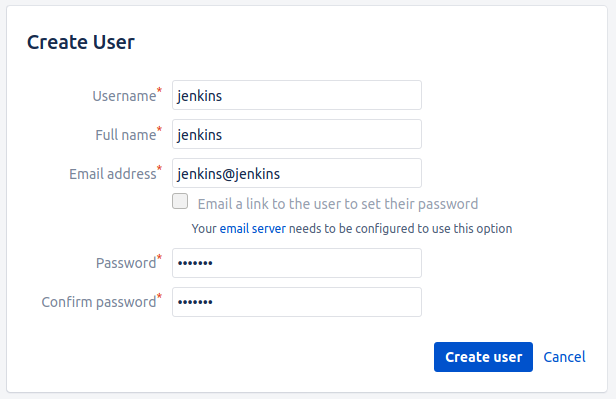
In Bitbucket, select the small cog icon near the top right of the screen to enter the Administration area, then select Users then Create user. Fill in the details like below to create a jenkins user. Be sure to remember whatever password you specify as we’ll need to enter it into Jenkins later:
Now navigate to Projects -> Infrastructure as Code -> Project Settings -> Project Permissions.
In the User access section, add the new jenkins user with Read access.
Our jenkins user can now authenticate to Bitbucket to allow it to check code within its build pipelines.
We can now apply some final configuration settings to our example-project repository to make it ready for a pull request based workflow with integration with Jenkins.
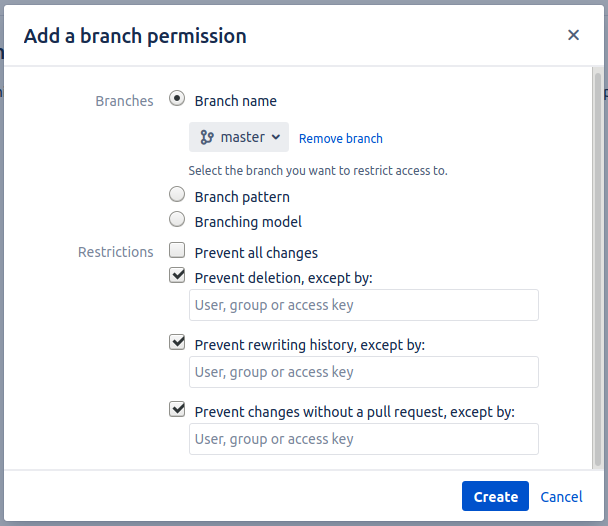
We want to prevent anyone from pushing code directly into our master branch - instead we want them to raise a pull request before code can be merged. We will set up branch permissions to help us with this. Navigate to the settings for the example-project then into Branch permissions under the SECURITY section.
Select Add permissions, then match the options to the settings below - this will prevent any direct pushes to the master branch:
Configure Post Webhook
Now we need to configure our repository such that any Git changes we care about will trigger notifications to Jenkins. This part is pretty cool because it will be the first example of using the names of our Docker containers to connect them to each other through our custom iac-env network.
We will be using the Post Webhooks third party plugin for firing our webhooks: https://marketplace.atlassian.com/apps/1215474/post-webhooks-for-bitbucket?hosting=server&tab=overview.
Go to the global Bitbucket settings - it’s the small cog icon in the top right - and navigate to Find new apps in the ADD-ONS section. Search for Post Webhooks for Bitbucket and install it.
While we are here, we need to change the base url of our Bitbucket server otherwise the webhooks plugin won’t work. Select Server settings under the SETTINGS section and change the Base URL field to http://bitbucket:7990.
Now navigate into our example-project repository and into its settings then select Post Webhooks.
Important: Go to Post Webhooks not Webhooks!
Select Add Webhook and enter the details like below:
Note: The URL field is http://jenkins:8080/bitbucket-scmsource-hook/notify
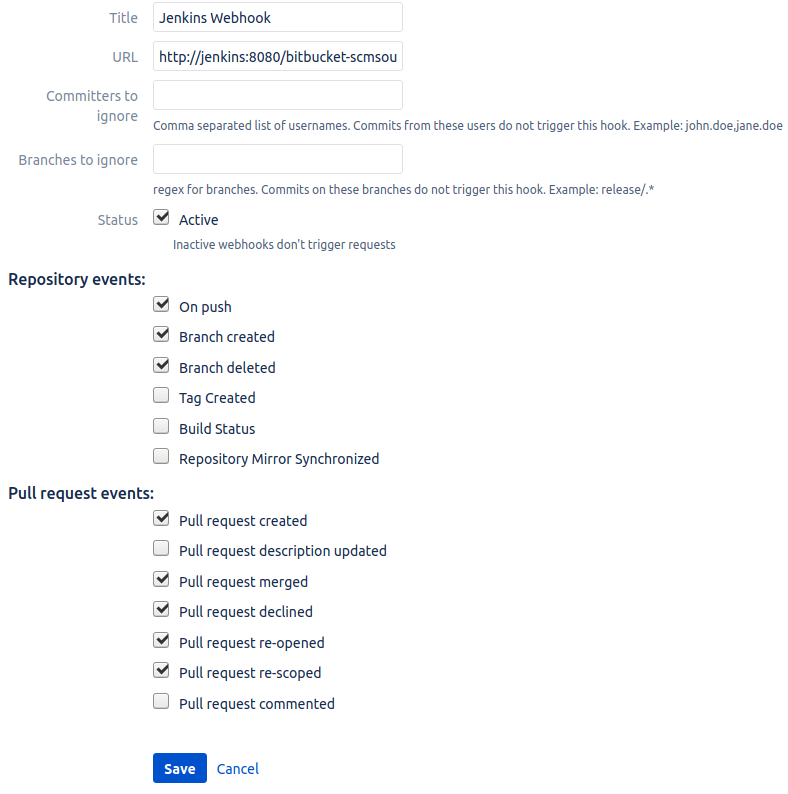
We specify http://jenkins:8080 as the destination to send triggers to - which in our case will be Jenkins. Although we haven’t created our Jenkins Docker image yet, we will run it with the name jenkins which is how our network bridge will associate it to http://jenkins.
Note: The webhook won’t be able to connect to Jenkins yet as we aren’t running it yet!
Onward!
That’s about it for Bitbucket, next up we will run Jenkins and have it talk to Bitbucket to run a build pipeline every time code is changed.
Source code can be found at: https://github.com/MarcelBraghetto/iac-env
Continue to Part 4: Setup Jenkins.
End of part 3
